J. Morita i-Dixel Software Bridge Setup Guide
This guide describes the installation and setup of the J. Morita i-Dixel software bridge for use with Dentrix Ascend Imaging.
Last updated: 10/31/2025
Overview
Dentrix Ascend Imaging supports the acquisition of intraoral and extraoral images from the i-Dixel software on a computer running the Windows operating system. The i-Dixel software must be installed on each computer that the software bridge will be used.
Notes:
-
All acquisition devices must be functioning in the i-Dixel software on each computer that will acquire images using the i-Dixel software bridge.
-
Prior to the installation of any imaging devices or setting up the i-Dixel software, the acquisition agent application must be installed on each computer that will acquire images using the software bridge. Refer to Setting up the acquisition agent for instructions on downloading and installing the acquisition agent.
-
To use the i-Dixel software bridge for 2D acquisitions, the acquisition agent must be run as administrator (see the "Troubleshooting" section).
Recommended Version
-
i-Dixel imaging software v2.4.0.2 or later
Minimum Version
-
i-Dixel imaging software v2.3.1.0 or later
Registry Settings
To add the required registry settings for 3D volume acquisitions, do the following:
-
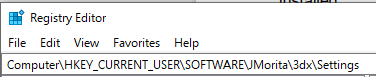
Open Registry Editor.

-
Locate the following folder: Computer\HKEY_CURRENT_USER\SOFTWARE\JMorita\3dx\Settings.
-
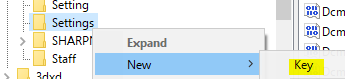
Right-click the Settings folder, point to New, and then click Key. Then, name the new key ExtendedExport.
-
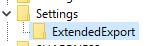
Select the ExtendedExport key.
-
Add the following values:
-
bRunByAcquisition (DWORD) - Set the value to 1. This value determines if an acquired image is exported automatically.
-
strExportPath (STRING) - Set the value to C:\Users\(username)\AppData\Local\Temp\IDixel. This value determines where the exported image data is saved on the computer.
-
bReportSuccess (DWORD) - Set the value to 0. This value determines if a message appears after a successsful transfer occurs.
-
bSetCTUIDForScout (DWORD) - Set the value to 0. This value determines if a scout image is linked to the CT by a UID.
-
bRunBySavingIn3DViewer (DWORD) - Set the value to 0. This value determines if a snapshots saved by the CT viewer is exported automatically.
-
Link and Export Configuration
To set up the i-Dixel link and export options, do the following:
-
Open i-Dixel.

-
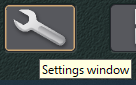
Click the Settings window button (wrench icon).
-
Select the Navigation Bar tab.

-
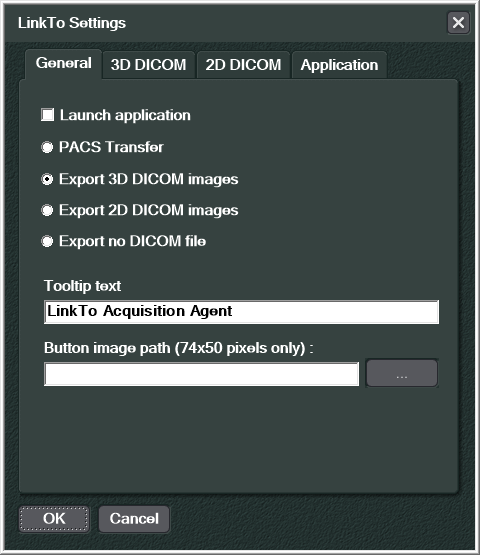
Under LinkTo settings, click New.

-
Select the Export 3D DICOM images checkbox, and type LinkTo Acquisition Agent in the Tooltip text box.
-
Select the 3D DICOM tab.

-
Set the Export folder to the temporary folder location used for the registry value strExportPath C:\Users\(username)\AppData\Local\Temp\IDixel).

-
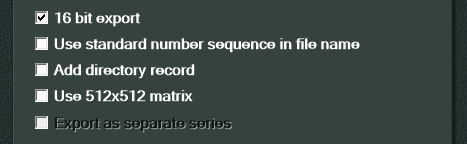
Select the 16 bit export checkbox.
-
Click OK.
-
Click Apply.

-
Select the Export tab.

-
Under DICOM Export, for CT, select LinkTo Acquisition Agent from the Use LinkTo after image acquisition list.


-
Click Apply and then OK. Then, close i-Dixel to apply the changes.
Patient ID Configuration
If patients are being bridged with external IDs (which is platform specific), to configure the patient ID, do the following:
-
In i-Dixel, click the Settings window button (wrench icon).
-
Leave the General tab selected.

-
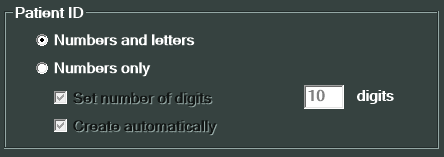
Under Patient ID, select the Numbers and letters option.
-
Click Apply and then OK to save the changes.
Testing
The i-Dixel software bridge is now functional in Dentrix Ascend Imaging. To acquire a test intraoral image, do the following:
-
Select the 1 Bitewing imaging procedure.

-
Select any teeth for the test.

-
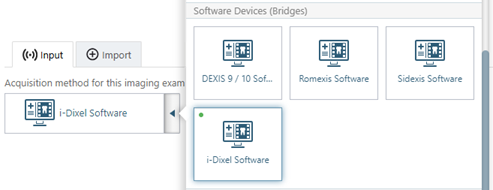
On the Available Devices menu, select i-Dixel Software.
Note: It is recommended that the i-Dixel software be closed before you start the acquisition.
-
Click Start.

-
Acquire an image in the i-Dixel software. The captured image appears in Dentrix Ascend Imaging automatically.
Troubleshooting
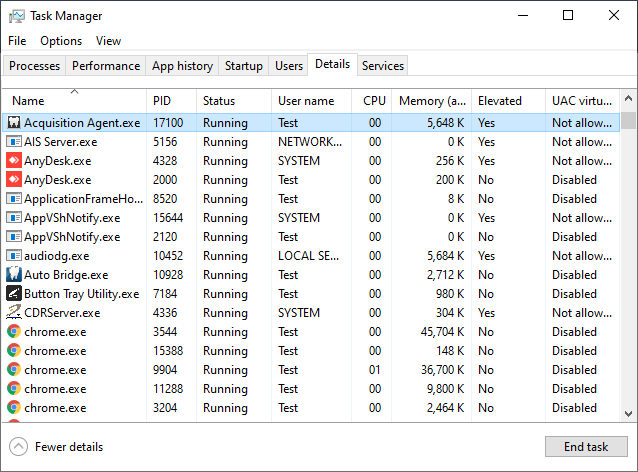
To allow 2D images that are captured in the i-Dixel imaging software to be transferred to Dentrix Ascend Imaging, the acquisition agent must be run as an administrator. To check if the acquisition agent is running as an administrator, do the following:
-
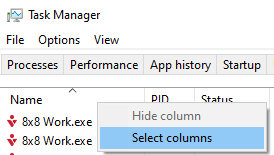
Open Task Manager, and then select the Details tab.

-
If the Elevated column is not visible, do the following to add the column to the view:
-
Right-click anywhere on the column header, and then click Select columns.
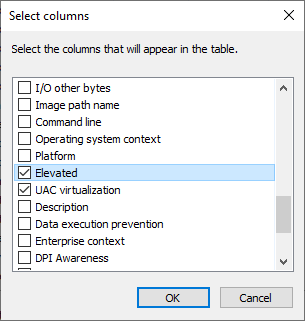
The Select columns dialog box appears.
-
Select the Elevated checkbox, and then click OK.
-
-
Find Acquisition Agent.exe in the Name column, and check if Yes appears in the Elevated column. If the program is elevated, it is being run as an administrator; if the program is not elevated, it is not being run as an administrator.