Importing 3D volumes
You can import 3D volume files (.dcm files) to attach to a patient's record in Dentrix Ascend Imaging, such as in the following scenarios:
-
Importing images from another office or provider (most common).
-
Importing images acquired in your office with non-integrated third-party imaging software.
To import a 3D volume
-
If the correct patient is not already selected, use the Patient Search box to access the patient's record.

-
On the Patient menu, under Clinical, select Chart, Progress Notes, Quick Exam, Perio, Tx Planner, or Imaging.
The patient's clinical record opens with the Chart, Progress Notes, Quick Exam, Perio, Tx Planner, or Imaging tab selected.
-
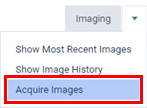
On the Imaging tab's menu, select Acquire Images.
Notes:
Alternatively, you can press Alt+X to start the acquisition process (instead of using the Acquire Images option on the Imaging tab's menu). To use this keyboard shortcut, you must be viewing the patient's clinical record (on the Chart, Progress Notes, Quick Exam, Perio, Tx Planner, or Imaging tab).
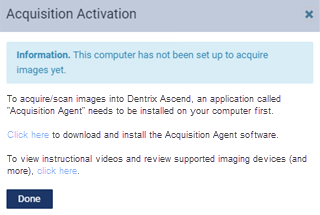
If the acquisition agent is not installed, the Acquisition Activation dialog box appears. Click (or tap) the Click here link to download the acquisition agent installer. Then, click (or tap) Done. After you install the acquisition agent and the drivers for your acquisition devices, you can begin acquiring images.
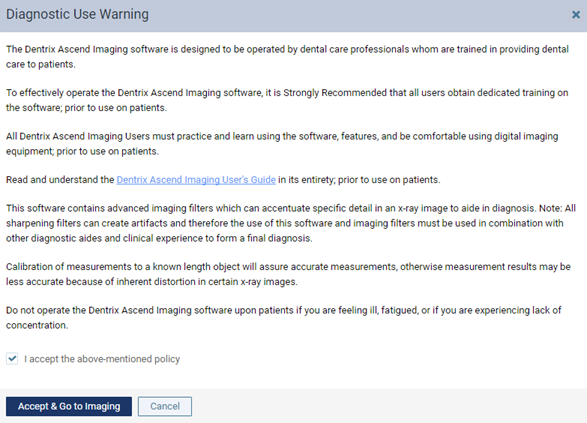
If you have not already accepted the diagnostic use policy, the Diagnostic Use Warning dialog box appears. To begin using the imaging features of Dentrix Ascend, you must select the I accept the above-mentioned policy checkbox, and then click (or tap) Accept & Go to Imaging.
The options for acquiring images become available.
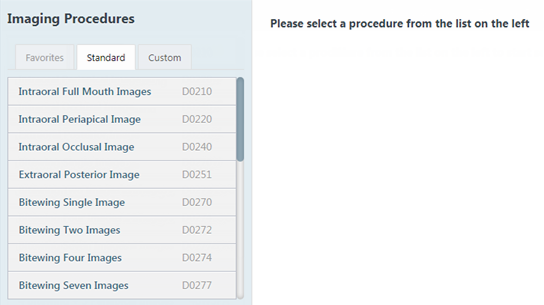
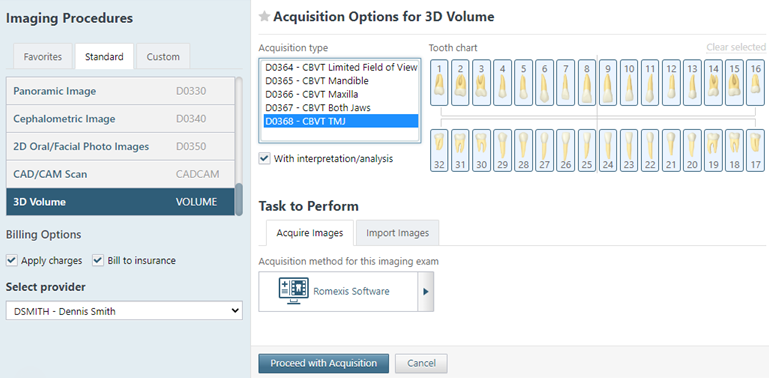
Select the imaging procedure CBCT Volume, which corresponds to the only acquisition type for a 3D volume.
The options for the selected procedure become available.
-
Under Billing Options, set up the following options:
-
Apply charges - Do one of the following:
-
If you are importing a 3D volume from another office or provider - Ignore this setting because it will become unavailable when you select the Existing procedure option in a later step.
-
If you are importing a 3D volume acquired in your office with non-integrated third-party imaging software - Either select the checkbox to post the fee for the selected procedure (such as VOLUME), or clear the checkbox to post a zero amount for the procedure.
-
-
Bill to insurance - Do one of the following:
-
If you are importing a 3D volume from another office or provider - Ignore this setting because it will become unavailable when you select the Existing procedure option in a later step.
-
If you are importing a 3D volume acquired in your office with non-integrated third-party imaging software - Either select the checkbox to bill the patient's insurance carrier for the procedure, or clear the checkbox to not bill the patient's insurance carrier for the procedure.
-
-
Select provider - Select the provider who you want to associate with the procedure.
Note: Only providers who have access to the current location and who are flagged as charting providers are available. Also, the provider who is selected by default is determined by the current location's Default procedure provider setting.
-
-
Do the following:
-
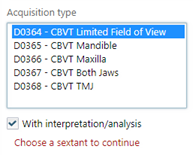
In the Acquisition type list, select the procedure that will be posted.
-
With Mandible, Maxilla, Both Jaws, or TMJ selected in the Acquisition type list, the applicable teeth are selected on the Tooth chart automatically for your reference. However, if Limited Field of View is selected, select the correct teeth on the Tooth chart by clicking (or tapping) one of the teeth in each applicable sextant or by clicking (or tapping) somewhere within the square bracket of each applicable sextant.
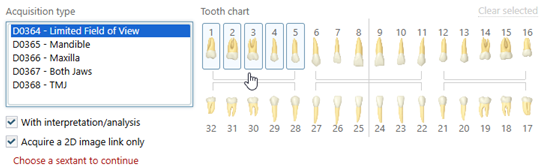
Note: To deselect all selected teeth, click (or tap) the Clear selected link. The link is available only if you have selected teeth manually.
-
If no interpretation or analysis of the imported 3D volume will be done in your office, to use the alternative procedure code for the selected procedure in the Acquisition type list, clear the With interpretation/analysis checkbox.
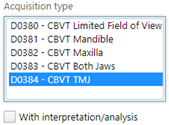
Note: The codes for the procedures in the Acquisition type list change as you select or clear the With interpretation/analysis checkbox.
-
-
Do one of the following:
-
If you are importing a 3D volume from another office or provider - On the Import tab, select the Existing Procedure option, and then specify the date that the procedure was performed.
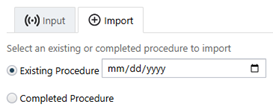
Note: With this option selected, the Apply charges and Bill to insurance checkboxes under Billing Options become unavailable because the procedure will be posted with a zero dollar fee and will not be billed to insurance. The procedure (which will have an "Existing" status) will appear in the patient's clinical record but not on the patient's ledger.
-
If you are importing a 3D volume acquired in your office with non-integrated third-party imaging software - Do one of the following:
-
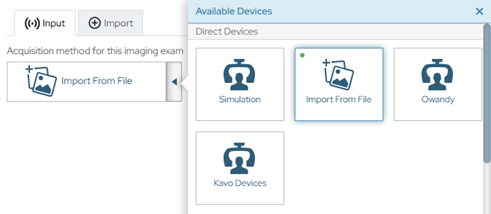
On the Input tab, select the Import From File device on the Available Devices menu if it is not already selected.
-
On the Import tab, select one of the following options:
-
Existing Procedure - Use this for a procedure that was performed prior to today (and may already have been billed to the patient's insurance carrier). Specify the date that the procedure was performed.
Note: With this option selected, the Apply charges and Bill to insurance checkboxes under Billing Options become unavailable because the procedure will be posted with a zero dollar fee and will not be billed to insurance. The procedure (which will have an "Existing" status) will appear in the patient's clinical record but not on the patient's ledger.
-
Completed Procedure - Use this for a procedure that you performed today. Today's date and time will be associated with the procedure.
Note: The procedure (which will have a "Completed" status) will appear in the patient's clinical record and on the patient's ledger.
-
-
-
-
Click (or tap) Start.
-
Import a 3D volume:
-
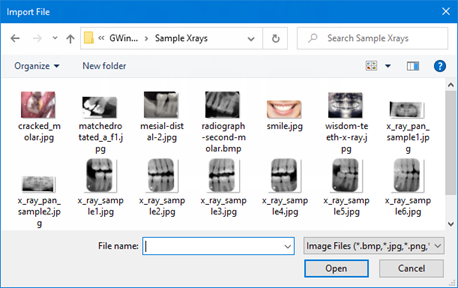
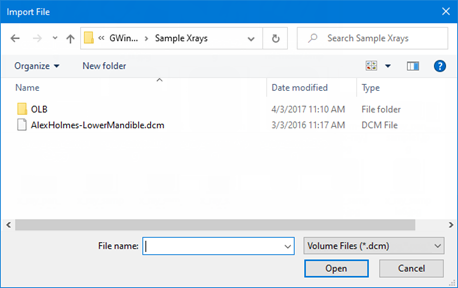
In the Import File dialog box appears that appears, select the correct 3D volume file.
Without DICOM support
With DICOM support
-
Click (or tap) Open.
The image is saved to the patient's record.
-
-
If needed, to change the assigned tooth numbers, do the following:
-
Click the Edit button
 .
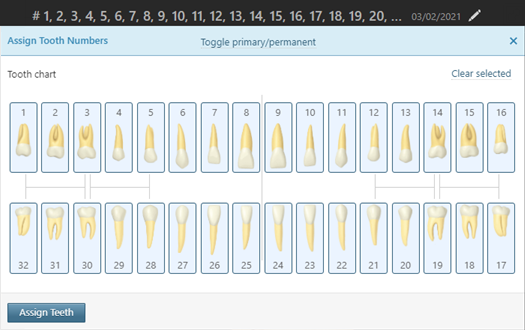
.The Assign Tooth Numbers dialog box appears.
-
To change dentition, click (or tap) the Toggle primary/permanent link to show a tooth chart and the dentition buttons, select the applicable teeth, and then click (or tap) the Permanent or Primary button. Repeat this process as needed to change the dentition of other teeth. Then, click (or tap) the Back to assignment link.

-
Select the correct tooth numbers, or deselect tooth numbers as needed.
-
Click (or tap) Assign Teeth.
-