Filtering images in the Modality view
If you are using the Modality view, a Narrow down the results box is available at the top of the viewing area so you can filter by date, tooth number, or deleted images.
To filter images by specific criteria
-
Click (or tap) in the Narrow down the results box to view the available filters.
-
Set up any of the following filters:
-
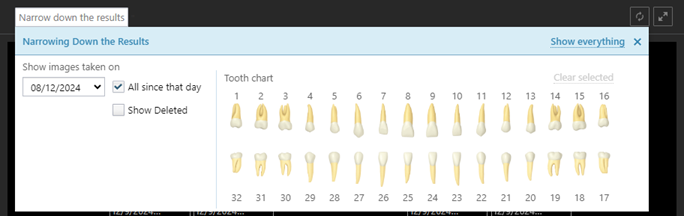
Date - To view the images according to a different date, select the desired date in the list under Show images taken on. To view all images that have been acquired on and after the selected date, select the All since that day checkbox. To view the images that were acquired only on the selected date, clear the All since that day checkbox.
-
Show Deleted - To view deleted images so you can review or recover them, select this checkbox.
Note: Viewing or restoring deleted images is only possible with the use of this filter.
-
Teeth - To view images for specific teeth, select the desired teeth on the Tooth chart.
Note: The tooth filter does not apply to intraoral photos that do not have tooth numbers assigned to them, extraoral X-rays (which apply to all teeth), and extraoral photos (which apply to all teeth). To clear all tooth selections, click (or tap) the Clear selected link.
-
Show everything - To set the filter options to their default states and display all the patient's images, including deleted images, click (or tap) the Show everything link.
-
-
Click (or tap) the X in the upper-right corner of or anywhere outside of the Narrowing Down the Results menu to close the menu.