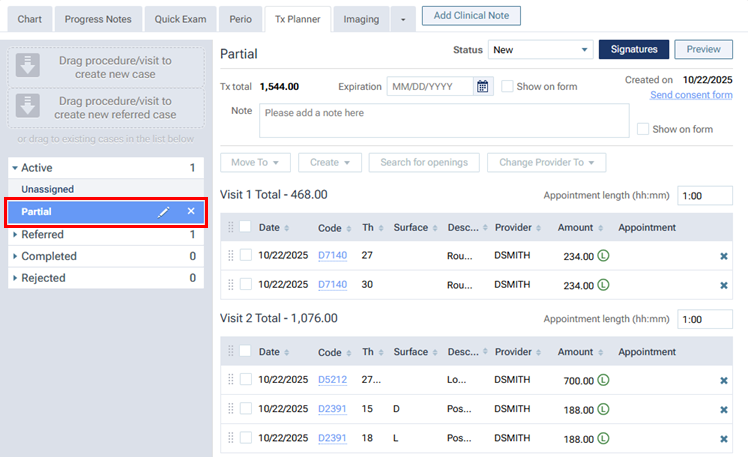
Editing treatment plans
You can modify treatment plan cases and the visits within those cases as needed.
To edit a treatment plan
-
If the correct patient is not already selected, use the Patient Search box to access the patient's record.

-
Do one of the following:
-
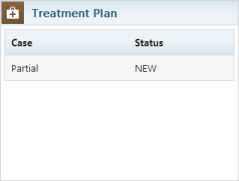
If the patient's Overview page is not already open, on the Patient menu, under General, select Overview. The patient's Overview page opens. Click (or tap) the Treatment Plan box.
-
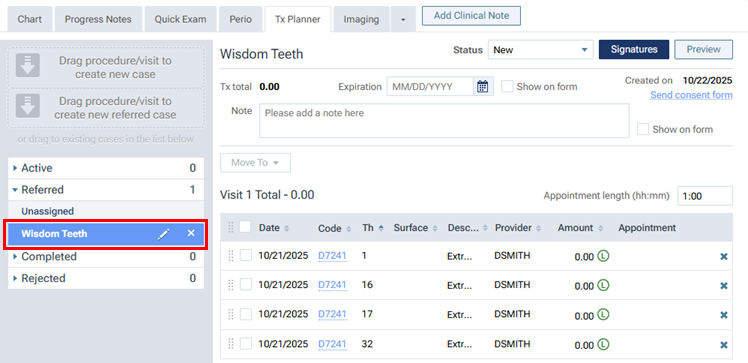
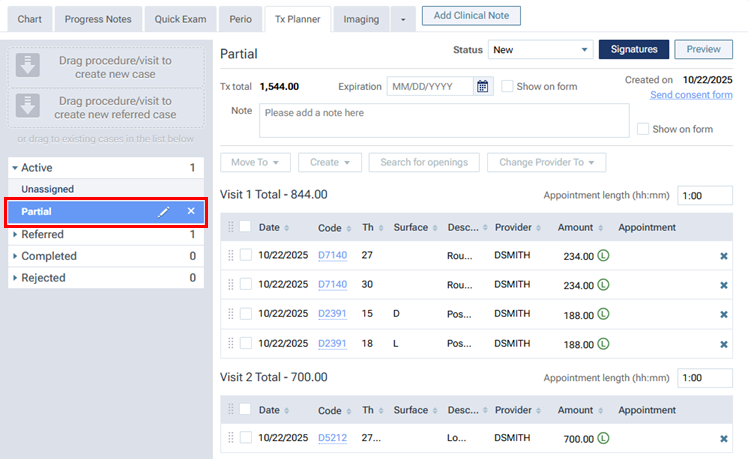
On the Patient menu, under Clinical, select Treatment Planner.
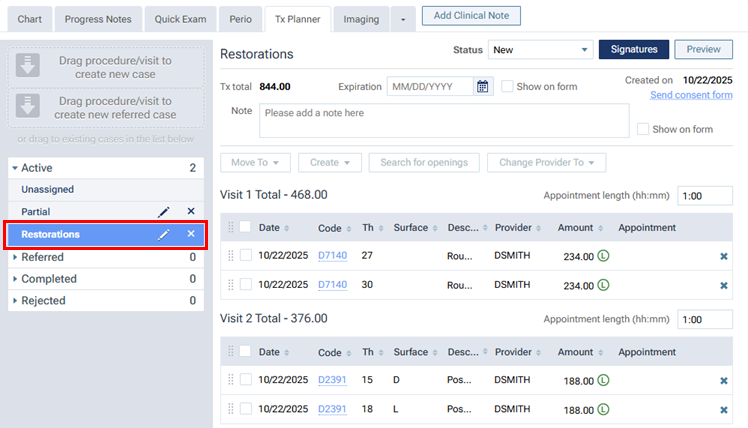
The patient's clinical record opens with the Tx Planner tab selected.
-
-
Do any of the following as needed to edit an existing case:
-
Add unassigned procedures (planned or referred) to a case.
-
On the navigation panel (on the left), do one of the following:
-
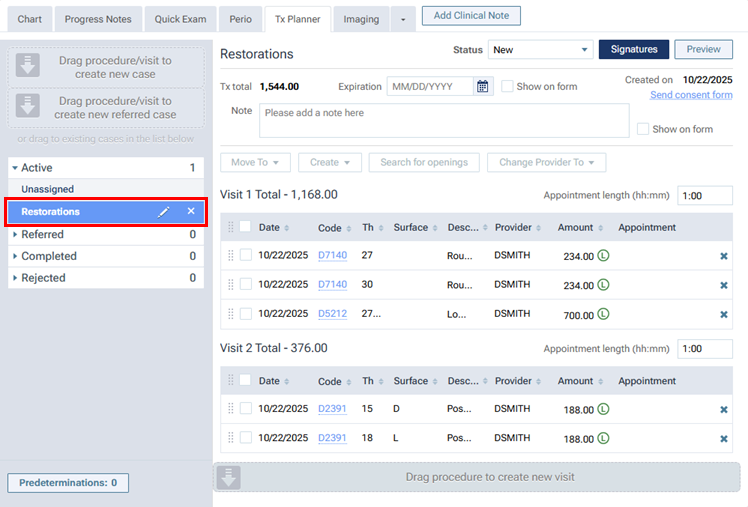
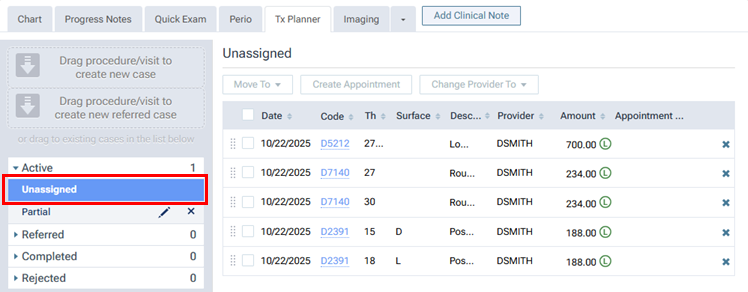
For unassigned, planned procedures - Under Active, select Unassigned. The procedures that have not been assigned to a case appear on the right.
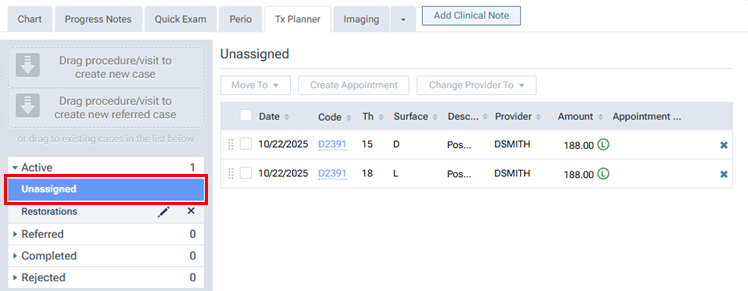
Notes:
-
To view or edit the details of a procedure, click (or tap) the corresponding Code link.
-
To change the provider of multiple procedures at one time, do the following:
-
Select the checkboxes of the procedures that you want to change the provider for.
-
From the Change Provider To menu, select the correct provider.
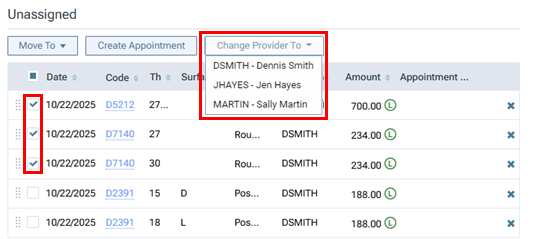
Note: Only providers who have access to the current location and who are flagged as charting providers are available.
The Changing Provider dialog box appears.
-
Do one of the following:
-
If the new provider has an assigned fee schedule, to update the amounts for the procedures based on that provider's fee schedule, select the Update procedure amount(s) based on this fee schedule checkbox. With the checkbox clear, the amounts for the procedures will not change. Then, click (or tap) Change.
-
If the new provider does not have an assigned fee schedule, there is not a checkbox, so click (or tap) Change. The amounts for the procedures will not change.
Note: Changing the provider and amount requires the "Edit patient procedure" and "Edit patient procedure amount" security rights.
-
-
-
-
For unassigned, referred procedures - Under Referred, select Unassigned. The procedures that have not been assigned to a case appear on the right.
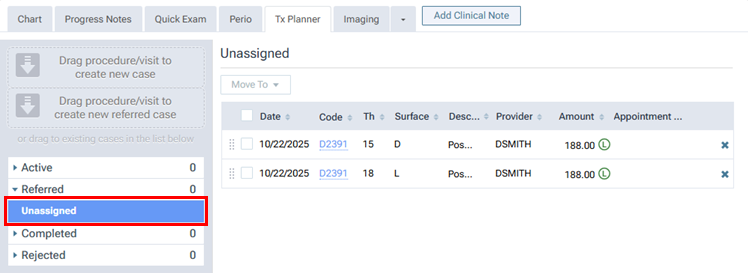
Notes: To view or edit the details of a procedure, click (or tap) the corresponding Code link.
-
-
Do any of the following:
-
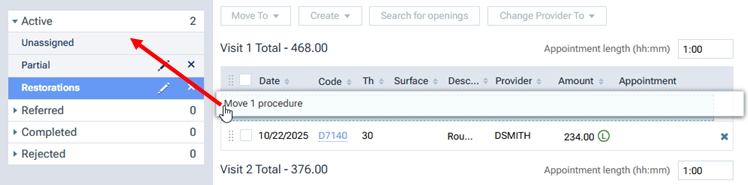
To add an individual procedure, drag that procedure (using the handle
 ) to a case under Active on the navigation panel (on the left).
-
For unassigned, planned procedures:
-
For unassigned, referred procedures:
Note: Moving a procedure from the "Referred - Unassigned" to the "Active - Unassigned" category changes the status of that procedure from "Referred" to "Tx Plan."
-
-
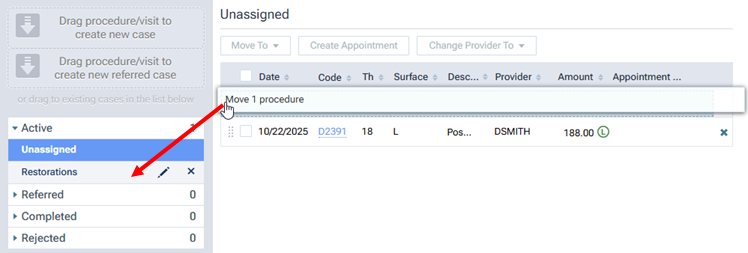
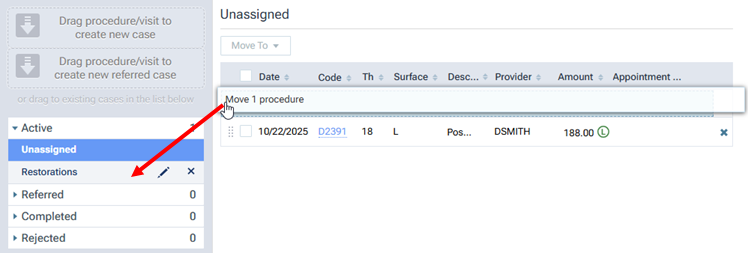
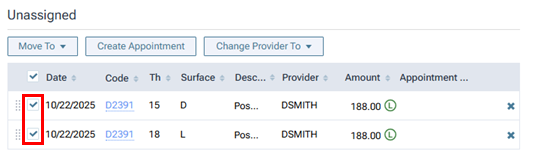
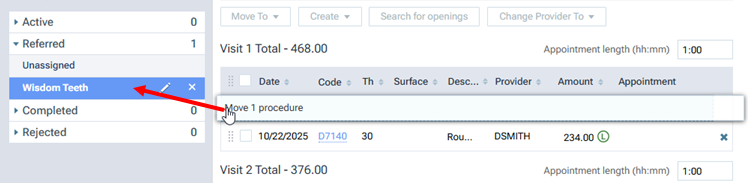
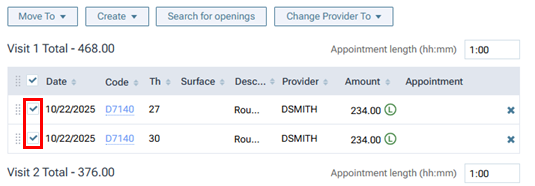
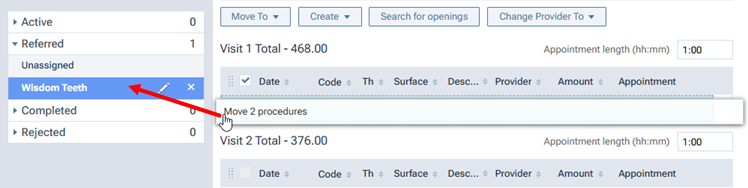
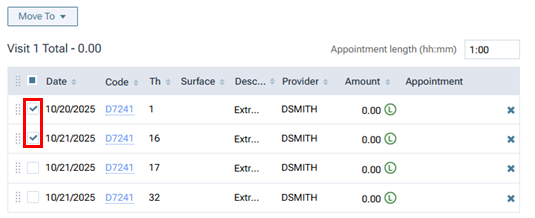
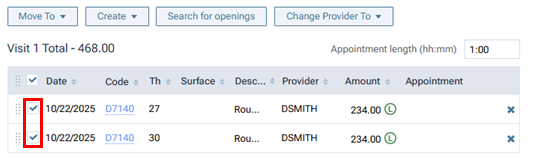
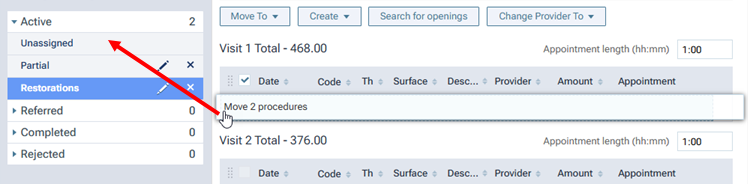
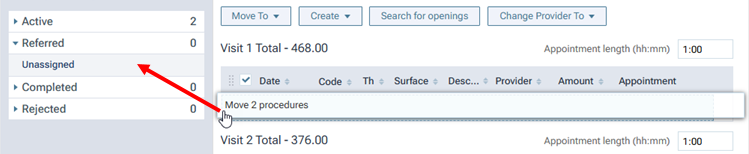
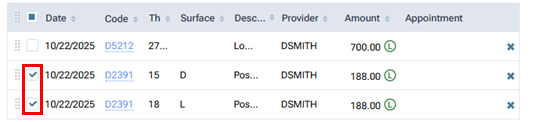
To move one or more procedures, select the checkbox of each procedure.
-
For unassigned, planned procedures:
-
For unassigned, referred procedures:
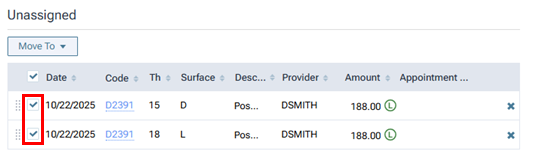
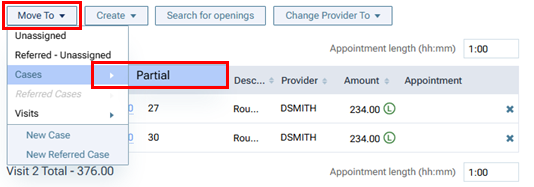
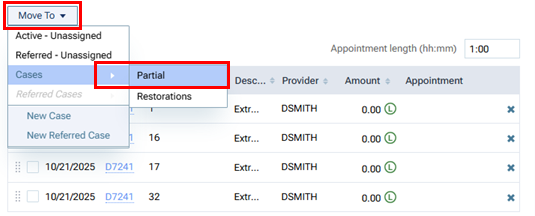
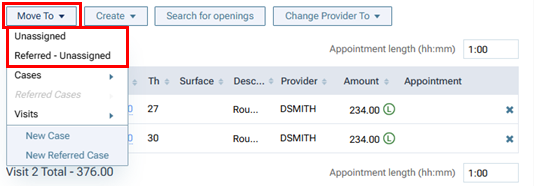
Next, do one of the following:
-
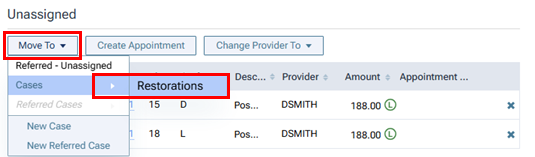
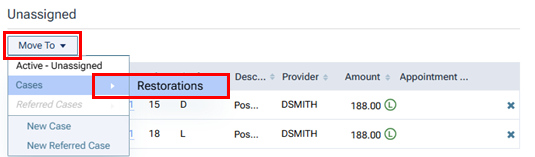
On the Move To menu, point to (or tap) Cases, and then select the name of a case. A new visit that contains those procedures is added as the last visit in the case.
-
For unassigned, planned procedures:
-
For unassigned, referred procedures:
Note: Moving procedures from the "Referred - Unassigned" to the "Active - Unassigned" category changes the status of those procedures from "Referred" to "Tx Plan."
-
-
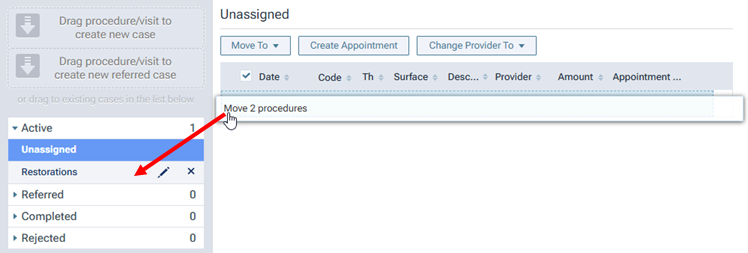
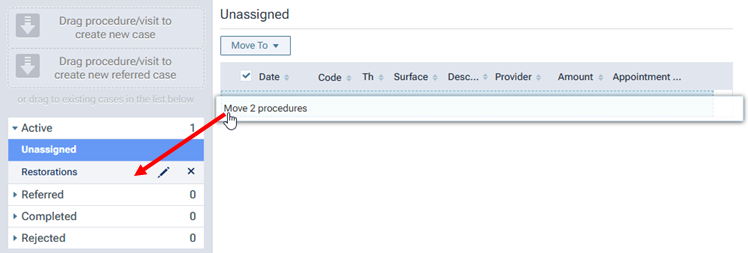
Drag those procedures (using the handle
of any of those procedures) to a case under Active on the navigation panel (on the left). A new visit that contains those procedures is added as the last visit in the case. -
For unassigned, planned procedures:
-
For unassigned, referred procedures:
Note: Moving procedures from the "Referred - Unassigned" to the "Active - Unassigned" category changes the status of those procedures from "Referred" to "Tx Plan."
-
-
-
-
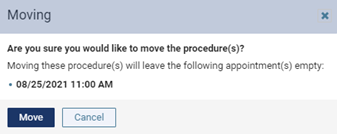
If you move procedures that are already scheduled, they are removed from the corresponding appointment. However, if removing those procedures leaves the appointment empty, the Moving message box appears and displays the date and time of the affected appointment. To confirm the removal of the procedures and allow the existence of the empty appointment, click (or tap) Move. Later, you can go to the schedule and delete the empty appointment.
A new visit that contains those procedures is added as the last visit in the specified case.
-
-
Move procedures from a case to a new case (active or referred).
-
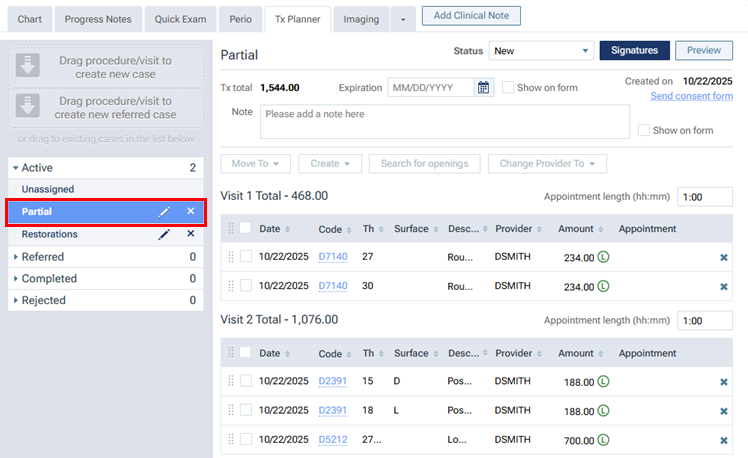
On the navigation panel (on the left), under Active, select a case. The case details appear on the right.
-
Do one of the following:
-
To move an individual procedure, drag that procedure (using the handle
) to the Drag procedure/visit to create new case or Drag procedure/visit to create new referred case box on the navigation panel (on the left).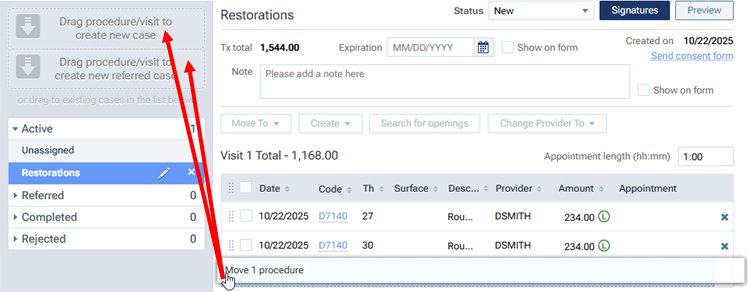
Note: Moving a procedure from an active case to a referred case changes the status of that procedure from "Tx Plan" to "Referred."
-
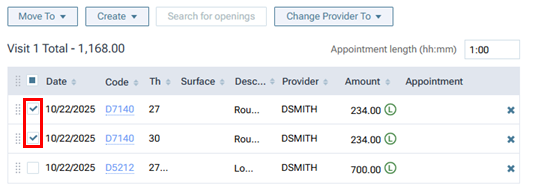
To move one or more procedures, select the checkbox of each procedure.
Next, do one of the following:
-
On the Move To menu, select New Case or New Referred Case.
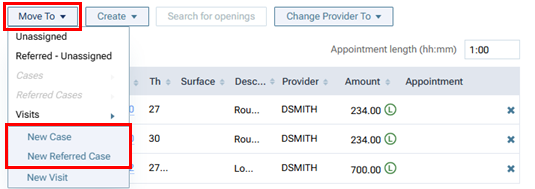
Note: Moving procedures from an active case to a referred case changes the status of those procedures from "Tx Plan" to "Referred."
-
Drag those procedures (using the handle
of any of those procedures) to the Drag procedure/visit to create new case or Drag procedure/visit to create new referred case box on the navigation panel (on the left).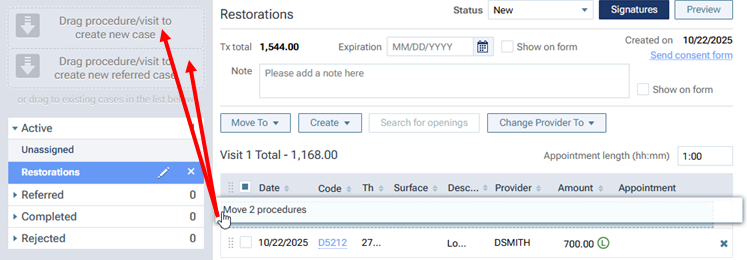
Note: Moving procedures from an active case to a referred case changes the status of those procedures from "Tx Plan" to "Referred."
-
-
To move all the procedures in a visit, drag that visit (using the handle
 ) to the Drag procedure/visit to create new case or Drag procedure/visit to create new referred case box on the navigation panel (on the left).
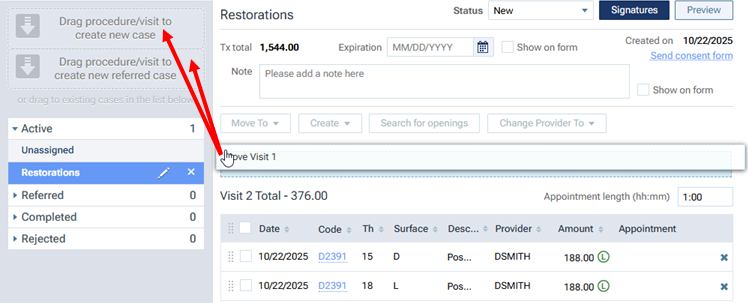
Note: Moving procedures from an active case to a referred case changes the status of those procedures from "Tx Plan" to "Referred."
-
-
If you move procedures that are already scheduled, they are removed from the corresponding appointment. However, if removing those procedures leaves the appointment empty, the Moving message box appears and displays the date and time of the affected appointment. To confirm the removal of the procedures and allow the existence of the empty appointment, click (or tap) Move. Later, you can go to the schedule and delete the empty appointment.
A new case is created, and the procedures are moved to it.
-
-
Move procedures from an active case to another case (active or referred).
-
On the navigation panel (on the left), under Active, select a case. The case details appear on the right.

-
Do any of the following:
-
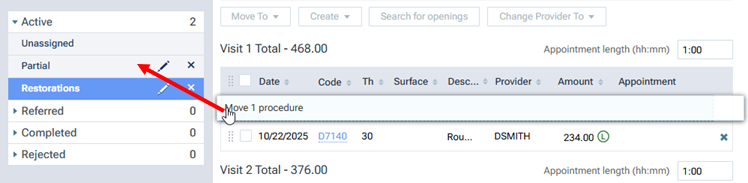
To move an individual procedure, drag that procedure (using the handle
) to a case under Active or Referred on the navigation panel (on the left).-
To move it to an active case:
-
To move it to a referred case:
Note: Moving a procedure from an active case to a referred case changes the status of that procedure from "Tx Plan" to "Referred."
-
-
To move one or more procedures, select the checkbox of each procedure.
Next, do one of the following:
-
On the Move To menu, point to (or tap) Cases or Referred Cases, and then select the name of a case. A new visit that contains those procedures is added as the last visit in the case.
-
To move them to an active case:
-
To move them to a referred case:
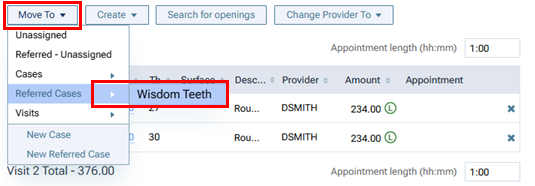
Note: Moving procedures from an active case to a referred case changes the status of those procedures from "Tx Plan" to "Referred."
-
-
Drag those procedures (using the handle
of any of those procedures) to a case under Active or Referred on the navigation panel (on the left). A new visit that contains those procedures is added as the last visit in the case.-
To move them to an active case:

-
To move them to a referred case:
Note: Moving procedures from an active case to a referred case changes the status of those procedures from "Tx Plan" to "Referred."
-
-
-
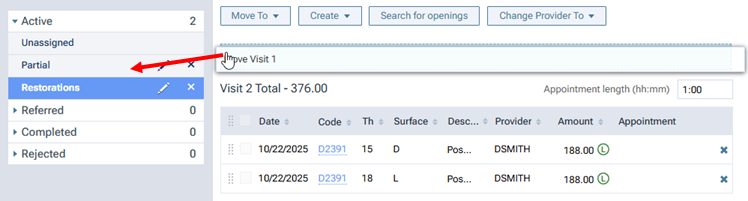
To move all the procedures in a visit, drag that visit (using the handle
) to a case under Active or Referred on the navigation panel (on the left). A new visit that contains those procedures is added as the last visit in the case, and the structure of that visit (appointment length, scheduled status, and so forth) remains intact.-
To move the visit to an active case:
-
To move the visit to a referred case:
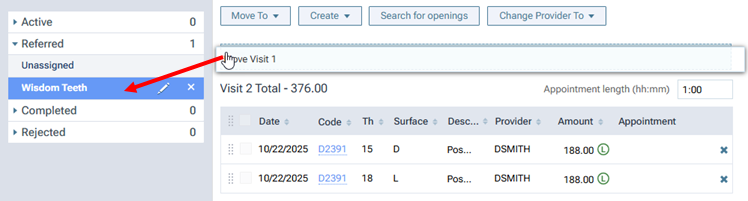
Note: Moving procedures from an active case to a referred case changes the status of those procedures from "Tx Plan" to "Referred."
-
-
-
If you move procedures that are already scheduled, they are removed from the corresponding appointment. However, if removing those procedures leaves the appointment empty, the Moving message box appears and displays the date and time of the affected appointment. To confirm the removal of the procedures and allow the existence of the empty appointment, click (or tap) Move. Later, you can go to the schedule and delete the empty appointment.
-
-
Move procedures from a referred case to an active case.
-
On the navigation panel (on the left), under Referred, select a case. The case details appear on the right.
-
Do any of the following:
-
To move an individual procedure, drag that procedure (using the handle
) to a case under Active on the navigation panel (on the left).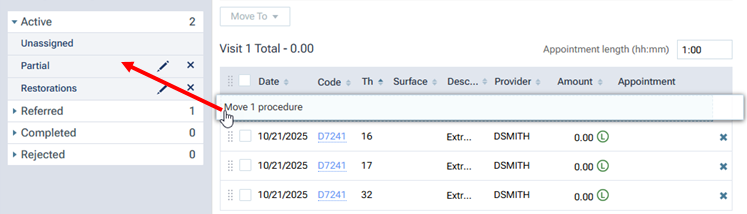
Note: Moving a procedure from a referred case to an active case changes the status of that procedure from "Referred" to "Tx Plan."
-
To move one or more procedures, select the checkbox of each procedure.
Next, do one of the following:
-
On the Move To menu, point to (or tap) Cases, and then select the name of a case. A new visit that contains those procedures is added as the last visit in the case.
Note: Moving procedures from a referred case to an active case changes the status of those procedures from "Referred" to "Tx Plan."
-
Drag those procedures (using the handle
of any of those procedures) to a case under Active on the navigation panel (on the left). A new visit that contains those procedures is added as the last visit in the case.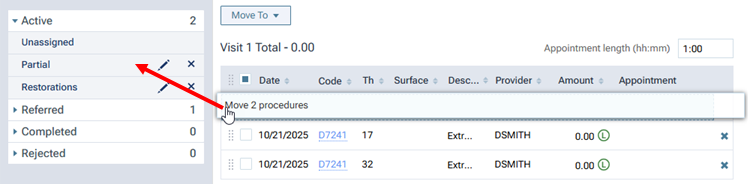
Note: Moving procedures from a referred case to an active case changes the status of those procedures from "Referred" to "Tx Plan."
-
-
-
-
Move procedures from a case to the "Active - Unassigned" or "Referred - Unassigned" category.
-
On the navigation panel (on the left), under Active, select a case. The case details appear on the right.
-
Do any of the following:
-
To move an individual procedure, drag that procedure (using the handle
) to Unassigned under Active or Referred on the navigation panel (on the left).-
To move it to the "Active - Unassigned" category:
-
To move it to the "Referred - Unassigned" category:
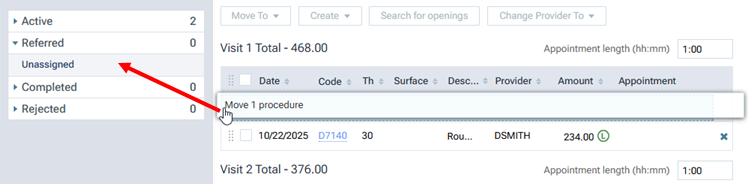
Note: Moving a procedure from an active case to the "Referred - Unassigned" category changes the status of that procedure from "Tx Plan" to "Referred."
-
-
To move one or more procedures, select the checkbox of each procedure.
Next, do one of the following:
-
From the Move To menu, click (or tap) Unassigned or Referred - Unassigned.
Note: Moving procedures from an active case to the "Referred - Unassigned" category changes the status of those procedures from "Tx Plan" to "Referred."
-
Drag those procedures (using the handle
of any of those procedures) to Unassigned under Active or Referred on the navigation panel (on the left).-
To move them to the "Active - Unassigned" category:
-
To move them to the "Referred - Unassigned" category:
Note: Moving procedures from an active case to the "Referred - Unassigned" category changes the status of those procedures from "Tx Plan" to "Referred."
-
-
-
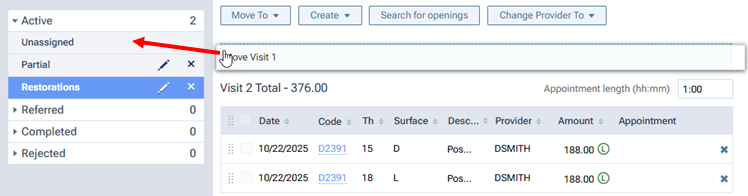
To move all the procedures in a visit, drag that visit (using the handle
) to Unassigned under Active or Referred on the navigation panel (on the left).-
To move the visit to the "Active - Unassigned" category:
-
To move the visit to the "Referred - Unassigned" category:

Note: Moving procedures from an active case to the "Referred - Unassigned" category changes the status of those procedures from "Tx Plan" to "Referred."
-
-
-
If you move procedures that are already scheduled, they are removed from the corresponding appointment. However, if removing those procedures leaves the appointment empty, the Moving message box appears and displays the date and time of the affected appointment. To confirm the removal of the procedures and allow the existence of the empty appointment, click (or tap) Move. Later, you can go to the schedule and delete the empty appointment.
-
-
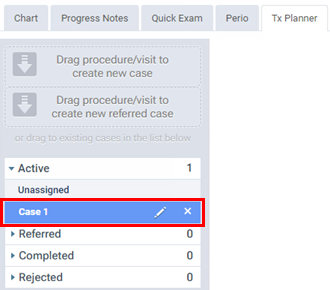
Rename a case.
-
On the navigation panel (on the left), under Active, select a case.
-
Click (or tap) the corresponding Edit button
 .
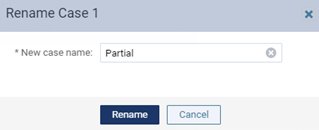
.The Rename dialog box appears.
-
Change the name in the New case name box.
-
Click (or tap) Rename.
-
-
Create a new visit for procedures.
-
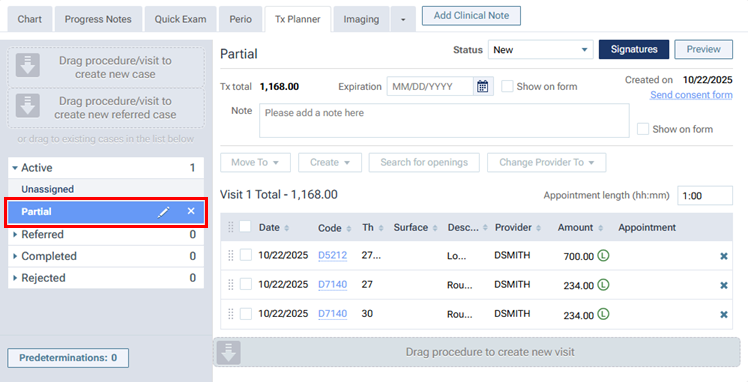
On the navigation panel (on the left), under Active, select a case. The case details appear on the right.
-
Do any of the following:
-
To create a new visit for an individual procedure, drag that procedure (using the handle
) to the Drag procedure to create new visit box (below the visits).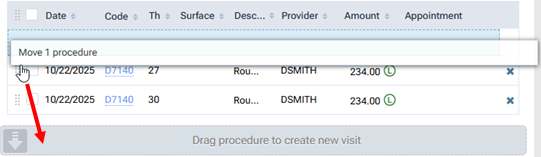
-
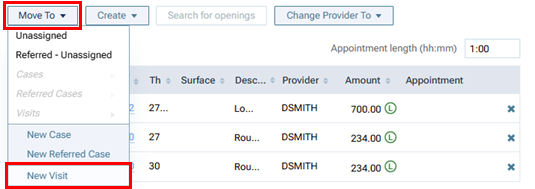
To create a new visit for one or more procedures, select the checkbox of each procedure.

Next, do one of the following:
-
On the Move To menu, click (or tap) New Visit.
-
Drag those procedures (using the handle
of any of those procedures) to the Drag procedure to create new visit box (below the visits).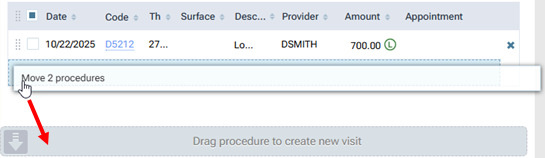
-
-
-
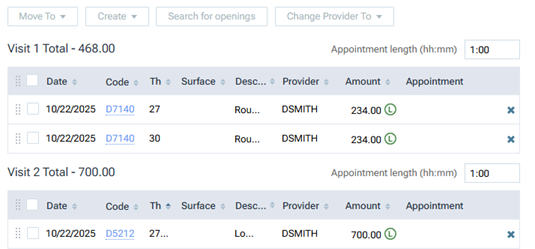
If you move procedures that are already scheduled, they are removed from the corresponding appointment. However, if removing those procedures leaves the appointment empty, the Moving message box appears and displays the date and time of the affected appointment. To confirm the removal of the procedures and allow the existence of the empty appointment, click (or tap) Move. Later, you can go to the schedule and delete the empty appointment.
The new visit is created, and the procedures are moved to it.
-
-
Move procedures to an existing visit.
-
On the navigation panel (on the left), under Active, select a case. The case details appear on the right.
-
Do any of the following:
-
To move an individual procedure to an existing visit, drag that procedure (using the handle
) to a visit.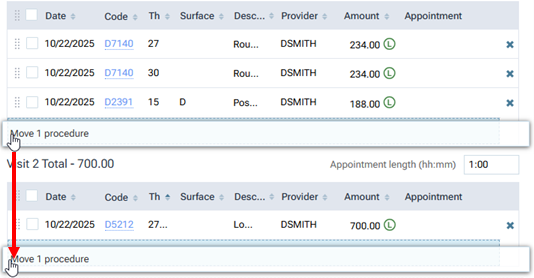
-
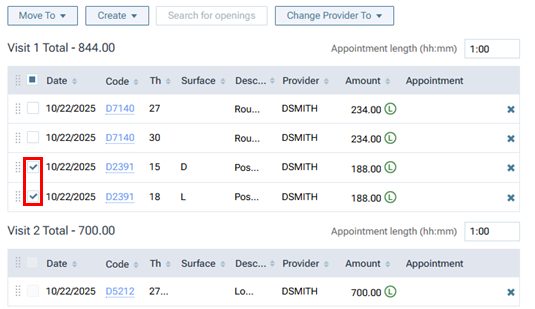
To move multiple procedures to an existing visit, select the checkboxes of those procedures.
Next, do one of the following:
-
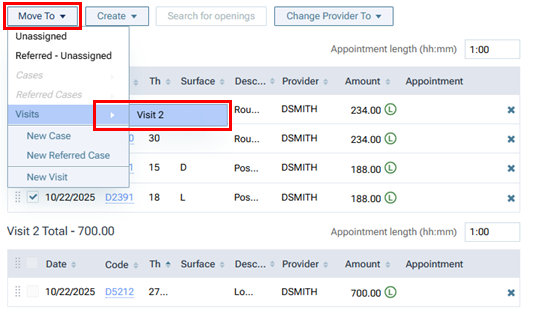
On the Move To menu, point to (or tap) Visits, and then select the name of a visit.
-
Drag those procedures (using the handle
of any of those procedures) to a visit.
-
-
-
If you move procedures that are already scheduled, they are removed from the corresponding appointment. However, if removing those procedures leaves the appointment empty, the Moving message box appears and displays the date and time of the affected appointment. To confirm the removal of the procedures and allow the existence of the empty appointment, click (or tap) Move. Later, you can go to the schedule and delete the empty appointment.
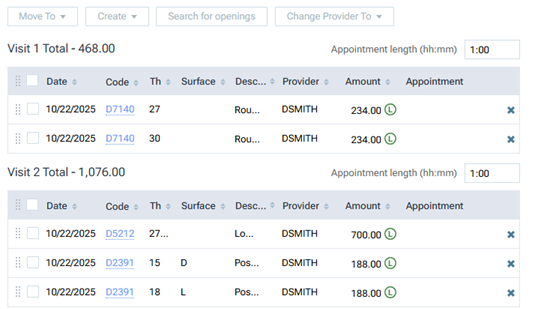
The procedures are moved to the other visit.
-
-
Adjust the order of procedures in a visit.
-
On the navigation panel (on the left), under Active, select a case. The case details appear on the right.
-
Do any of the following:
-
To move an individual procedure, drag that procedure (using the handle
) to a location above or below another procedure in that visit.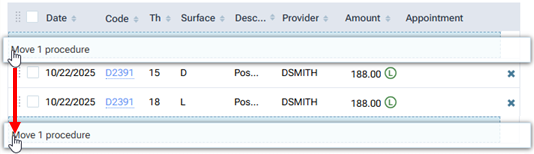
-
To move one or more procedures, select the checkbox of each procedure.
Next, drag those procedures (using the handle
of any of those procedures) to a location above or below another procedure in that visit.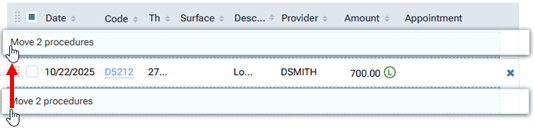
-
The procedures in the visit are now reordered.
-
-
Delete a procedure from a case or the "Active - Unassigned" category.
-
On the navigation panel (on the left), under Active, do one of the following:
-
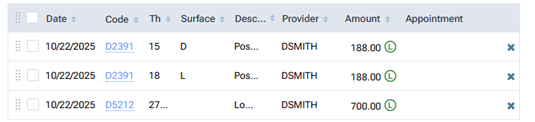
Select Unassigned. The procedures that have not been assigned to a case appear on the right.
-
Select a case. The case details appear on the right.
-
-
Click (or tap) the procedure's Delete button (X):

-
Do one of the following:
-
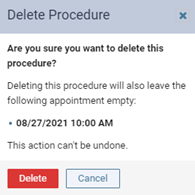
If deleting the procedure leaves an appointment empty, the Delete Procedure message box appears and displays the date and time of the affected appointment. To confirm the deletion of the procedure and allow the existence of the empty appointment, click (or tap) Delete. Later, you can go to the schedule and delete the empty appointment.
-
If deleting the procedure does not leave an appointment empty, on the confirmation message that appears, click (or tap) Delete.
-
-
-
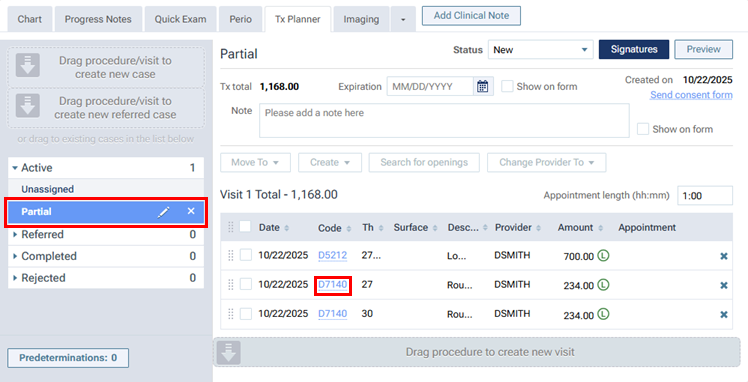
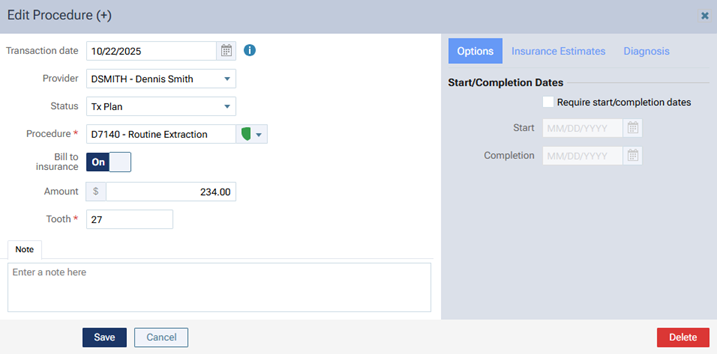
Edit a procedure.
-
On the navigation panel (on the left), under Active, select a case. The case details appear on the right.
-
Click (or tap) a procedure's Code link.
The Edit Procedure dialog box appears.
-
Make the necessary changes.
-
Click (or tap) Save.
-
-
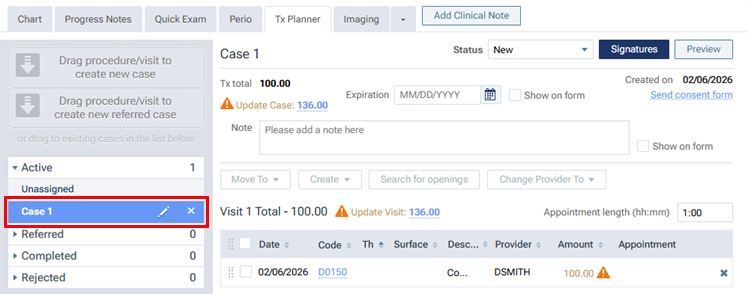
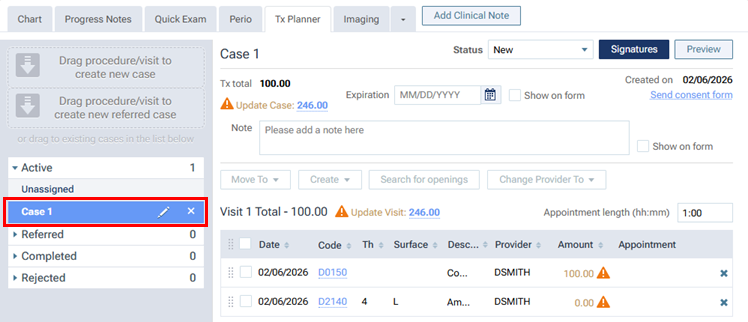
If the amount for a procedure in a selected case does not match the charge for that procedure in the applicable fee schedule (as indicated by the orange warning icon
 next to the corresponding Amount), you can update the amount for that procedure so it matches the fee schedule.
-
On the navigation panel (on the left), under Active, select a case. The case details appear on the right.
-
Click (or tap) the procedure's Code link.

The Edit Procedure dialog box appears.
-
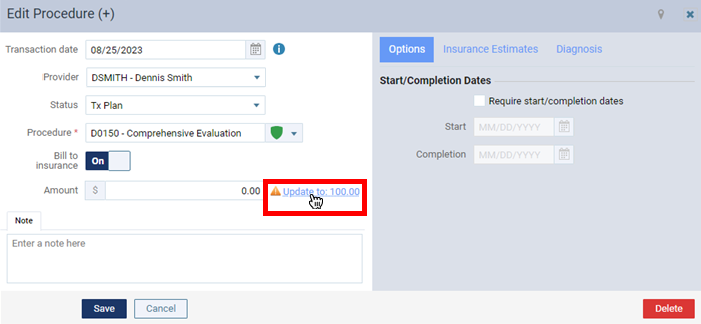
Click (or tap) the Update to: [amount] link (next to the Amount box).
Note: Updating the procedure amount by clicking (or tapping) this link, requires the "Edit patient procedure amount" security right, or if that right has not been granted, it requires either the "Update patient procedure amount" security right (if the posted amount is currently greater than $0) or the "Edit patient procedure zero amount" security right (if the posted amount is currently $0).
-
Click (or tap) Save.
The procedure's amount now matches the fee schedule, and the visit's total has been updated.

-
-
If the total amount for the procedures in a visit of a selected case do not match the total charges for those procedures in the associated fee schedule (as indicated by the orange warning icon
and Update Visit link next to Visit [#] Total), you can quickly update the outdated amounts for all the procedures in that visit at one time so they match the fee schedule.-
On the navigation panel (on the left), under Active, select a case. The case details appear on the right.
-
To see what the updated fee will be for each affected treatment-planned procedure in the visit of that case, click the orange warning icon
next to Visit [#] Total.
-
Click (or tap) the Update Visit link (which displays the updated visit total).

A confirmation message appears.
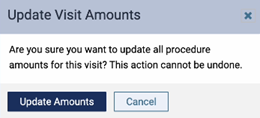
-
Click (or tap) Update Amounts.
All applicable procedure amounts now match the fee schedule, and the visit's total has been updated.

Notes:
-
Updating the fees for all affected treatment-planned procedures cannot be undone. After updating the fees, if you want to revert back to the old fees, you have to edit each procedure one at a time to change the fee.
-
Updating the fees for a visit affects only treatment-planned procedures. Completed procedures are not affected.
-
The change in each procedure's amount is recorded in the Audit Log.
-
To update multiple procedure amounts for a visit at one time, the "Update Tx Plan amounts per visit" security right is required.
-
-
If needed, change the provider of multiple procedures at one time.
-
On the navigation panel (on the left), under Active, select a case. The case details appear on the right.
-
Select the checkboxes of the procedures that you want to change the provider for.
-
From the Change Provider To menu, select the correct provider.
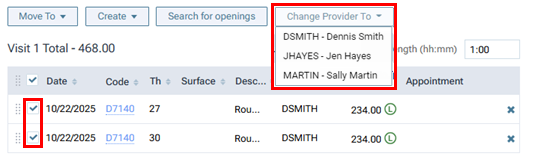
Note: Only providers who have access to the current location and who are flagged as charting providers are available.
The Changing Provider dialog box appears.
-
Do one of the following:
-
If the new provider has an assigned fee schedule, to update the amounts for the procedures based on that provider's fee schedule, select the Update procedure amount(s) based on this fee schedule checkbox. With the checkbox clear, the amounts for the procedures will not change. Then, click (or tap) Change.
-
If the new provider does not have an assigned fee schedule, there is not a checkbox, so click (or tap) Change. The amounts for the procedures will not change.
Note: Changing the provider and amount requires the "Edit patient procedure" and "Edit patient procedure amount" security rights.
-
-
-
Modify the details of a case, such as the expiration date and status, as needed.
-
On the navigation panel (on the left), under Active, select a case. The case details appear on the right.
-
Do any of the following:
-
Specify the Expiration date of the case. You can choose a specific date, insert the last day of the current year, or insert a date that is three months in the future. To show the expiration date when presenting the case, on the printed copy of the case, and on a consent form, select the Show on form checkbox.
-
Enter a Note regarding the case. The note can be up to 250 characters long. To show the note when presenting the case, on the printed copy of the case, and on a consent form, select the Show on form checkbox.
-
To change the duration of any visit, enter a different appointment length in the corresponding Appointment length box. (Also, you can select a length from the list that appears when you click in, or tap, the box.)
Note: Changing the duration of a visit requires the "Manage Appointments" security right.
-
By default, a new case has a "New" status initially, but you can select a different Status for the case. Select one of the following options.
-
New - If this is a newly created case that you have not presented to the patient yet.
-
Presented - If you have presented the case to the patient.
-
Accepted - If the patient accepts the entire case.
-
Rejected - If the patient rejects any part of the case.
-
-
-
-
If any of the procedures in a case that are being billed to insurance require a predetermination (pre-authorization), according to the patient's primary insurance plan settings, a yellow warning message appears, and a Predetermination Required symbol
 appears next to those procedures and next to the case name. However, for any procedure that requires a predetermination but is not flagged as being billed to insurance, the procedure's Predetermination Required symbol is gray
  , but you can edit the procedure to flag it as being billed to insurance if you want to include the procedure on a predetermination. Create a predetermination.
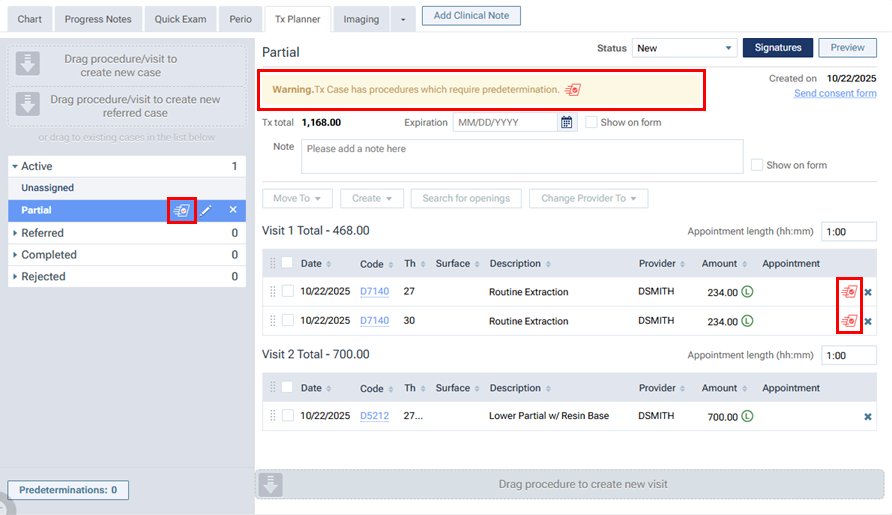
-