Editing patient notes
You can edit a patient note as needed.
To edit a patient note
-
How to get there
-
If the correct patient is not already selected, use the Patient Search box to access the patient's record.
Note: You can include inactive patients in the search results by setting the Include inactive patients switch to On.
-
Do one of the following:
-
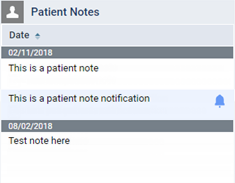
On the Patient menu, under General, click (or tap) Overview. The patient's Overview page opens. Click (or tap) the Patient Notes box.

Note: By default, notes are sorted chronologically in ascending order (oldest first). If you change the sort order, that sort order will persist for your user account until you change it.
The Patient Information page opens with the Patient Notes tab selected.
-
On the Patient menu, under General, click (or tap) Patient Information. The patient's Patient Information page opens. Click (or tap) the Notes tab.
-
On the Notes tab of a patient's Patient Information page, click (or tap) a note.

Note: By default, notes are sorted chronologically in ascending order (oldest first). If you change the sort order, that sort order will persist for your user account until you change it.
The Edit Notes dialog box appears.

-
-
If necessary, select a different Date to associate with the note.
-
In the Patient specific note field, change or add to the existing note. This note will appear in the Patient Notes box of the patient's Overview page. The note can be up to 5000 characters long.
Note: To insert the current date where the text cursor is located, click (or tap) Insert Date.
-
To make the note into a notification that will appear when someone accesses specified areas of Dentrix Ascend, and/or to remove the notification from all or specified areas, under Notification Pages, do any of the following:
-
To add the notification to all available areas, select the Add all pages checkbox.
-
To remove the notification from all available areas, clear the Add all pages checkbox.
-
To add the notification to only certain areas, select the desired checkboxes. To select all pages within a category (General, Insurance, Financial, Clinical, or Schedule), select the checkbox of the desired category. To select an individual page within a category, expand the category, and then select the checkbox of the desired page.
-
To remove the notification from all pages in a category, clear the checkbox of the category. To remove the notification from an individual page within a category, expand the category, and then clear the checkbox of the page.
Note: From the Edit Notes dialog box, you can also delete the note by clicking (or tapping) Delete.
-
-
Click (or tap) Save.