Detect AI tab
On the Detect AI tab of the AI panel (the panel on the right), a summary of the AI analysis performed on the displayed teeth (using all images, with those same teeth in common, that were acquired during that visit—in the same series) appears.
Notes:
-
This tab is available only if Detect AI has been activated, and the image being viewed is eligible for AI findings.
-
If this tab available, it is selected by default for each patient (when you start a new image-viewing session for that patient).
-
Depending on the width of the AI panel, the tab's name may be hidden, leaving only an icon to identify the tab.
To use the Detect AI tab
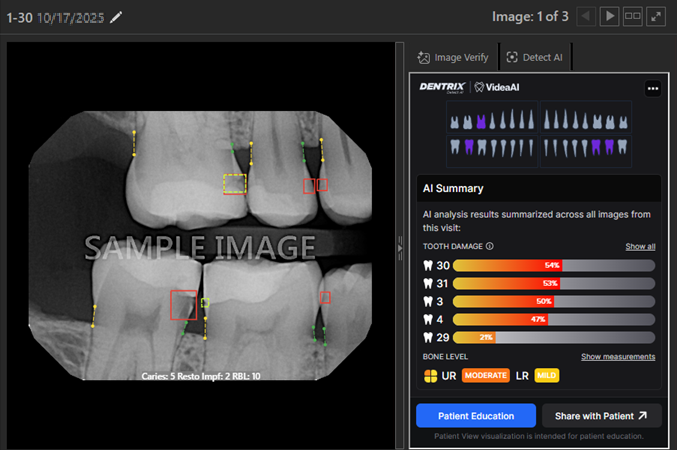
The following appear:
-
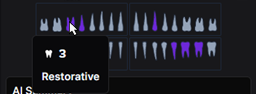
The odontogram at the top displays the teeth that may require restorative procedures in a purple color. Position your pointer over any tooth to see the tooth number and "Restorative" (if applicable).
-
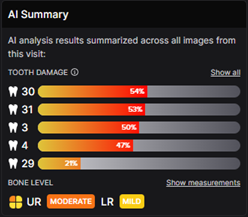
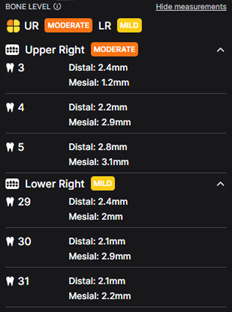
The AI Summary displays damage levels per tooth and bone levels per quadrant:
-
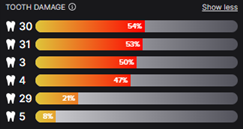
For Tooth Damage, if not all damaged teeth appear, to view the entire list, click (or tap) the Show all link.
-
For Bone Level, to view distal and mesial bone level measurements for each each tooth in each quadrant, click (or tap) the Show measurements link.
-
Do any of the following as needed:
-
View patient education topics to provide visual aids that may help the patient understand his or her treatment needs:
-
Click (or tap) Patient Education.

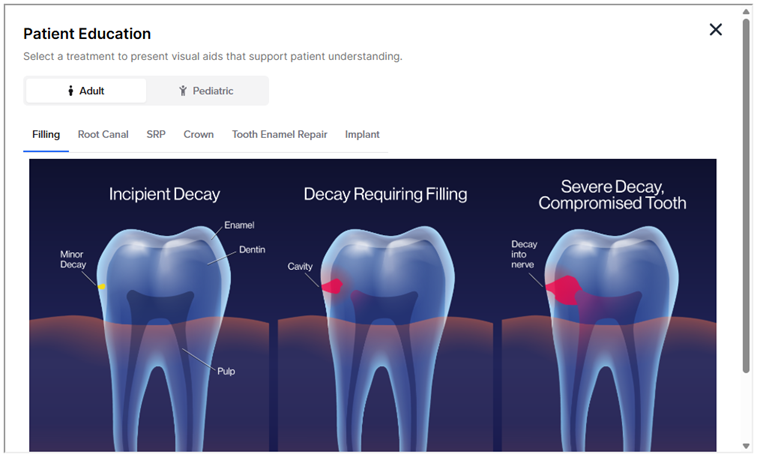
The Patient Education dialog box appears.
-
Select Adult or Pediatric, depending on the patient's age and dentition.
-
Select a treatment:
-
Visual aids for the following adult treatments are available:
-
Filling
-
Root Canal
-
SRP
-
Crown
-
Tooth Enamel Repair
-
Implant
-
-
Visual aids for the following pediatric treatments are available:
-
Fluoride (Preventative)
-
Tooth Enamel Repair (Incipient Lesion)
-
Stainless Steel/Zirconia Crown
-
Space Maintainer
-
Sealant
-
-
-
-
Share the AI summary and patient education topics with the patient:
-
To provide a QR code, do the following:
-
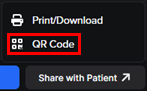
Click (or tap) Share with Patient, and then select QR Code.
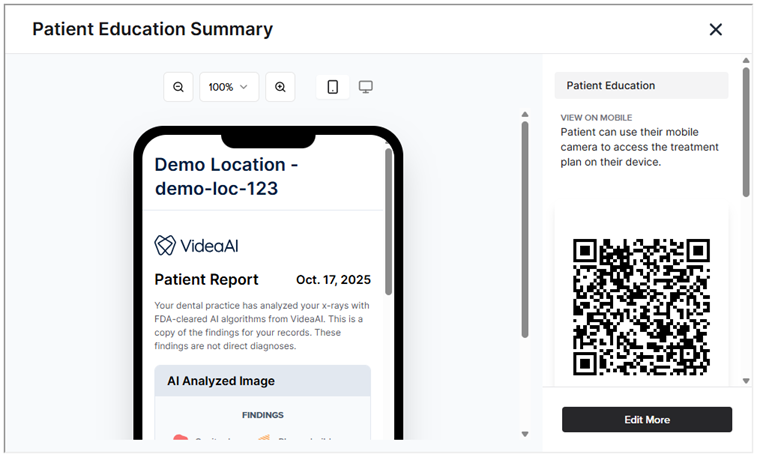
The Patient Education Summary dialog box appears.
-
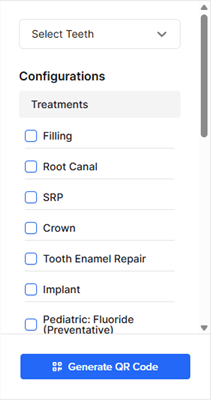
Click (or tap) Edit More to customize the report and generate a new QR code.
-
Set up the following options:
-
From the Select Teeth list, select the checkbox of each tooth to include.
-
Under Configurations, set up the following options:
-
Treatments - Select the checkbox of each patient education topic to include.
-
Note - Enter notes to include.
-
AI Findings to Include - Select the checkbox of each type of finding to include.
-
-
-
Click (or tap) Generate QR Code.
-
-
Have the patient scan the QR code.
-
-
To provide a downloaded file, do the following:
-
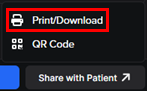
Click (or tap) Share with Patient, and then select Print/Download.
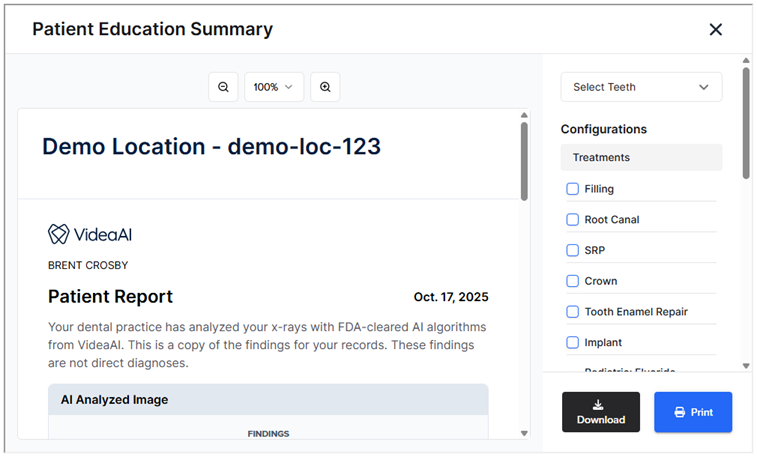
The Patient Education Summary dialog box appears.
-
Customize the report:
-
From the Select Teeth list, select the checkbox of each tooth to include.
-
Under Configurations, set up the following options:
-
Treatments - Select the checkbox of each patient education topic to include.
-
Note - Enter notes to include.
-
AI Findings to Include - Select the checkbox of each type of finding to include.
-
-
-
Click (or tap) Download. The report is saved as a .jpg file.
-
Send the report to the patient.
-
-
To provide a printed document, do the following:
-
Click (or tap) Share with Patient, and then select Print/Download.
The Patient Education Summary dialog box appears.
-
Customize the report:
-
From the Select Teeth list, select the checkbox of each tooth to include.
-
Under Configurations, set up the following options:
-
Treatments - Select the checkbox of each patient education topic to include.
-
Note - Enter notes to include.
-
AI Findings to Include - Select the checkbox of each type of finding to include.
-
-
-
Click (or tap) Print.
-
Use the browser's Print dialog box to print the report.
-
Give the printout to the patient.
-
-