Deleting images
You can delete a single image or a series of images from a patient's record. You can delete images only if they are not associated with procedures that are attached to insurance claims.
Notes: The procedures that are associated with the images that you are deleting will also be deleted or voided (if older than 120 days).
To delete images
-
If the correct patient is not already selected, use the Patient Search box to access the patient's record.

-
Do one of the following:
-
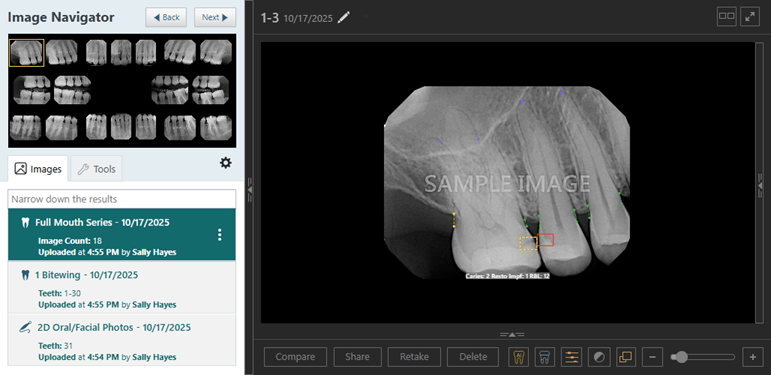
View an image from the patient's image history list (Exam view).
-
On the Patient menu, under Clinical, select Chart, Progress Notes, Quick Exam, Perio, Tx Planner, or Imaging.
The patient's clinical record opens with the Chart, Progress Notes, Quick Exam, Perio, Tx Planner, or Imaging tab selected.
-
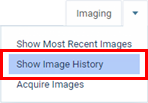
On the Imaging tab's menu, select Show Image History.
-
On the Images tab, select an image (intraoral or extraoral; X-ray or photo) or a series (such as a full mouth series or bitewings).
-
If you have selected a series, under Image Navigator, click (or tap) an image of that series.
-
-
View an image from the patient's image history list (Modality view).
-
On the Patient menu, under Clinical, select Chart, Progress Notes, Quick Exam, Perio, Tx Planner, or Imaging.
The patient's clinical record opens with the Chart, Progress Notes, Quick Exam, Perio, Tx Planner, or Imaging tab selected.
-
On the Imaging tab's menu, select Show Image History.
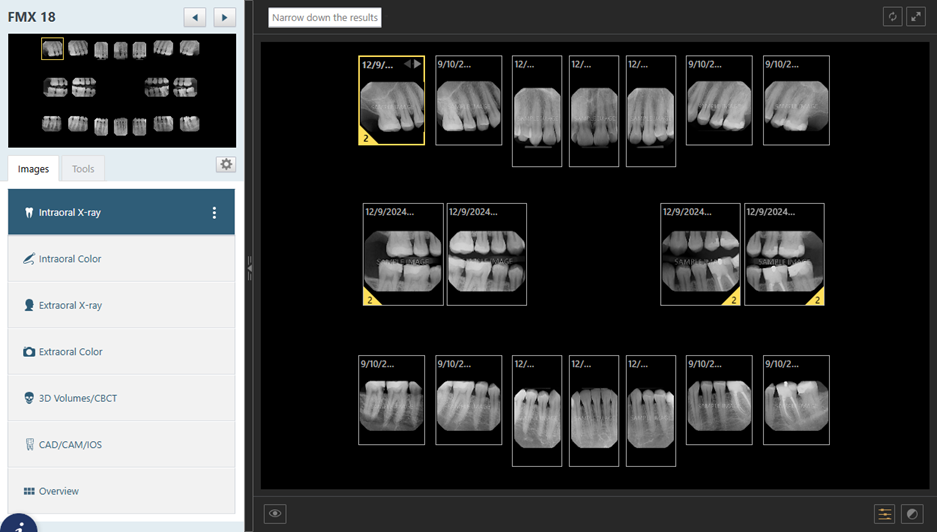
The patient's imaging page opens, and the Intraoral X-ray tab is selected by default.
-
Select one of the following modality tabs to view the corresponding images: Intraoral X-ray, Intraoral Color, Extraoral X-ray, or Extraoral Color.
-
To view an image (intraoral or extraoral; X-ray or photo), select it (a yellow border appears around it to indicate that it is selected), and then click (or tap) the item again.
-
-
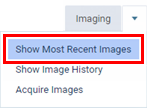
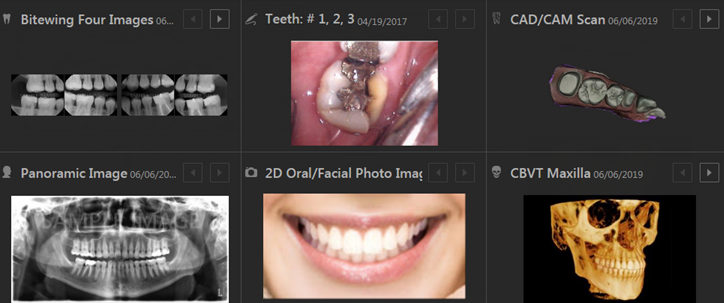
View one of the patient's most recent images.
-
Do one of the following:
-
On the Patient menu, under Clinical, select Imaging.
-
On the Patient menu, under Clinical, select Chart, Progress Notes, Quick Exam, Perio, Tx Planner, or Imaging. Then, on the Imaging tab's menu, select Show Most Recent Images.
-
-
Click (or tap) any single image (intraoral or extraoral; X-ray or photo) or an image within a series (such as a full mouth series or bitewings).
-
The selected image appears in the viewing area.
-
-
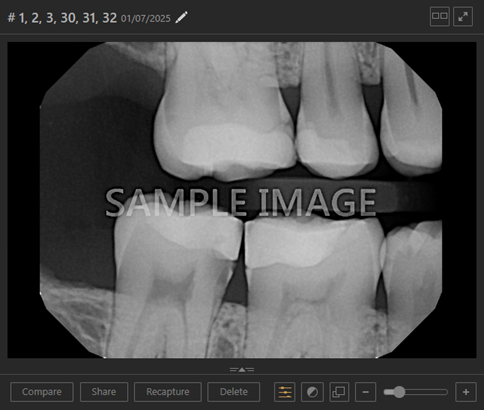
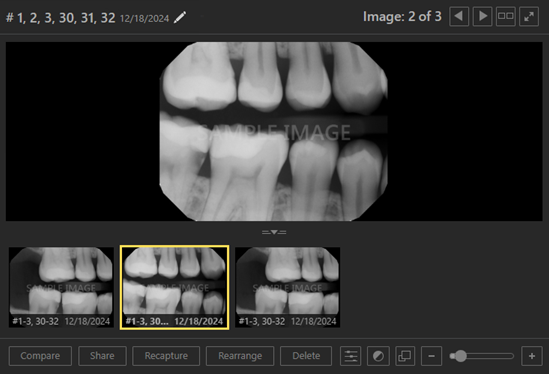
If the current template slot (for an intraoral X-ray image or an intraoral photo in a custom set) has multiple images assigned, to delete an image other than the top image of the stack, do any of the following as needed:
-
At the top of the viewing area, click (or tap) the Previous or Next button
 as needed to view the desired image in the stack.
 -
On the image stack panel (near the bottom of the viewing area), click (or tap) the desired thumbnail image to view that image in the viewing area.
Note: If the panel is collapsed, click (or tap) the handle
 to expand the panel.
-
-
Do one of the following:
-
(Exam view only) Delete the entire series or the exam with one image:
-
On the corresponding options menu, click (or tap) Delete exam.
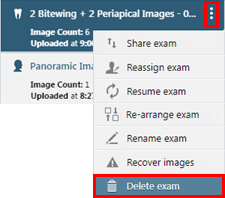
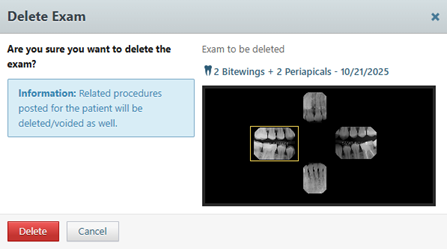
The Delete Exam confirmation message appears.
-
Click (or tap) Delete.
-
-
Delete the selected image:
-
Either click (or tap) Delete, or select the Delete Image option on the More menu.
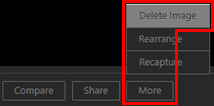
A confirmation message appears.
-
Click (or tap) Yes.
Note: If you delete an image that has been set as the top of the stack, the next image down in the stack becomes the top, and it is selected. If you delete an image other than the top image, the top image is selected.
-
-