Creating future payment plans (treatment plan preview)
You can use a future payment plan for the following scenario:
-
The patient is on a long-term treatment plan (such as for orthodontia).
-
You want to charge a down payment now (optional).
-
You want monthly charges to be automatically created and collected.
-
You prefer not to post the full treatment amount to the ledger upfront.
Note: Before creating a future payment plan, make sure provider information, fee schedules, patient information, and insurance details are complete.
There are two places in Dentrix Ascend where you can create a future payment plan (the steps differ slightly depending on where you begin):
-
A patient's treatment plan preview (which is explained in this topic)
-
A guarantor's/patient's ledger (which is explained in another topic)
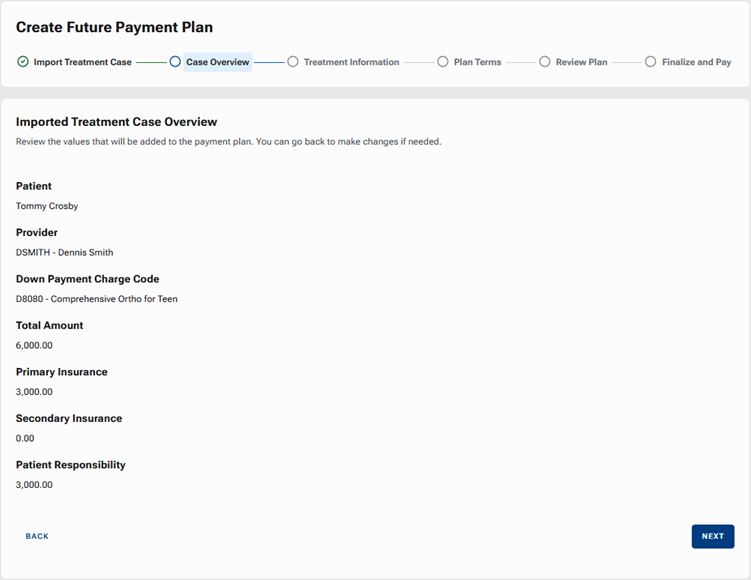
Creating a future payment plan from a patient's treatment plan preview helps ensure accuracy, reduces manual data entry, and ensures that the plan reflects contracted fees and realistic insurance expectations. When you start from the treatment plan preview, the system automatically uses fee schedules, max allowable amounts, and estimated insurance benefits. The following details will be automatically populated in the plan: total plan amount, estimated primary insurance portion, estimated secondary insurance portion, and down payment code.
To create a future payment plan from a patient's treatment plan preview
-
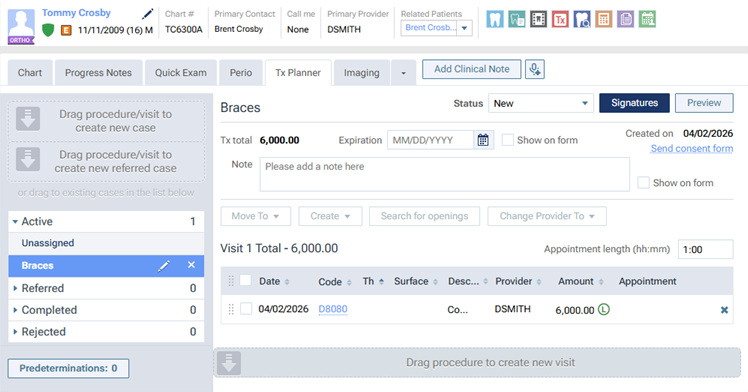
On the left panel, under Active, select a case with an ortho procedure.
-
Click (or tap) Preview.
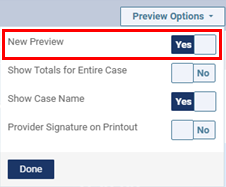
Note: You must be using the enhanced view to complete the following steps. If you are not, expand the Try New Preview menu, set the New Preview switch to Yes, and then click (or tap) Done.
-
Click (or tap) + Future Payment Plan.

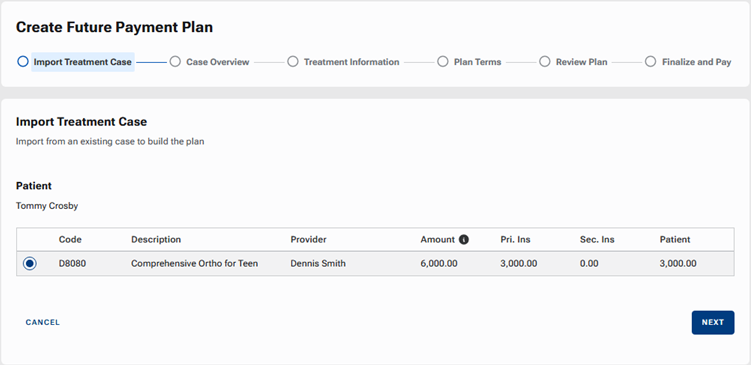
The Create Future Payment Plan page opens. The Import Treatment Case step is selected.
-
Select the ortho procedure for the plan.
-
Click (or tap) Next.
The Case Overview step is selected.
-
Review the pre-populated financial details.
-
Click (or tap) Next.
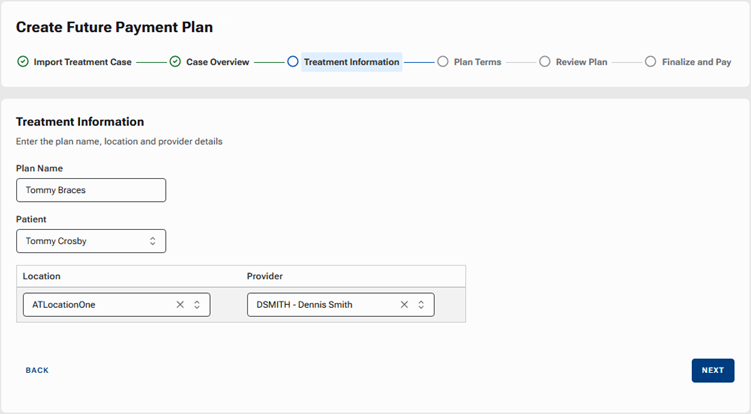
The Treatment Information step is selected.
-
Set up the following options:
-
Plan Name - Enter a name to identify the plan in Dentrix Ascend, such as on the Future Payment Plans dashboard.
-
Location - By default, the location that you are logged in to currently is selected, but you can select a different location if necessary.
-
Provider - By default, the provider who is associated with the planned procedure is selected by default, but you can select a different provider if necessary.
-
-
Click (or tap) Next.
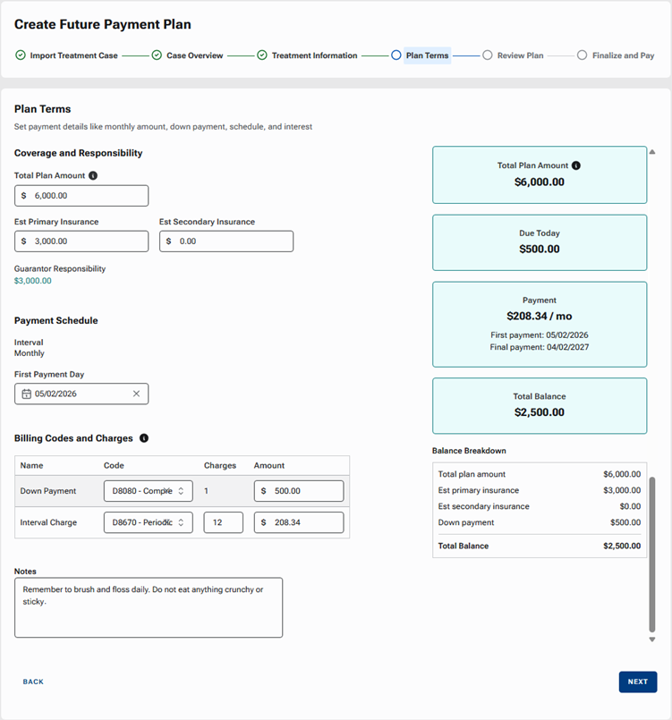
The Plan Terms step is selected.
-
Financial details from the Case Overview step pre-populate the applicable fields under Coverage and Responsibility, but you can change any of the following amounts if necessary:
-
Total Plan Amount - Enter the sum of the patient portion and the insurance portion.
-
Est Primary Insurance - Enter the primary insurance plan's portion.
-
Est Secondary Insurance - Enter the secondary insurance plan's portion (if applicable).
The Guarantor Responsibility is calculated automatically and appears for your reference.
-
-
Under Payment Schedule, select the First Payment Day. The first of the recurring monthly payments will be posted on the specified date.
-
Set up Billing Codes and Charges:
-
Down Payment:
-
Code - Select the procedure code that you are using for the patient's treatment (such as D8080).
-
Amount - If you are collecting a down payment, enter the applicable amount; otherwise, leave 0.00 entered. The credit card on file that you select in a later step will be used for the down payment.
-
-
Interval Charge:
-
Code - Select a procedure code to use for the automatic monthly recurring charges (such as D8670).
-
Charges - By default, 1 is entered, but you can change the number. Enter the correct number of monthly recurring payments that you will be charging and collecting for the patient's treatment.
-
Amount - As you change the number of charges, the amount to charge per interval is updated automatically based on the remaining patient portion after the down payment is applied and the number of charges, but you can change the amount. If you change the amount to charge per interval, the number of charges updates automatically.
Note: As you complete these fields in this step, the Total Plan Amount, Due Today, Payment, and Total Balance (the blue boxes on the right) and the Balance Breakdown (below the blue boxes on the right) update automatically.
-
-
-
Enter any Notes that you want to attach to the plan.
-
Click (or tap) Next.
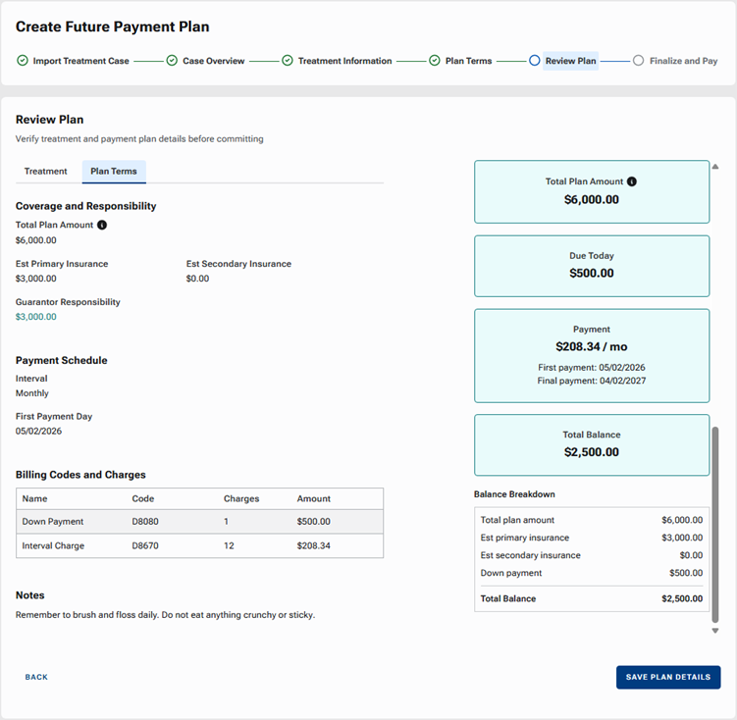
The Review Plan step is selected.
-
Review the following:
-
Review the Total Plan Amount, Due Today, Payment, and Total Balance (the blue boxes on the right) and the Balance Breakdown (below the blue boxes on the right).
-
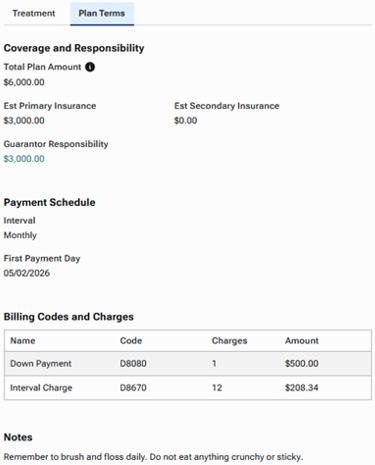
Review the details on the Plan Terms tab.
-
Review the details on the Treatment tab.
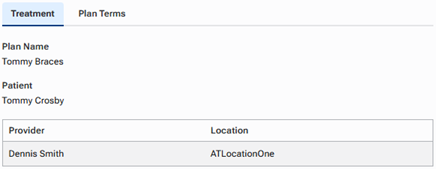
Note: If changes need to be made, click (or tap) the Back link and make the necessary changes as needed.
-
-
If the plan details are accurate, click (or tap) Save Plan Details.
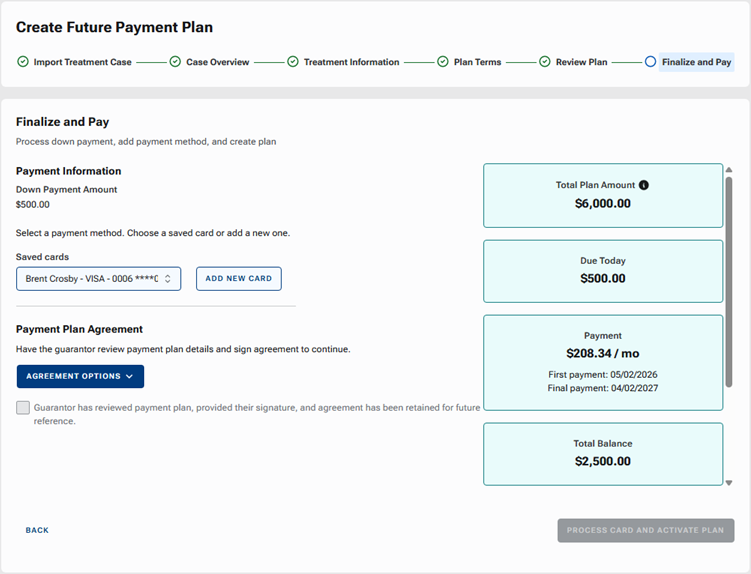
The Finalize and Pay step is selected.
-
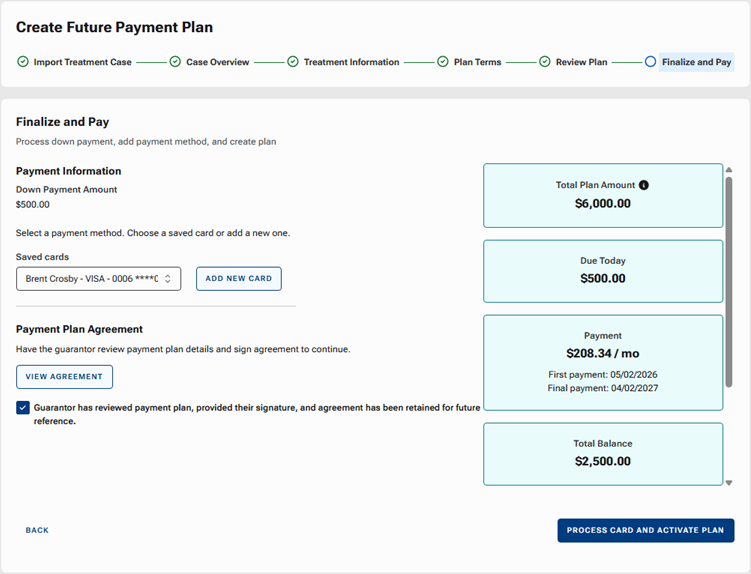
For the down payment (if applicable) and recurring monthly payments, you must associate a credit card with this plan. Do one of the following:
-
From the Saved cards list, select a card that has already been saved on file.
-
If no card is on file or the correct credit is not on file, and if the patient is physically present in the office, click (or tap) Add New Card to add a new card on file using your payment device.
-
-
To have the guarantor sign the agreement, do one of the following:
-
Send the agreement to the online patient forms portal. Do the following:
-
On the Agreement Options menu, select Send To Patient.
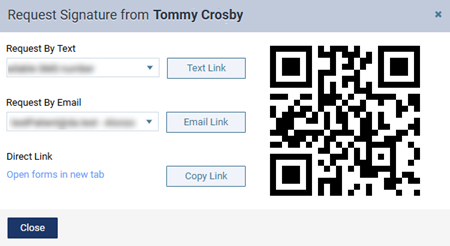
The Request Signature from [Patient Name] dialog box appears.
-
Do one of the following:
-
To send the portal link to a mobile phone number, select the desired number from the list, and then click (or tap) Text Link. This button is available only if the patient has a mobile phone number entered in his or her record. The mobile phone numbers of the patient and his or her primary contact are available for selection.
-
To send the portal link to an email address, select the desired address from the list, and then click (or tap) Email Link. This button is available only if the patient has an email address entered in his or her record. The email addresses of the patient and his or her primary contact are available for selection.
-
To copy the portal link to the Windows Clipboard, click (or tap) Copy Link. You can then paste the link in a document or email message for the patient.
-
To open the patient's portal on another tab of your Web browser (for instance, if you are opening it on a practice-owned mobile device that the patient can use to complete forms in the office; be sure to close any other Dentrix Ascend tabs before giving the device to the patient), you can click (or tap) the Open forms in new tab link.
-
To access the patient's portal link on a mobile device, use the camera on that device to scan the QR code, and then tap the link that appears on the mobile device.
Important:
-
Since using a mobile device to scan a QR Code to open a patient's portal registers that mobile device with Dentrix Ascend, you should use a mobile device that is owned by your practice.
-
Using a QR code requires that your mobile device meet the following specifications: for an Apple device, iOS 11 and the Safari browser; or for an Android device, Android 4 or newer and the Chrome browser.
-
-
-
The patient/guarantor clicks (or taps) the link in the text message (or button or link in the email message) he or she receives. However, if the patient/guarantor will use a practice-owned mobile device, after you open the patient forms portal using a direct link on that device, give the device to the patient/guarantor.
-
The patient/guarantor does one of the following:
-
If the patient/guarantor is accessing the patient forms portal from an email message, he or she does the following:
-
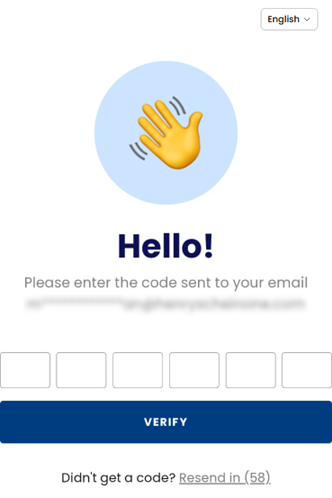
The system generates a unique six-digit OTP and sends it to the patient’s email address (if the patient is his/her own primary contact) or the email address of the patient’s primary contact (if someone else is the patient’s primary contact). The patient opens the email message with the verification code (OTP).
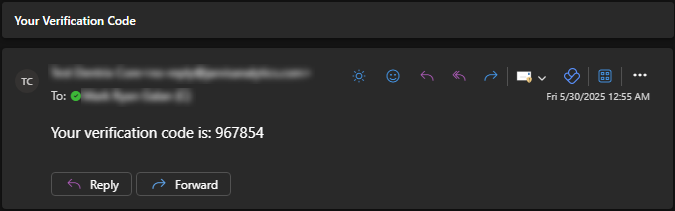
Note: The OTP is valid for two hours.
-
In the patient forms portal, the patient/guarantor enters the OTP and then clicks (or taps) Verify.
Notes:
-
The patient/guarantor has three attempts to enter a given OTP correctly.
-
After three failed attempts, or if the OTP has expired, the patient can request a new OTP:
-
The patient/guarantor can request a new OTP up to three times per form access session (per unique link click leading to an authentication attempt).
-
Requesting a new OTP invalidates any OTP sent previously for that session.
-
Each new OTP is valid for two hours.
-
-
-
-
If the patient/guarantor is accessing the patient forms portal from a text message, a direct link in an email message, or a direct link on a practice-owned mobile device, he or she does the following:
-
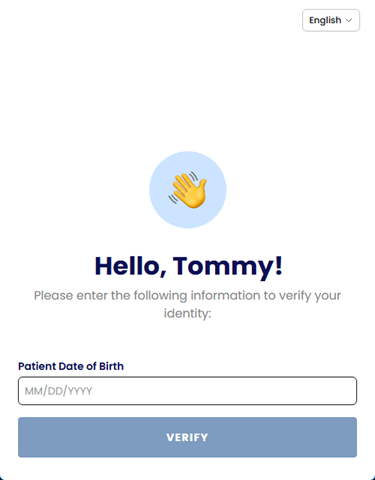
In the patient forms portal, the patient/guarantor enters the patient's birth date and then clicks (or taps) Verify.
-
-
-
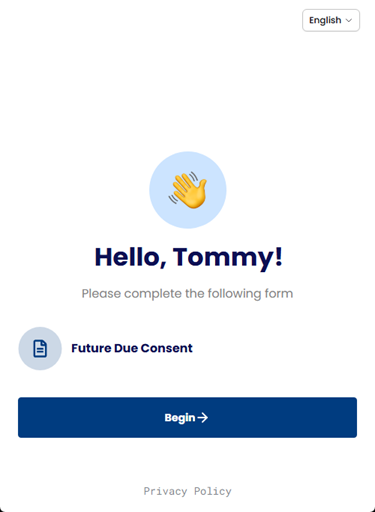
The patient/guarantor clicks (or taps) Begin to start the Future Due Consent form.
-
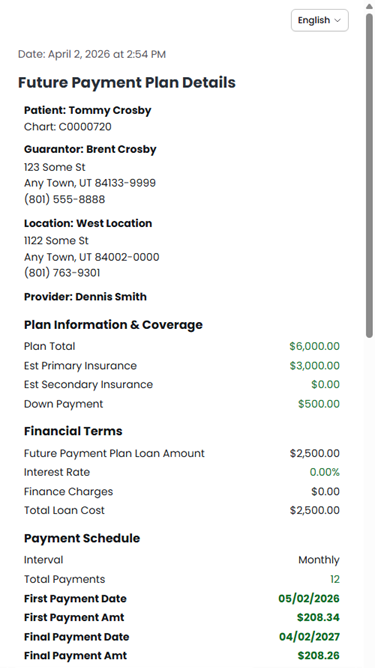
The patient/guarantor reviews the plan details.
-
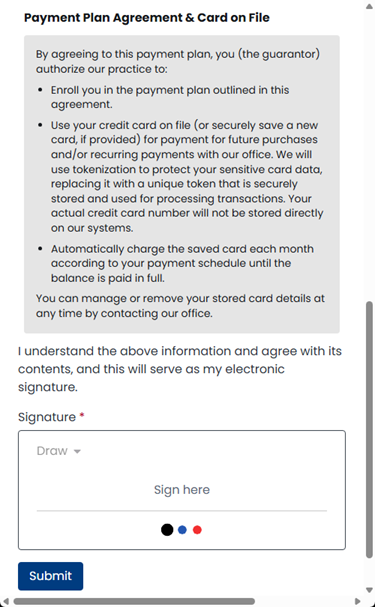
The patient/guarantor reads the agreement, signs, and then clicks (or taps) Submit.
-
Close the Request Signature from [Patient Name] dialog box to return to the Create Future Payment Plan page.
Note: After the contract has been signed and submitted, an entry for the signed agreement appears in the location's Inbox and in the patient's record.
-
-
Print the agreement. Do the following:
-
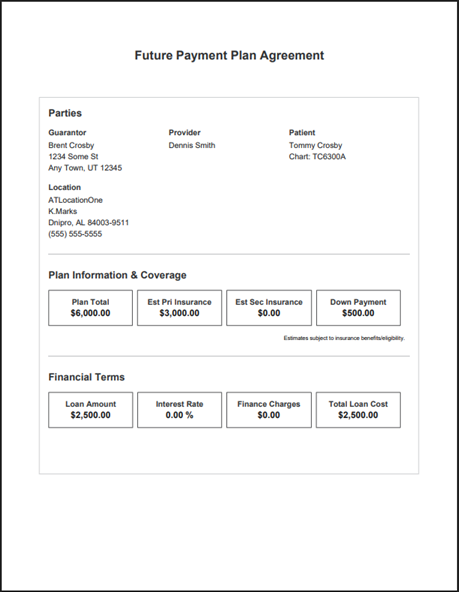
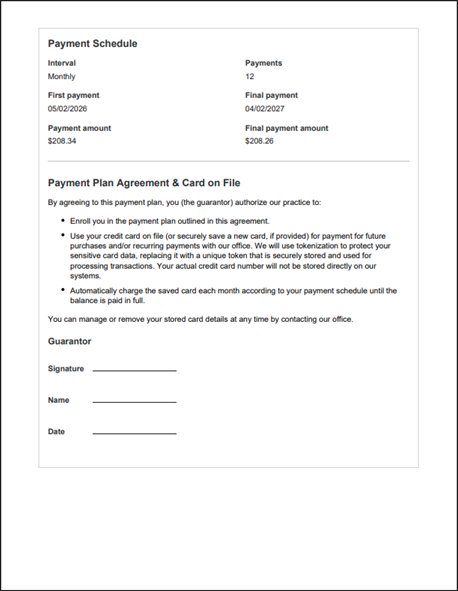
On the Agreement Options menu, select View/Print.
The agreement opens as a PDF document on a new browser tab.
-
Print the agreement.
-
The guarantor signs it.
Note: You can scan the signed document into the patient's Document Manager record. That way your office and the guarantor both have copies for your records.
-
Close the browser tab that is displaying the agreement to return to the tab that is displaying the Create Future Payment Plan page.
-
-
-
Select the Guarantor has received payment plan, provided the signature, and agreement has been retained for future reference. checkbox.
-
Click (or tap) Process Card And Activate Plan.
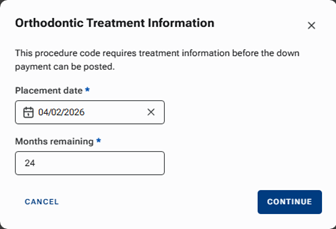
The Orthodontic Treatment Information dialog box appears.
-
Specify the following information:
-
Placement date - The date when the orthodontic device was placed. If you need to change the date, click (or tap) in the box to display a calendar, and then select the correct date.
-
Months remaining - The number of months that remain until the treatment is complete. If you need to change the date, in the box, enter the correct number of months.
Note: This information is added to the ortho procedure code (such as D8080) when it is posted.
-
-
Click (or tap) Continue.
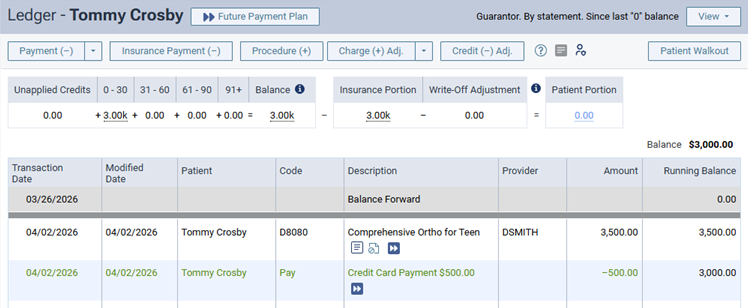
The following transactions are posted to the ledger:
-
The ortho procedure code (such as D8080). The amount charged is the sum of the specified down payment and the specified estimated insurance portion.
-
The credit card payment for the specified down payment. The down payment amount was processed through Dentrix Ascend Pay using the specified card on file.
-