Creating campaigns
You can create a targeted campaign to send to patients immediately or on a future date.
Note: Creating campaigns requires the "Manage Communications setup" security right.
To create a campaign
-
On the Settings menu, under Patient Care, select Patient Communications.
The Patient Communications page opens.
-
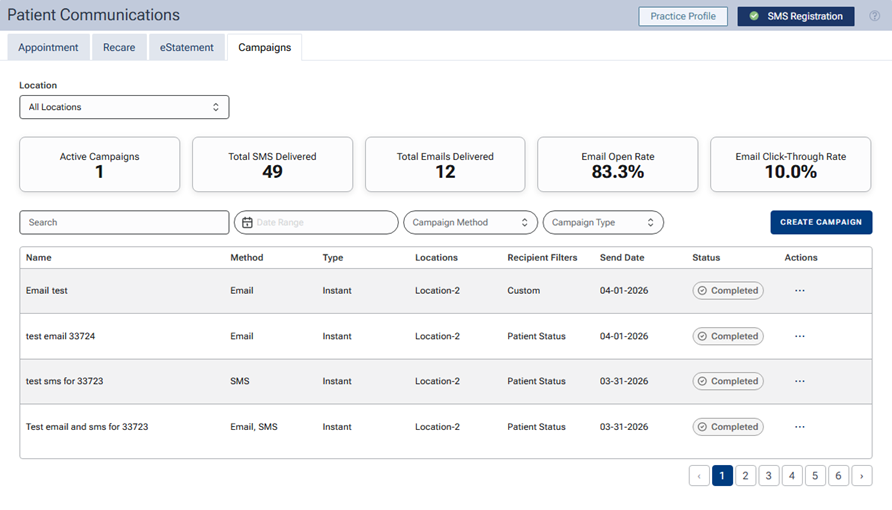
Select the Campaigns tab.
-
Click (or tap) CREATE CAMPAIGN.
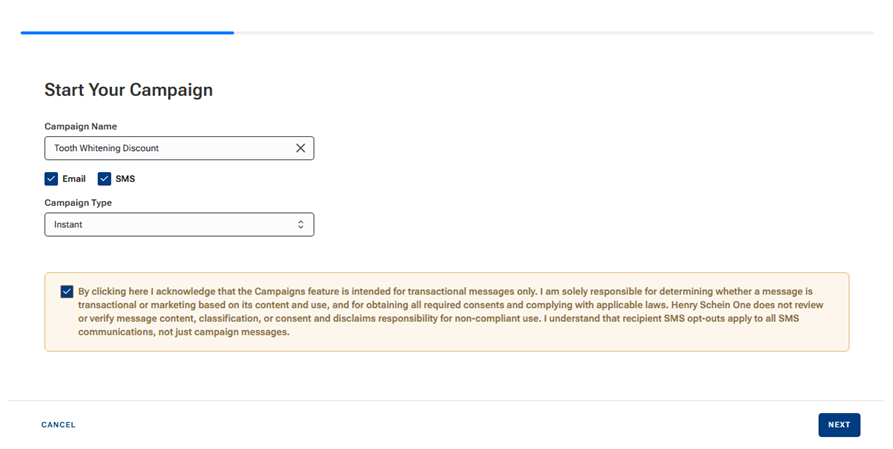
The Start Your Campaign options appear.
-
Set up the following options:
-
Campaign Name - Enter a name to identify the campaign in the list.
-
Email - If you want the message to be delivered by email, select this checkbox; otherwise, leave the checkbox clear.
Note: If Email is not selected, SMS must be selected.
-
SMS - If you want the message to be delivered by text, select this checkbox; otherwise, leave the checkbox clear.
Note: If SMS is not selected, Email must be selected.
-
Campaign Type - Select one of the following options:
-
Instant - To have messages delivered immediately after you complete the creation of the campaign.
Note: This option is available only between 8AM and 8PM. If you are creating the campaign outside of those hours, you must schedule the campaign.
-
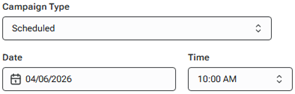
Scheduled - To have messages delivered on a specific date and time.
-
Note: If both Email and SMS are selected, a patient will receive only one type of message. Dentrix Ascend will attempt to send the type of message that corresponds to the communication preference in that patient's record.
-
-
If the Campaign Type is Scheduled, specify the Date and Time you want messages to be delivered.
-
Read the disclaimer, and then select the By clicking here I acknowledge that the Campaigns feature is intended for transactional messages only.... checkbox.
-
Click (or tap) NEXT.
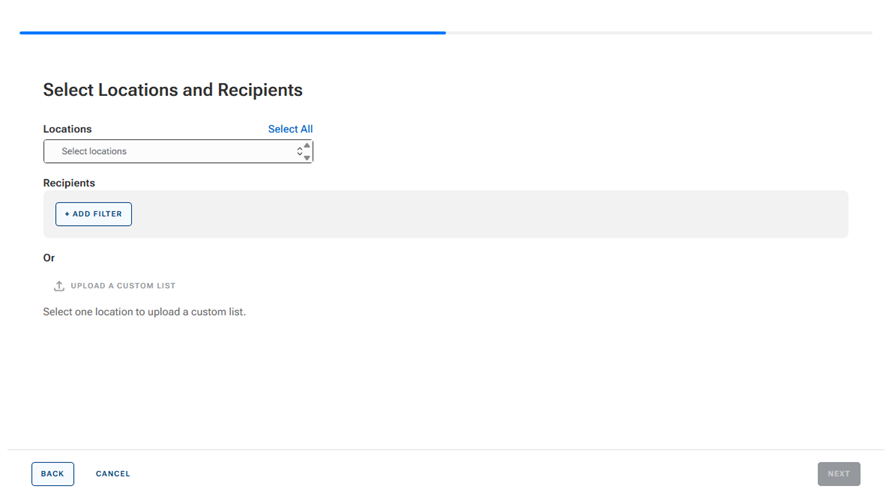
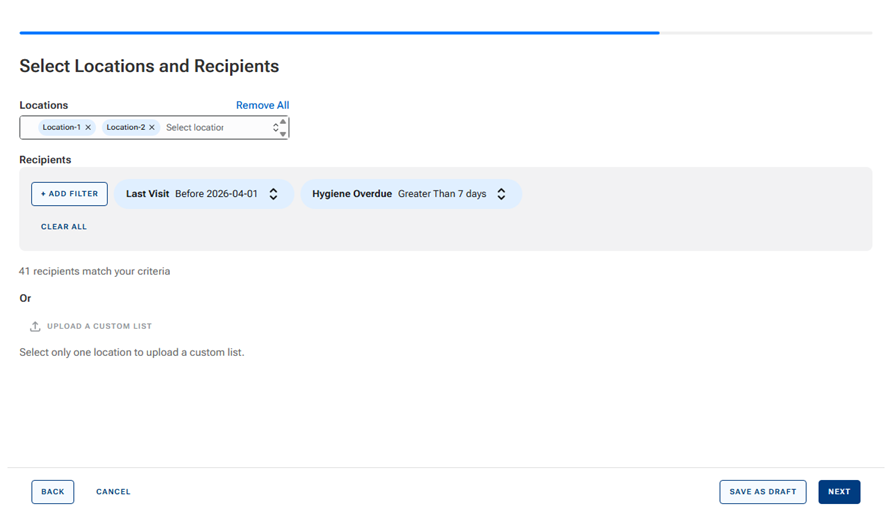
The Select Locations and Recipients options appear.
-
To select the locations that the campaign pertains to, expand the Locations menu, and then select each applicable location.
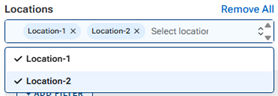
Notes:
-
Only locations for which SMS registration has been completed are available for selection.
-
To remove a location that you have added, click (or tap) its X.
-
If none, one, or only some of the available locations are selected, to quickly select all available locations, click (or tap) the Select All link.
-
If all available locations are selected, to quickly remove all locations, click (or tap) the Remove All link.
-
-
Do one of the following:
-
If you want to send message to patients whose preferred location (as specified in their patient records) is one of the selected locations, without further filtering the list, click (or tap) APPLY.
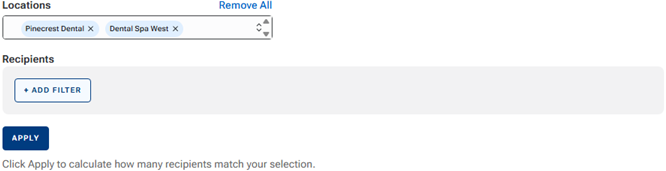
The number of recipients who match the specified criteria appears for your reference.
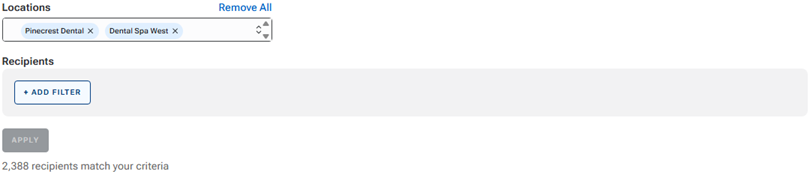
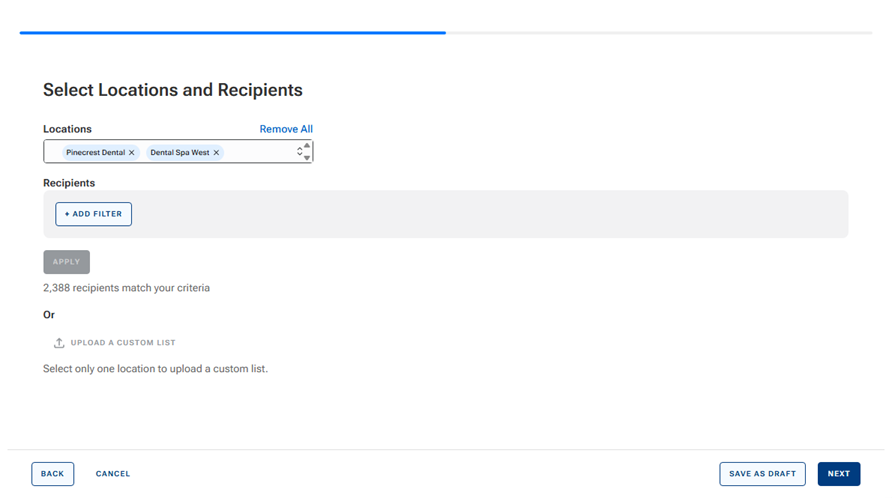
With locations applied, you can proceed. Or, you can save the campaign as a draft.
-
If you want to send messages to patients whose preferred location (as specified in their patient records) is one of the selected locations and who meet specific criteria, add filters:
-
Click (or tap) + ADD FILTER, and then select a filter.
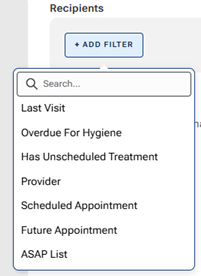
The following filters are available:
-
Last Visit - Patients whose last visit was on a specific date, before a specific date, after a specific date, or within a specific date range.
-
Overdue For Hygiene - Patients with a hygiene recare type that is due on, before, or after a specific number of days.
-
Has Unscheduled Treatment - Patients who have a planned procedure for which an appointment has not been scheduled. You can choose to include any type of procedure or specific types of procedures (crowns, root canals, implants, and/or bridges).
-
Provider - Patients with a matching primary provider (by name). You enter all or part of a name and specify the condition that a provider's name must meet (equal, starts with, ends with, contains, not contains, unknown, or has value).
-
Scheduled Appointment - Patients who either have or do not have a scheduled appointment in the future.
-
Future Appointment - Patients whose future visit is on a specific date, before a specific date, after a specific date, or within a specific date range.
-
ASAP List - Patients who have at least one future appointment on the ASAP list.
-
Remaining Benefits - Patients who have remaining insurance benefits that equals a specific amount, is greater than a specific amount, is less than a specific amount, or is within a specific amount range.
-
Age - Patients who are a specific age, older than a specific age, younger than a specific age, or within a specific age range.
-
Birthday - Patients whose birth month is a specific month or one of the specified months, birth date is within a specific date range, or birthday is within the next specified number of days.
-
-
Specify the parameters for the selected filter.
-
Repeat steps a-b as needed to add other filters.
-
Click (or tap) APPLY.
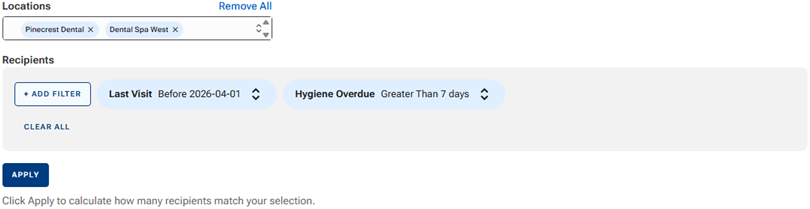
The number of recipients who match the specified criteria appears for your reference.

With locations and filters applied, you can proceed. Or, you can save the campaign as a draft.
-
-
If you want to send messages only to specific patients, upload a custom list:
-
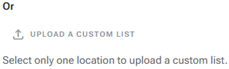
Click (or tap) the UPLOAD A CUSTOM LIST link.
Notes:
-
You can upload a custom patient list only if only one location is selected for the campaign.
-
The list should consist of patients whose preferred location (as specified in their patient records) is the selected location.
The Upload Custom Recipient List dialog box appears.
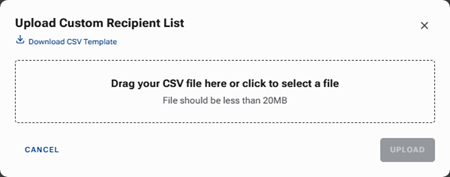
Note: If you need to create a list, click (or tap) the Download CSV Template link, open the .csv file, enter the first and last name, email address, and mobile phone number for each patient, and then save the changes.

-
-
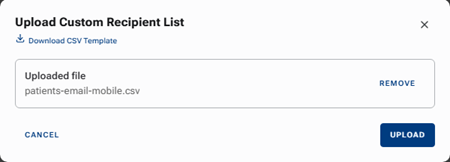
Either drag the .csv file from an open window to the Drag your CSV file here or click (or tap) to select a file box, or click (or tap) the Drag your CSV file here or click (or tap) to select a file box to select the .csv file.
The Uploaded file appears.
-
Click (or tap) UPLOAD.
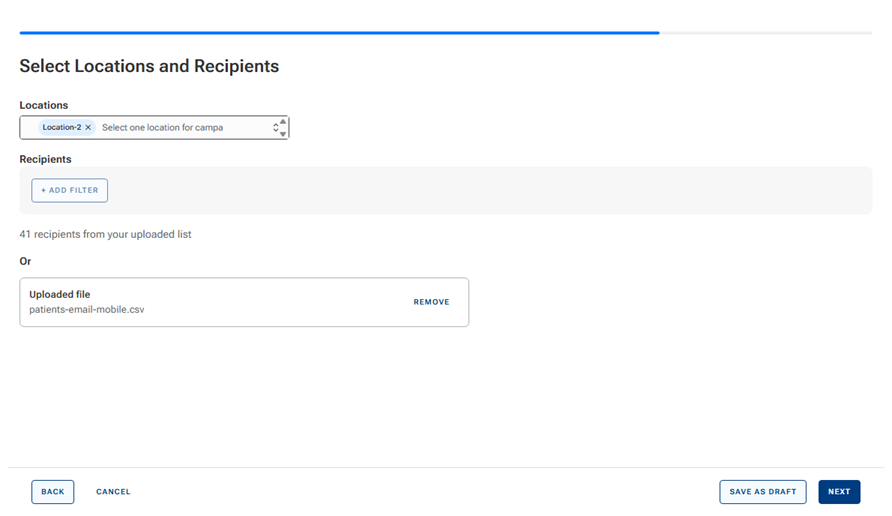
The number of recipients from the uploaded list appears for your reference.
With a location selected and a list uploaded, you can proceed. Or, you can save the campaign as a draft.
-
-
-
To save the campaign as a draft so you can edit it later, click (or tap) SAVE AS DRAFT. On the confirmation message that appears, click (or tap) SAVE AS DRAFT. Ignore the remaining steps.
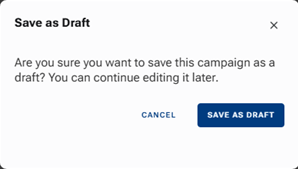
Note: Only you can edit a campaign that you saved as a draft.
-
Click (or tap) NEXT.
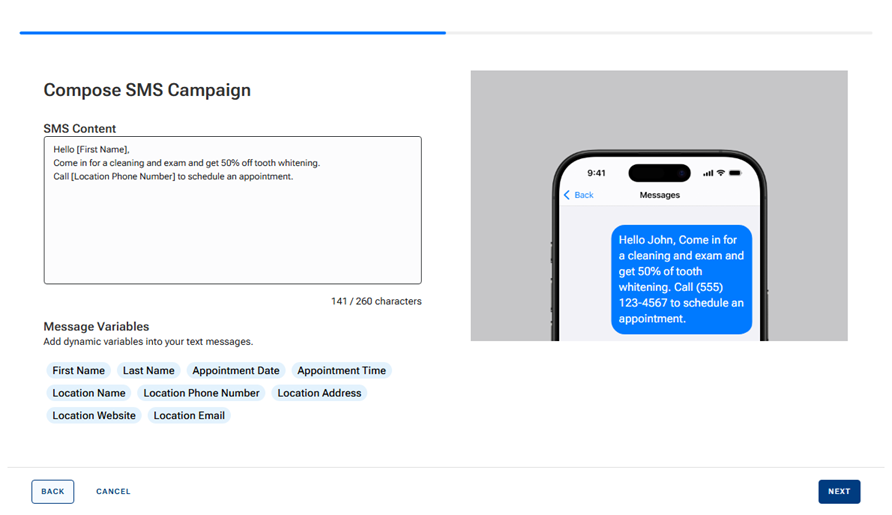
The Compose SMS Campaign options appear if the SMS checkbox was selected in step 4; otherwise, skip to step 15.
-
Type the content of the text message, inserting variables as needed. To insert a variable, position the text cursor where you want to insert the variable, and then click (or tap) the variable.
Notes:
-
In the generated text message, each inserted variable is replaced with the applicable patient or office information.
-
The text message can be up to 260 characters long.
A preview of the resulting text message appears on the right.
Note: To send a test text message, click (or tap) the SEND TEST link. The Send Test SMS dialog box appears. In the Phone Number box, enter the mobile phone number to which you want to send the message. Click (or tap) SEND TEST.
-
-
To save the campaign as a draft so you can edit it later, click (or tap) SAVE AS DRAFT. On the confirmation message that appears, click (or tap) SAVE AS DRAFT. Ignore the remaining steps.
Note: Only you can edit a campaign that you saved as a draft.
-
Click (or tap) NEXT.
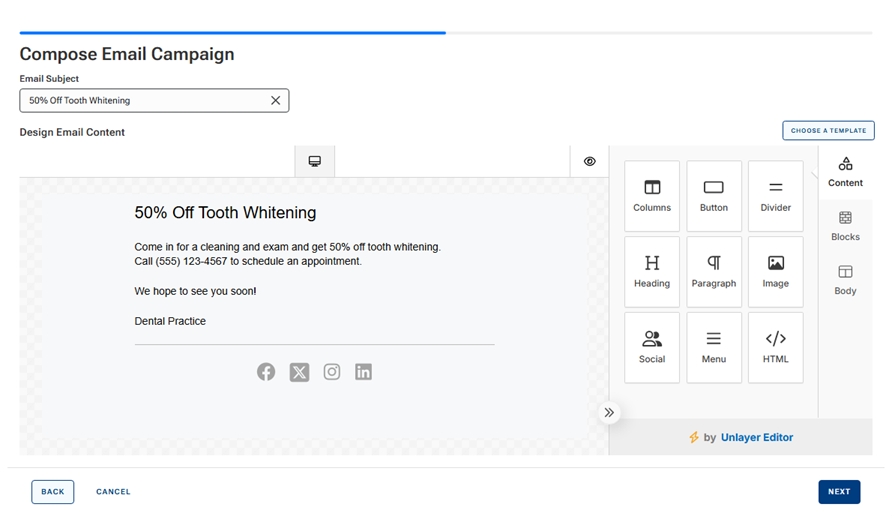
The Compose Email Campaign options appear if the Email checkbox was selected in step 4; otherwise, skip to step 22.
-
Enter an Email Subject.
-
Instead of beginning with a blank email message, you can select a professionally designed email template that aligns with your outreach objective, and then customize the content to suit your needs. To select a template, do the following (otherwise, skip to step 18):
-
Click (or tap) CHOOSE A TEMPLATE.
The Select Template dialog box appears.
-
Select a template. Several template options are presented, so you can select the layout that best aligns with your campaign objective, or you can select the blank template to start from scratch (in which case, skip to step 18).
-
Click (or tap) APPLY.
After you choose a template, the selected design is loaded into the authoring area. The template serves as the campaign foundation and includes pre-configured layouts, content sections, imagery placeholders, and design structure.
-
Customize the content as needed. You can use the modify text, images, colors, buttons, links, branding elements, and layout components.
-
-
If you add a practice logo to the email, each email message that gets delivered will include the logo that corresponds to the recipient's preferred location. Instead of creating separate campaigns for each location or manually managing image URLs, you can build a single email template and have the applicable practice logo displayed for every recipient. To add a practice logo, click (or tap) ADD LOCATION LOGO to add a placeholder logo to the message, and then modify the image's padding or other attributes as needed.
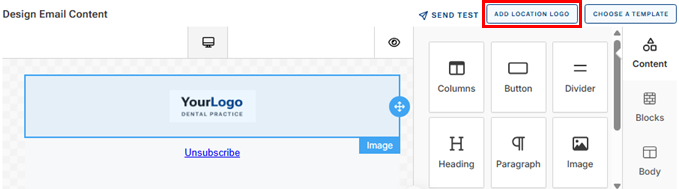
Note: For information about customizing the logo for each location, see the topic about customizing your practice profile.
-
To add content to the email message, do any of the following as needed:
-
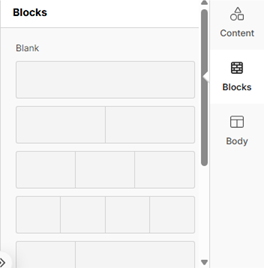
Use the Blocks to layout content in columns of various widths.
-
Drag Content components (such as Heading and Paragraph) to the authoring area, and type content for the email message.
-
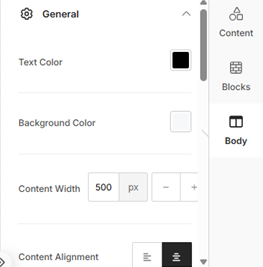
Use the Body options to further customize the look of the message, such as the text color and alignment.
-
-
To preview how the email message will look on various types of devices (desktop monitors, tablets, and mobile phones), click (or tap) the eye icon
 . You can also preview the message for specific screen widths by expanding the [Width]px menu and then selecting a specific device or entering a width. When you are finished with the preview, click (or tap) the X to close it.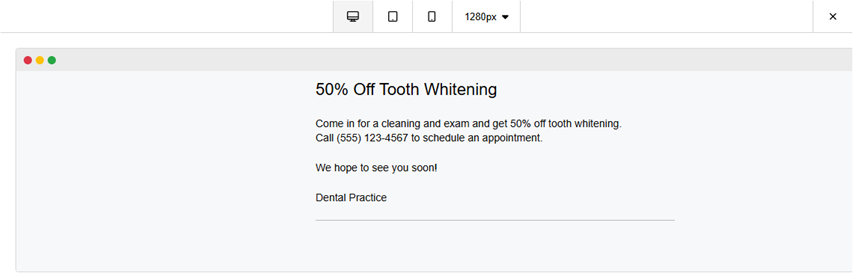
Note: To send a test email message, click (or tap) the SEND TEST link. The Send Test Email dialog box appears. In the Email Address box, enter the email address to which you want to send the message. Click (or tap) SEND TEST.
-
To save the campaign as a draft so you can edit it later, click (or tap) SAVE AS DRAFT. On the confirmation message that appears, click (or tap) SAVE AS DRAFT. Ignore the remaining steps.
Note: Only you can edit a campaign that you saved as a draft.
-
Click (or tap) NEXT.
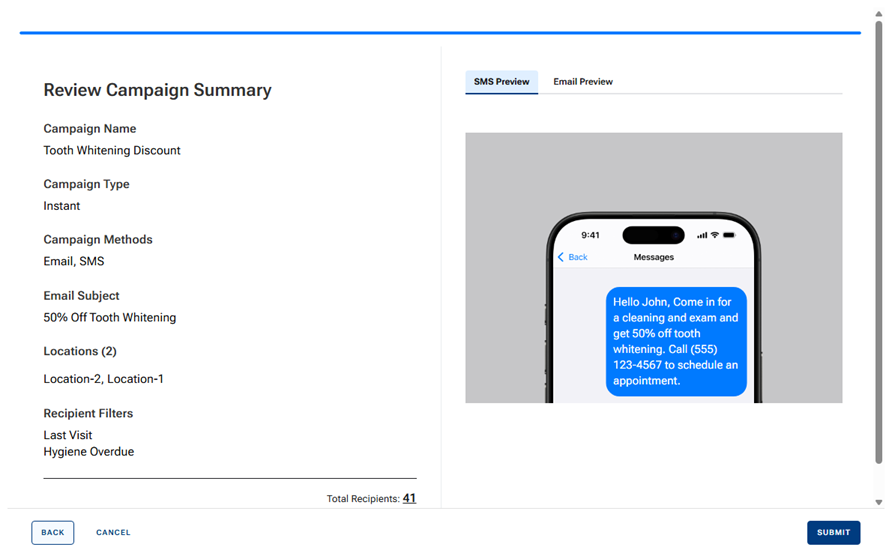
The Review Campaign Summary appears.
-
Review the details of the campaign: name, type, delivery methods, email subject (if applicable), locations, and recipient filters (if applicable).
Note: Text message and/or email message previews appear on the right.
-
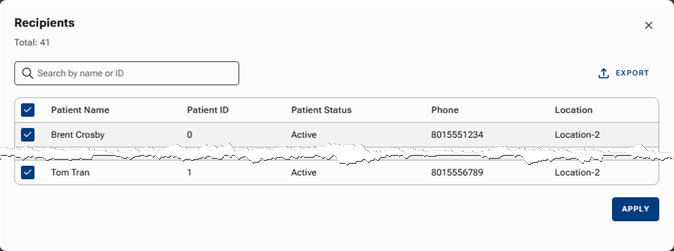
If you want to see the list of recipients, click (or tap) the number link next to Total Recipients.
The Recipients dialog box appears.
Notes:
-
To search for a recipient, begin typing a name or ID in the Search by name or ID box. As you type, the matching recipients appear.
-
If you want to exclude any patients from receiving messages, clear the checkbox next to each of those patients, and then click (or tap) Apply.
-
-
Click (or tap) SUBMIT.
The campaign is either sent as soon as possible or is scheduled to be sent.
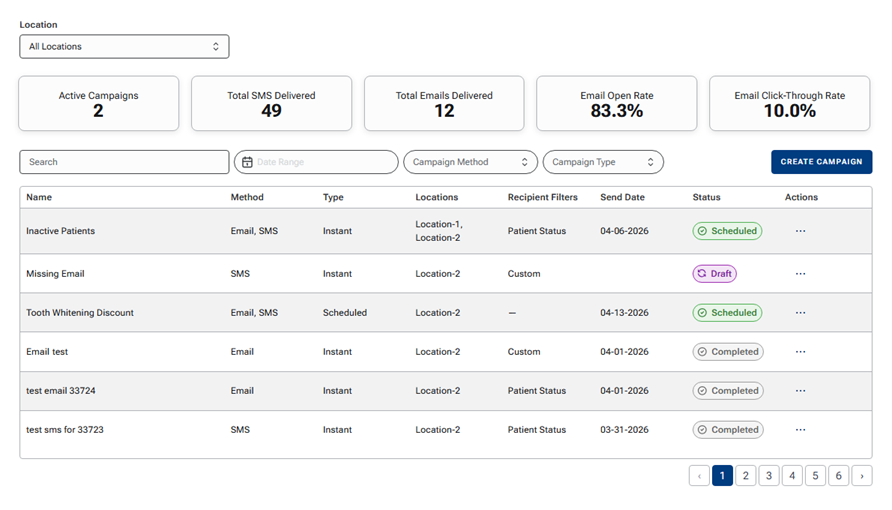
Note: A campaign can have one of the following statuses:
-
Scheduled - Whether the campaign's type is Instant or Scheduled, this is the status until all messages have been sent or delivery has been attempted.
-
Draft - The campaign was saved as a draft.
-
Paused - The campaign was paused. This will be the status until the campaign is resumed.
-
Completed - The messages were sent for the campaign.
-