Carestream RVG Sensor Setup Guide
This guide describes the installation and setup of the Carestream RVG series intraoral sensor for use with Dentrix Ascend Imaging.
Last updated: 10/30/2025
Overview
Dentrix Ascend Imaging supports the acquisition of intraoral images from Carestream RVG intraoral X-ray sensors on a computer running the Windows operating system. Drivers for the RVG sensor must be installed on each computer that the RVG sensor will be connected to. Calibration and correction files are stored in the RVG sensor and will be installed automatically on the computer that the sensor is connected the first time you attempt to use the sensor.
Notes:
-
Prior to the installation of the RVG sensor, the acquisition agent application must be installed on each computer that will acquire images. Refer to Setting up the acquisition agent for instructions on downloading and installing the acquisition agent.
-
With the direct integration of the RVG sensor, Dentrix Ascend Imaging receives images that are already filtered using a Kodak/Carestream X-ray filter. It is highly recommended that the imaging filters in Dentrix Ascend Imaging are set to Not Enhanced for each type of imaging procedure before you use the RVG sensor to acquire images.
Installation
To install the RVG sensor drivers, do the following:
-
Download the RVG sensor drivers (https://www.carestreamdental.com/RVG-drivers-download).
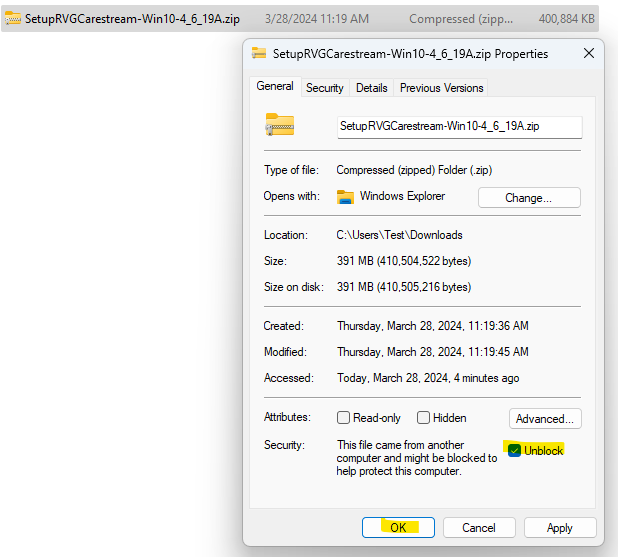
Note: Make sure you unblock the .zip file for the drivers before extracting it. To unblock the file, right-click it, select Properties, select the Unblock checkbox, and then click OK.
-
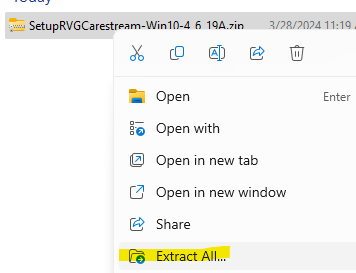
To extract the .zip file, right-click it, and then select Extract All.
-
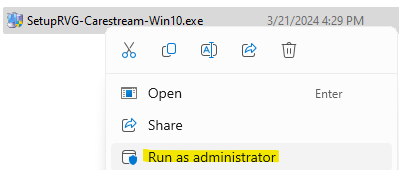
Run the driver installer as an administrator (right-click the file, and then select Run as administrator).
-
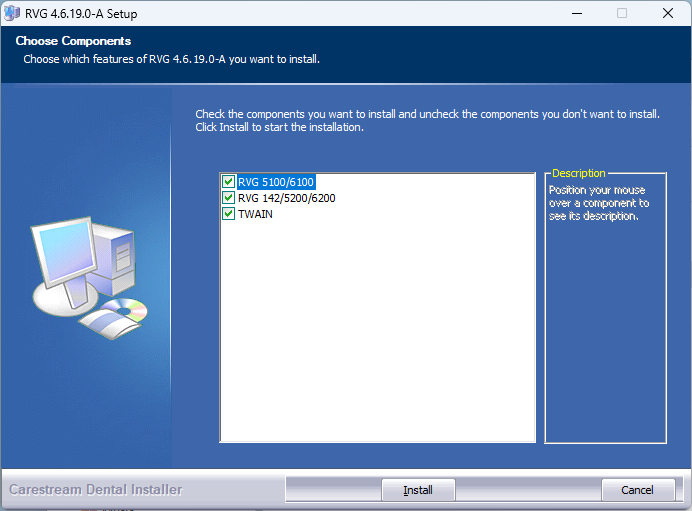
Proceed through the installer, selecting which models of the device you have.
Testing
The sensor is now functional in Dentrix Ascend Imaging. To acquire a test image, do the following:
-
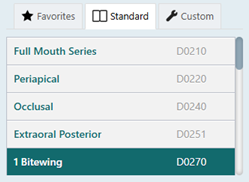
Select the 1 Bitewing imaging procedure.
-
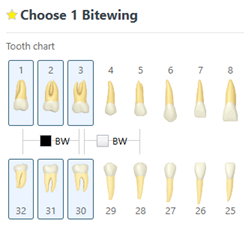
Select any teeth for the test.
-
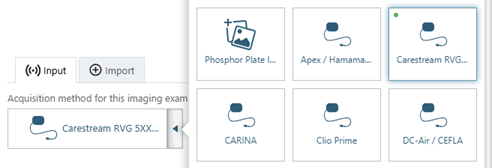
On the Available Devices menu, select Carestream RVG 5xxx/6xxx.
-
Click Start.

-
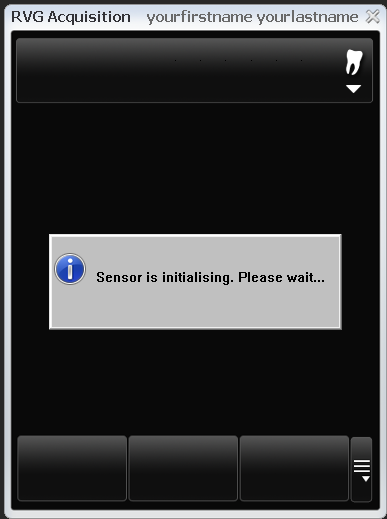
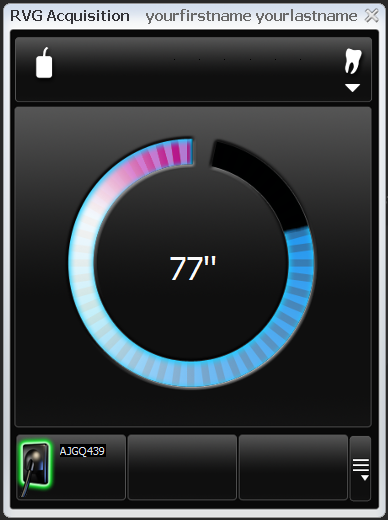
The RVG Acquisition window appears and displays a "Sensor is Initialising. Please wait..." message while the correction files are being copied from the sensor. This will only happen once. After the files are copied, the sensor will arm, and you will see a 90 second countdown to acquire an image.
Note: With the direct integration of the RVG sensor, Dentrix Ascend Imaging receives images that are already filtered using a Kodak/Carestream X-ray filter. It is highly recommended that the imaging filters in Dentrix Ascend Imaging are set to Not Enhanced for each type of imaging procedure before you use the RVG sensor to acquire images.
-
Acquire an image using your sensor.
Troubleshooting
Device Manager
Verify that your Carestream RVG sensor has been properly installed in Device Manager:
-
Your device may appear as RVG 5x00/6x00.

-
If your device has not been initialized yet, it may appear as RVG 5x00/6x00 Loader.

Note: The name of the device in Device Manager may vary depending on the model.
Image Quality
The way to adjust the image quality varies depending on the model.
To adjust the image quality for a 5100/6100/5200 sensor
-
Open Processings2DSampleAdvanced.exe (the default location is C:\Program Files (x86)\Common Files\Trophy\SDK\Processings2D\bin\win32\release).

-
On the File menu, select Open image file(s).

-
In the Load image file(s) dialog box, navigate to %temp%/CarestreamRvg, and then double-click the .dcm file to view it in the program without any processing applied
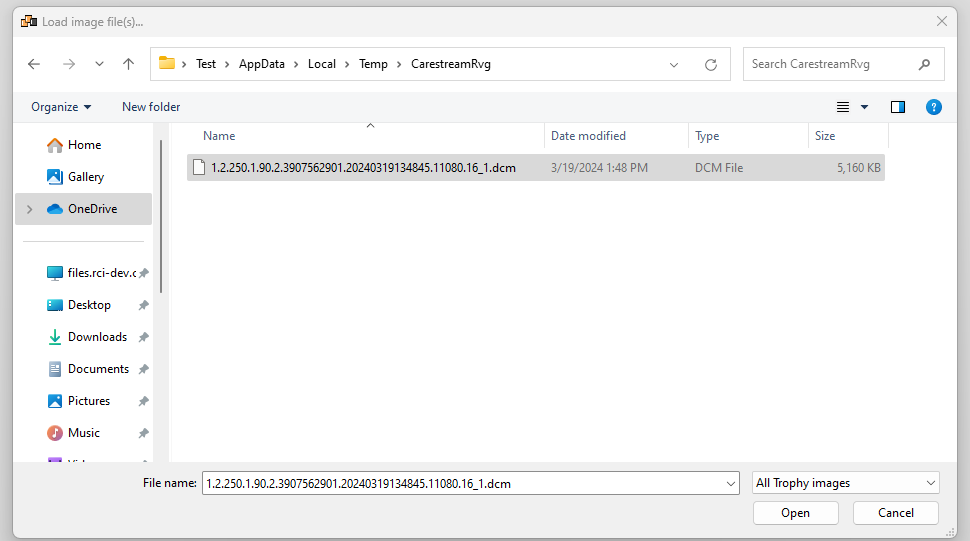
Note: The .dcm file from the most recent acquisition should be available in the folder. If one is not available, acquire a single image periapical or bitewing to put an image in the folder.
-
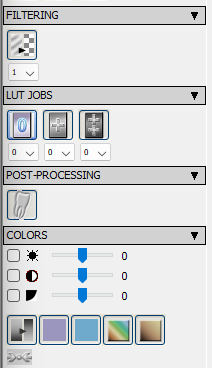
Use the left-side menu to apply filtering and enhancements until you are satisfied with the image quality.
-
After the quality is where you want it, click the Save button under Image Processor State. Enter the name of the device as the File name (for example, RVG 5200), and then click Save.


Note: If you have more than one model of sensor, you must configure and save the settings per device.
-
Copy the .xml file into the acquisition agent program's directory (the default location is C:\Program Files (x86)\Acquisition Agent).
Now, when you acquire images with the device, the image quality options are automatically applied .
To the adjust image quality for a 6200 sensor
-
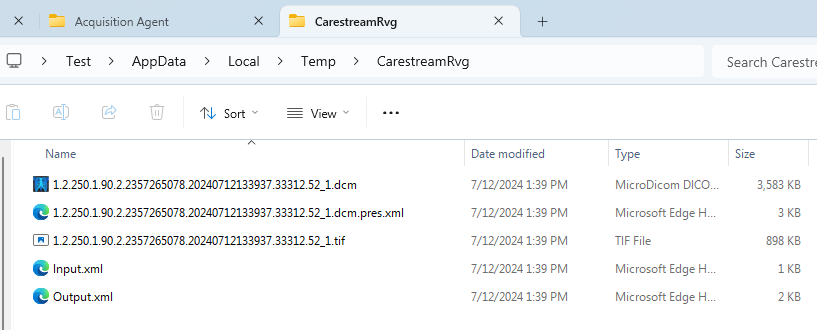
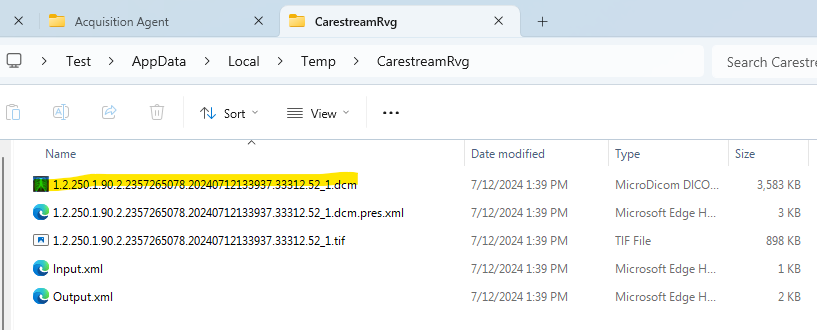
In File Explorer, navigate to %temp%/CarestreamRvg.
-
Copy the .dcm image file in the folder (if there is not an image, capture a single PA in Dentrix Ascend Imaging with the sensor, and the image will be in the temp folder after the acquisition).
-
Paste the .dcm image file into C:\Program Files (x86)\Common Files\Trophy\IPET\config\sample_images.
-
Rename the file to rvg_6200.dcm.
Note: If one already exists, rename the existing file to old_rvg_6200.dcm, and then retry the renaming of the new file.
-
Open ipet.exe (the default location is C:\Program Files (x86)\Common Files\Trophy\IPET\bin).

-
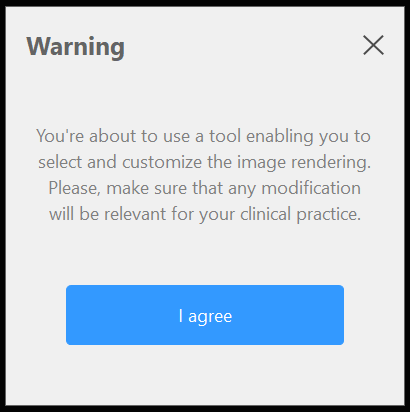
Read the warning, and then click I agree.
-
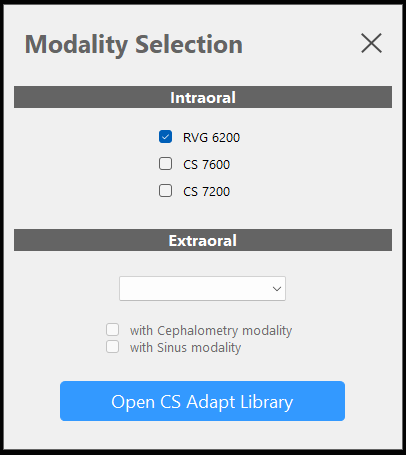
Select the correct RVG 6200 sensor model, and then click Open CS Adapt Library.
-
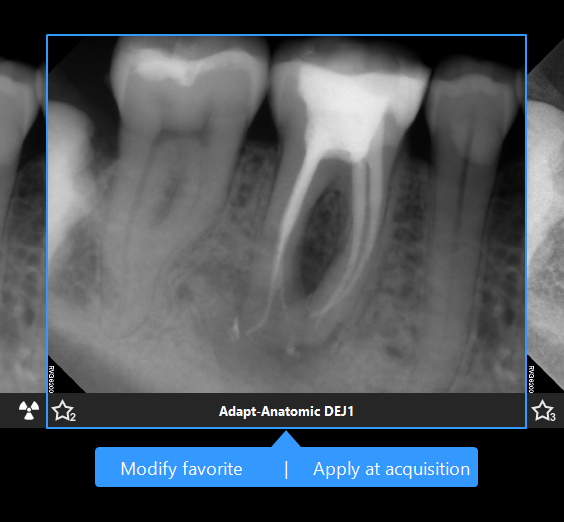
Select which filter you prefer the most. If none look good, select Modify favorite for more options; otherwise, select Apply at acquisition.
-
Click Save and Exit.

The filtering will now be applied to new images captured in Dentrix Ascend Imaging.