Acteon Sopro PSPIX Scanner Setup Guide (Mac OS)
This guide describes the installation and setup of the Acteon Sopro PSPIX phosphor plate scanner for use with Dentrix Ascend Imaging.
Last updated: 10/29/2025
Overview
Dentrix Ascend Imaging supports the acquisition of intraoral images from the Sopro PSPIX phosphor plate scanner on a computer running the Mac operating system. Drivers for the Sopro PSPIX scanner must be installed on each computer that the scanner will be connected to.
Notes:
-
If you are using a Sopro PSPIX scanner with an ethernet connection, all computers that are used with the scanner must be plugged in to the same switch/router as the scanner using a Cat5 ethernet cables.
-
Prior to the installation of the Sopro PSPIX scanner, the acquisition agent application must be installed on each computer that will acquire images. Refer to Setting up the acquisition agent for instructions on downloading and installing the acquisition agent.
Installation
The minimum version of the acquisition agent that includes the device drivers is 1.2.6798.31616. Confirm that your version is the minimum version or later. If your version of the acquisition agent is an earlier version than the minimum version, obtain the latest version of the acquisition agent application, which includes the device drivers for the PSPIX scanner.
Refer to Updating the acquisition agent for instructions on checking for, downloading, and installing updates for the acquisition agent.
Configuration and Testing
In Dentrix Ascend Imaging, you must configure the scanner while acquiring a test image. To acquire a test image, do the following:
-
Select the 1 Bitewing imaging procedure.

-
Select any teeth for the test.

-
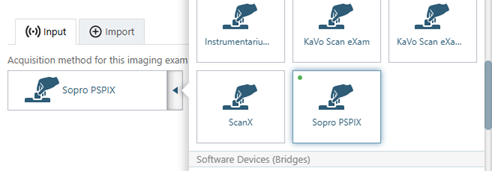
On the Available Devices menu, select Sopro PSPIX.
-
Click Start.

-
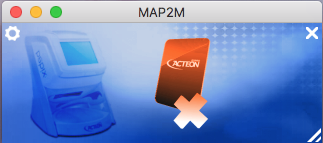
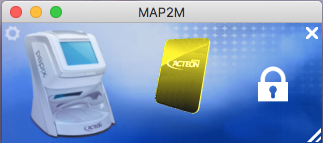
A MAP2M dialog box appears. The graphic indicates that your Sopro PSPIX scanner is not yet connected. Click the small cog icon.
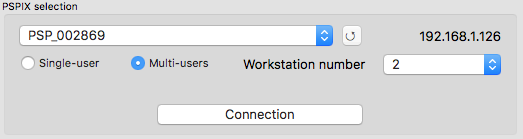
The PSPIX Setup dialog box appears. The Configuration tab is selected by default.

-
From the PSPIX selection list, select your device, select whether you want to use Single-user or Multi-users mode, and then click Connection.
-
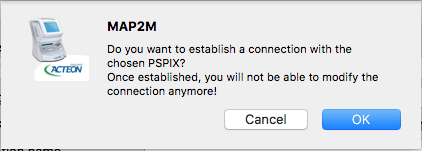
In the confirmation dialog box that appears, click OK.
The graphic now indicates that the Sopro PSPIX scanner is properly configured.
-
Acquire a test image using a plate, and then insert that plate into the Sopro PSPIX scanner according to the instructions provided with the scanner.
Note: If you are using the multi-users mode, you may need to select the computer (Workstation number) on the PSPIX device itself to begin scanning.