You can merge Quick Letters using Microsoft Word.
Note: For information regarding supported versions of Microsoft Word, please refer to the current Dentrix System Requirements available in the Dentrix Resource Center.
To merge a Quick Letter
1. From any Dentrix module except the Office Manager, select a patient.
2. From the module's toolbar, click the Quick Letters button.
The Quick Letters dialog box appears.
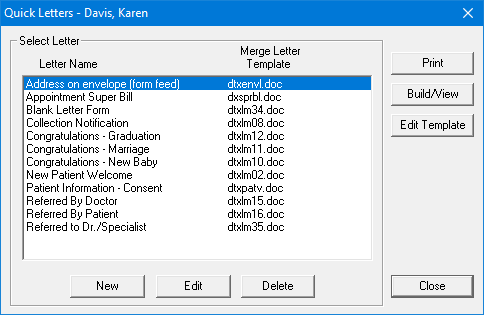
3. From the list, select the letter that you want to merge:
Address on envelope (form feed) - Creates an envelope for the selected patient.
Appointment Super Bill - Creates a detailed receipt for the patient to send to their insurance company.
Blank Letter Form - Creates a blank letter for the selected patient with the patient’s name, address and greeting pre-written.
Collection Notification - Creates a 90 Day Past Due letter for the selected patient.
Congratulations - Graduation - Creates a congratulations letter for a new graduate.
Congratulations - Marriage - Creates a congratulations letter for a newly married patient.
Congratulations - New Baby - Creates a congratulations letter for a new parent.
Internet Communications Consent - Creates a letter granting consent to communicate with a patient over the internet.
New Patient Welcome - Creates a welcome letter for new patients.
Patient Information - Consent - Creates a patient information form with some patient information pre-entered.
Referred by Doctor - Creates a thank you letter for a doctor who referred the patient.
Referred by Patient - Creates a thank you letter for a patient who referred the selected patient.
Referred to Dr./Specialist - Creates a referral information letter for the doctor to whom the selected patient has been referred.
4. Do one of the following:
To create and print the letter without reviewing it, click Print. Word opens, merges the letter, prints the letter, and then closes the letter.
To create and review the letter prior to printing it, click Build/View. Word opens and merges the letter. Once the letter has been successfully merged, make any changes and then click Print.
5. After the letter has printed, close it.
A message appears asking if you want to save the changes. Click No. (If you click Yes, all merge information will be lost.)
6. Exit Microsoft Word.
7. Repeat steps 1 - 6 for any other patients who need letters.
Note: After the letter prints,an entry is automatically added to the Office Journal indicating that a letter was sent to the patient.