
Dentrix lets you set up as many as 999 fee schedules. With that many fee schedules available, you have the flexibility to pre-set alternative fees for some patients, such as family members, special insurance holders, senior citizens, and so forth. When you enter a procedure in the Ledger or the Patient Chart, Dentrix assigns the charge according to the selected provider's fee schedule. You can override the provider’s fee schedule by assigning a fee schedule to a patient or an insurance carrier.
Setting up a fee schedule
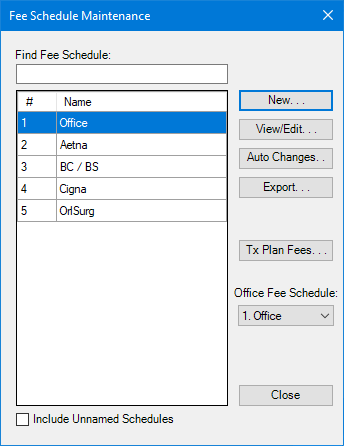
1. In the Office Manager, click Maintenance, point to Reference, and then click Fee Schedule Maintenance.
The Fee Schedule Maintenance dialog box appears.
2. Click New.
The New Fee Schedule dialog box appears.
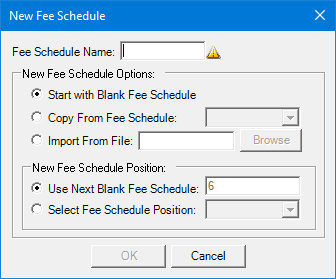
3. Type a fee schedule name in the appropriate text box.
Note: We recommend that you add your practice's usual and customary fees to Office #1. Fees are not pre-assigned in Dentrix.
4. Under New Fee Schedule Options, do one of the following:
· Start with Blank Fee Schedule - Select to use a blank fee schedule.
· Copy From Fee Schedule - Select and then from the list, select the fee schedule that you want to copy.
· Import From File - Select to import the fee schedule from a comma delimited (.csv) or Excel file. Select the appropriate file from the Select file to import dialog box.
5. Under New Fee Schedule Position, do one of the following:
· Use Next Blank Fee Schedule - Select to use the next blank position in the fee schedule list.
· Select Fee Schedule Position - Select and then from the fee schedule list, select where you want the new fee schedule to be positioned.
6. Click OK.
The View/Edit Fee Schedule dialog box appears.
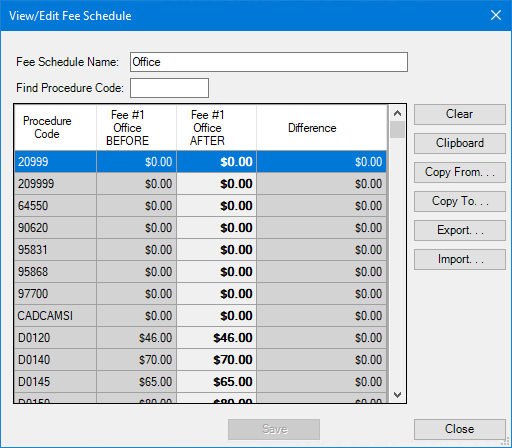
7. Click Save.