
Before using the Office Manager, you need to enter your practice information, such as the title of your practice, your address, and a few other settings.
To configure your practice’s information
1. In the Office Manager, click Maintenance, point to Practice Setup, and then click Practice Resource Setup.
The Practice Resource Setup dialog box appears.
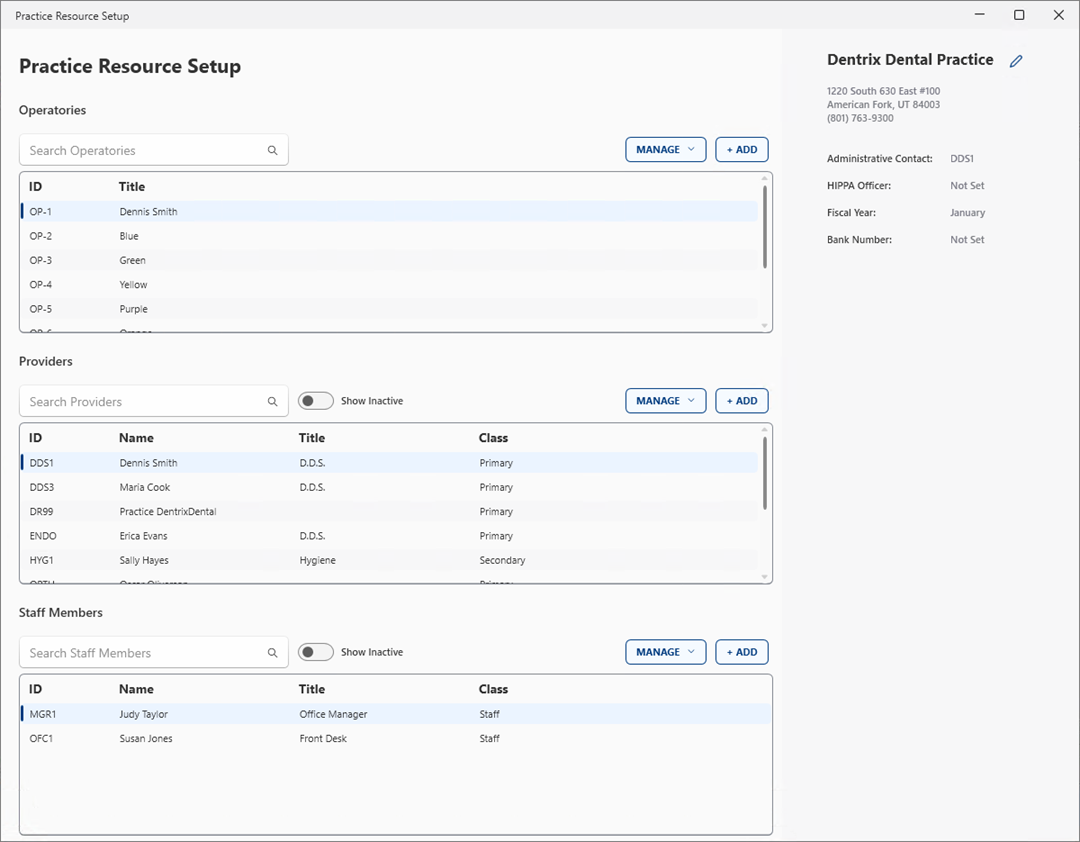
2. To enter your practice's contact information, click the Edit icon in the top-right corner.
The Practice Information dialog box appears.
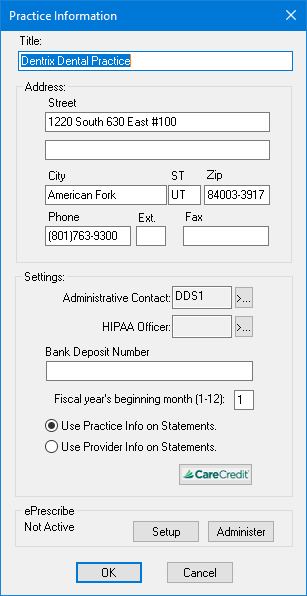
3. Type the practice’s name, address, and phone and Fax numbers in the appropriate fields.
Notes:
· Initial caps in the Title and Address fields and parentheses and hyphens in the Phone field are added automatically.
· To avoid claims being rejected for insufficient address, in the Zip field, type the practice's ZIP + 4 ZIP Code without the hyphen. The hyphen is added automatically.
· If you use ePrescribe, you must supply a Fax number.
4. Click the Administrative Contact search button.
The Select Provider/Staff dialog box appears.
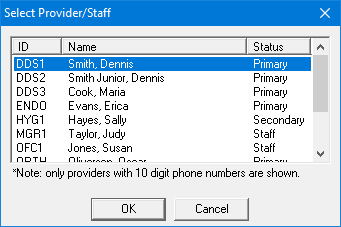
5. Select the provider or staff member you want to name the administrative contact for your practice, and then click OK.
Note: Only those providers and staff members who have a phone number with an area code are listed. Also, the title for this duty appears under the selected provider or staff member on the Practice Organization List.
6. Click the HIPAA Officer search button.
The Select Provider/Staff dialog box appears.
7. Select the provider or staff member you want to name as your practice’s HIPAA officer, and then click OK.
8. Type your account number in the Bank Deposit Number field.
Note: Your account number prints on your deposit slips automatically.
9. Type the number of the month that your fiscal year begins.
The default is 1.
10. Select one of the following options:
· Use Practice Info on Statements - Prints your practice name and address on billing statements. This is the default.
· Use Provider Info on Statements - Prints a patient's primary provider's name and address on billing statements.
11. Click OK.