
In Dentrix, each individual who provides billable treatment to patients is a provider. Providers appear alphabetically according to their IDs, and usually only a provider's ID is displayed and/or printed. You can create or add as many providers as necessary for your practice. Before setting up providers, consider the following information:
· You must assign each provider a unique, four-character, alphanumeric ID. You can use initials or other codes, such as DOC1, DDS1, HYG1, and so forth.
· You cannot change a Provider ID once you set it up.
· You cannot delete providers once you create them; however, you can inactivate them.
· You can filter information according to a range of providers in certain reports. Alphabetize your providers so that you can use these ranges effectively for these reports.
To add a provider
1. In the Office Manager, click Maintenance, point to Practice Setup, and then click Practice Resource Setup.
The Practice Resource Setup dialog box appears.
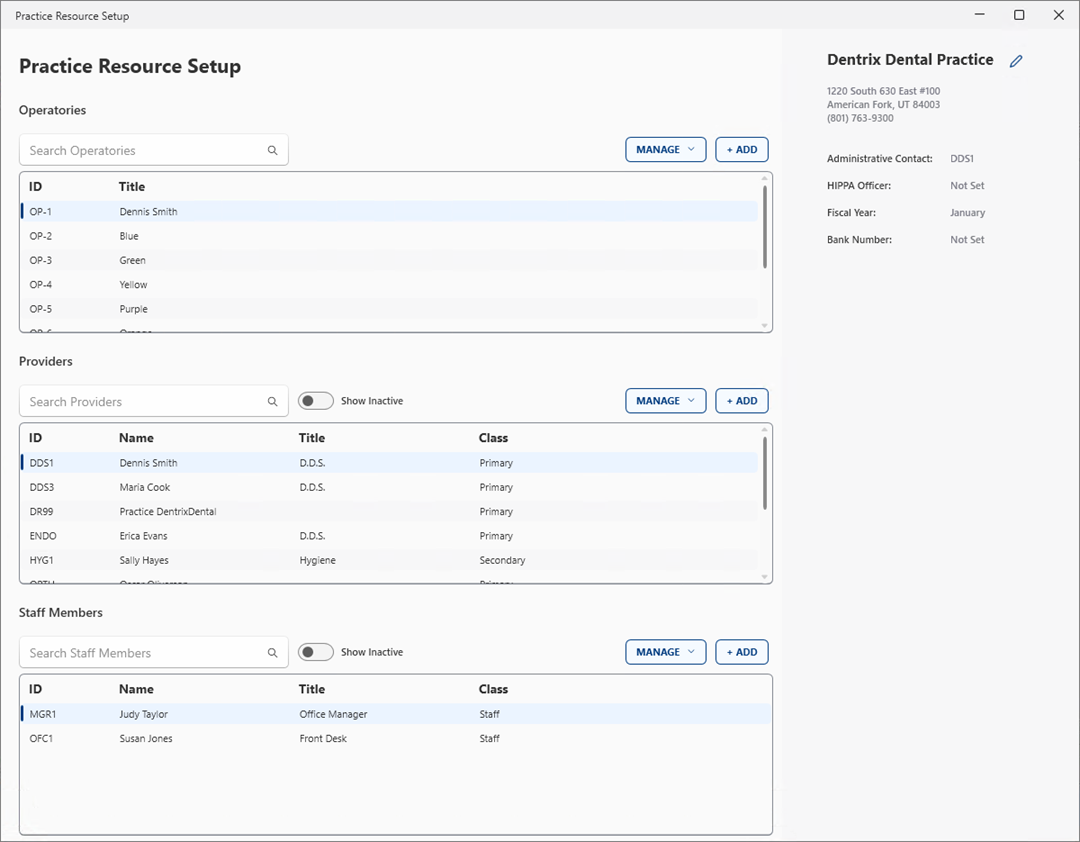
2. Under Providers, click Add.
The Provider Information dialog box appears.
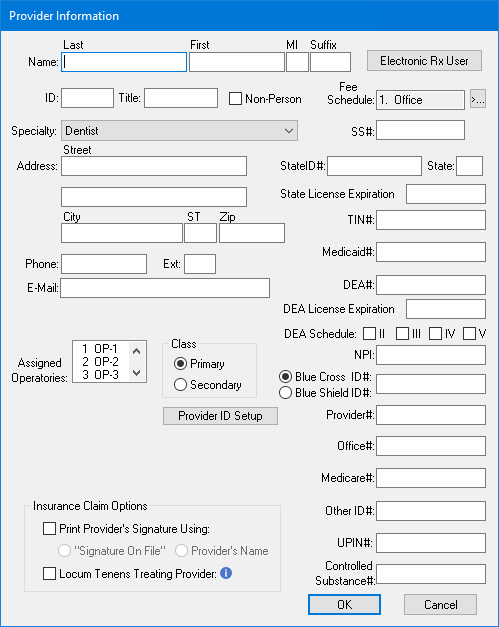
3. As appropriate, do the following:
· Name - Type the provider’s last and first names and middle initial.
· ID - Type a unique, four-character, alphanumeric ID, such as DDS1 or HYG1. Once you create a provider ID, you cannot edit it.
· Title - Type the provider’s professional title, such as DDS, DMD, or RDH.
· Specialty - Select the provider’s specialty from the list.
· Address - Type the provider’s complete business address; otherwise, some claims may be rejected.
Important: Type the provider's ZIP + 4 ZIP Code without the hyphen. Dentrix inserts the hyphen automatically.
· Phone - Type the provider’s business telephone number and extension.
· E-Mail - Type the provider’s email address.
· Assigned Operatories - Select the operatories that the provider uses most often.
· Class - Select Primary for providers, such as dentists, or Secondary for providers, such as hygienists.
· Provider ID Setup - Click to set up the provider’s insurance ID.
· Insurance Claim Options -
· Select Print Provider’s Signature to avoid signing every printed insurance claim, and then select "Signature On File" or Provider’s Name.
· Select Locum Tenens Treating Provider to set a provider's status as rendering provider who steps in temporarily for another provider either fill in for that provider or to work in a practice that is different from his or her usual one.
· Electronic Rx User - Click to allow the provider to write electronic prescriptions.
· Fee Schedule - Click the search button to select a fee schedule different from your practice's usual fee schedule.
· SS# - Type the provider’s Social Security number.
· State ID # - Type the provider’s state ID number.
· State - Type the two-digit postal code for the state the provider is licensed in.
· State License Expiration - Type the expiration date of the provider’s state license.
· TIN # - Type the provider’s Taxpayer Identification Number.
Note: The provider name, address, Social Security number, TIN, state ID number, and phone number print on insurance claims.
· Medicaid # - Type the provider’s Medicaid number.
· DEA # - Type the provider’s DEA ID number.
· DEA License Expiration - Type the expiration date of the provider’s DEA license.
· DEA Schedule - Select the appropriate schedule.
· NPI - Type the provider’s National Provider Identifier number issued by the Centers for Medicare and Medicaid Services (CMS).
· Specialized insurance claim IDs - Select the appropriate option, and then type the appropriate claim ID.
· Provider # - Type the provider’s provider number.
· Office # - Type the provider's office number.
· Medicare # - Type the provider’s Medicare number.
· Other ID # - Type the provider’s other insurance ID.
· UPIN # - Type the provider’s unique physician identifier number.
· Controlled Substance # - Type the provider’s controlled substance number.
4. Click OK.