
In Dentrix, each account is assigned a billing type. Using that number, you can target specific groups when applying finance charges, processing bills, and printing reports.
Dentrix comes with the following default billing types:
1: Standard Billing - finance charges
2: Standard Billing - no finance charges
3: No Insurance
4: Insurance Family - Dual Insurance
5: Insurance Family - finance charges
6: Payment Plan - finance charges
7: Payment Plan - no finance charges
8: Bad Debt - at risk
9: Bad Debt - to collections
10: No Statement and No Finance Charges
Note: You can have up to a total of 99 Billing Types.
To help you better identify each group, a text description is included with each billing type. The description succinctly characterizes the accounts with the selected type.
Note: When customizing billing types, keep in mind how you can use billing types in Dentrix. You can filter certain reports (like billing statements) by billing type, but you can only filter them using a range of types. For example, you could include types 1 - 3 because they are in a range. However, if you wanted to run the report for types 1, 3, 4, and 5, you would have to run the report twice (once with a range of 1 - 1 and a second time with the range of 3 - 5). For this reason, we recommend that you group similar account types together sequentially.
To customize billing types
1. In the Office Manager, click Maintenance, point to Practice Setup, and then click Definitions.
The Practice Definitions dialog box appears.
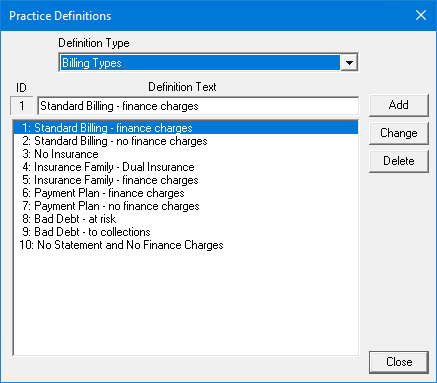
2. From the Definition Type list, select Billing Types.
The current list of billing types appears.
3. Do one of the following:
· To add a new billing type, type the description under Definition Text and click Add.
· To change a billing type, select the type that you want to change, replace the description with a new one, and then click Change. To learn more, click Changing a practice definition.
· To delete a billing type, select it and then click Delete. To learn more, click Deleting a practice definition.