
Because passwords are not enabled when you install Dentrix, the first step in setting up security is to enable passwords and set up a password administrator. After you enable passwords, users must log in each time they start Dentrix. The password administrator can further enhance security by determining which tasks require users to re-enter their passwords. For example, since you assign user passwords according to provider and staff IDs, you could ensure that only specified members of your staff could perform sensitive tasks, such as deleting transactions, changing patient information, or accessing financial information. You could also use passwords, in conjunction with the Audit Trail Report, to track who makes changes to information in the Dentrix database.
Note: If you enable passwords, you must set up at least one password administrator. Consider adding a second password administrator to ensure that someone with those rights is always available in your practice.
Once you have enabled passwords and set up a password administrator, you can assign user security rights and require users to re-enter their passwords before they can perform selected tasks.
To enable passwords and set up a password administrator
1. In the Maintenance menu in the Office Manager, point to Practice Setup > Passwords, and then click Practice Passwords Setup.
The Practice Passwords Setup dialog box appears.
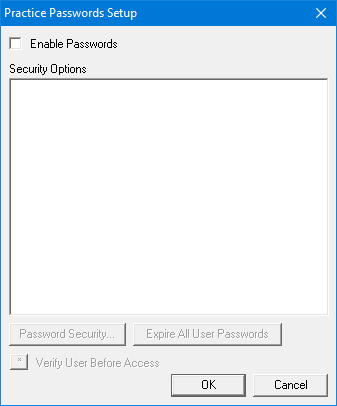
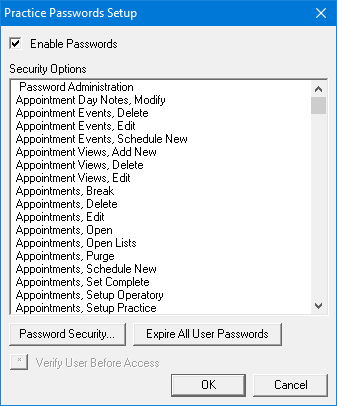
2. Select Enable Passwords.
All of the available security options appear in the Security Options list.
Note: Once you enable passwords, all the tasks appearing in the Security Options list are protected. In order for users to perform any of these tasks, you must assign them rights to the security option. For information about assigning user rights, see Assigning user rights.
3. Click OK.
The Setup User Permissions dialog box appears.
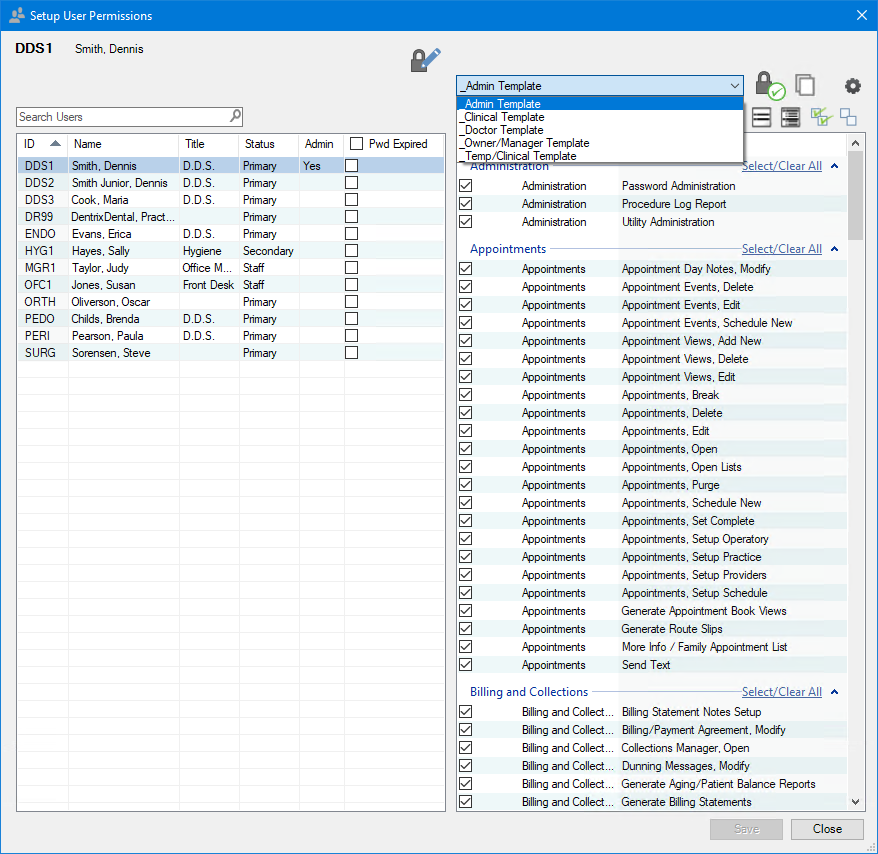
4. In the User list, select a password administrator.
5. (Required) To grant permissions to the administrator, do one of the following:
· Select the Admin
Template from the template list, and then click the Apply Permissions
Template to User icon ![]() .
.
Note: To set up permissions in your office more quickly, apply the other templates to other users in your office according to their roles.
· Under Administration, click Password Administration. The Office Manager, Open permission is selected automatically. These are the minimum permissions required.
· To grant all permissions to the administrator, click the Check All Permissions icon.
6. To save the user as a password administrator, click Save.