In addition to the pre-set multi-codes, you can edit multi-codes to meet your specific needs.
To edit a multi-code
1. In the Office Manager, click Maintenance, point to Practice Setup, and then click Multi-Code Setup.
The Multi-Code Setup dialog box appears.

2. Select the multi-code that you want to edit and then click Edit.
The Multi-Code Editor dialog box appears.
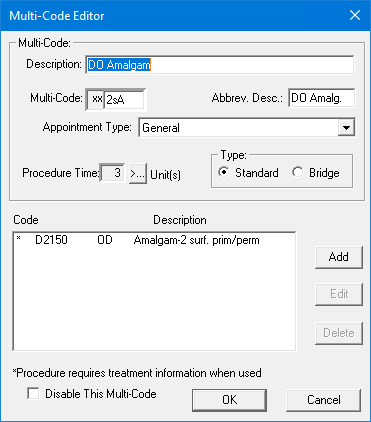
3. If necessary, do one or all of the following:
Type a new description of up to 31 characters for the multi-code that you are editing.
Type three new alphanumeric characters to represent the code that you are editing.
Note: You must assign a unique five-character code to each multi-code. Dentrix automatically assigns "xx" as the first two characters.
Type an abbreviated description of up to nine characters in the Abbrev. Desc. field.
Select an appropriate appointment type from the list.
Set the length of time required to complete this group of procedures.
Under Type, select Standard or Bridge.
4. Do one or more of the following:
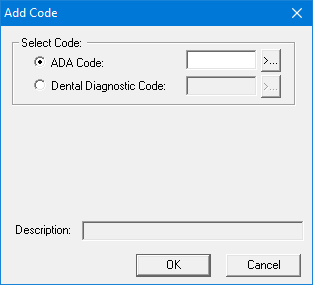
To add a procedure code to the multi-code, click Add.
The Add Code dialog box appears.
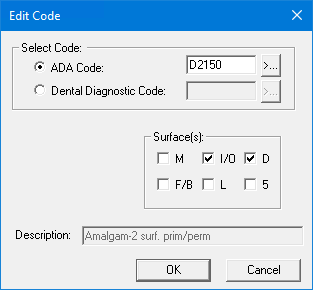
To edit a procedure code in the multi-code, select it, and then click Edit.
The Edit Code dialog box appears.
To delete a code from the multi-code, select it, and then click Delete.
5. If you are adding or editing a code and depending on the procedure, select one of the following:
ADA Code
Dental Diagnostic Code
6. Do one of the following:
Type the ADA code or dental diagnostic code
Click the corresponding search button, select the appropriate code from the list, and click OK.
Note: Depending on the procedure code you selected, a group box appears allowing you to select the surfaces, quadrant, or sextant appropriate to the procedure code. Dentrix flags multi-codes consisting of one or more procedures that require additional treatment information, such as a tooth number, with an asterisk (*) in the Procedure Codes List. You must supply this additional information before you can post a multi-code.
7. Click OK to save your changes, and as necessary, repeat steps 4 through 6 to complete editing the selected multi-code.
8. When you have completed editing, click OK to close the Multi-Code Editor dialog box and save your changes.