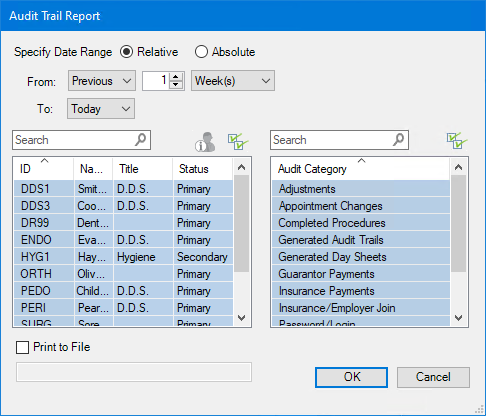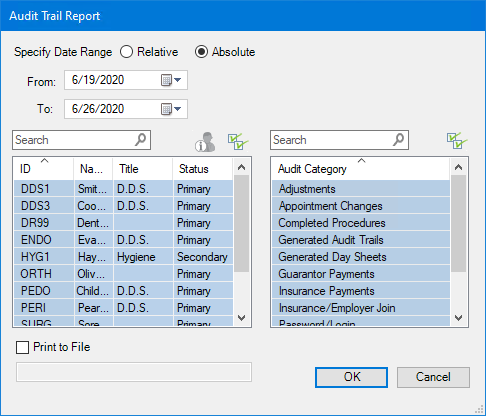

The Audit Trail Reports allow you to print a report of all transaction entries that have been changed or deleted. The Standard Audit Trail Report prints out a report of information regarding any transaction that has been edited or deleted. It can also contain information about changes made to patient's Family File, including: Patient Name, Social Security number, Prov1, Prov2, Chart Number and Billing Type.
Note: If you have enabled passwords, you must have the proper rights to send the Audit Trail Report to the Batch Processor. From there, you may view or print the report. (If you have not enabled passwords, anyone can access the report.) Once you send the report to the Batch Processor any user who has the rights to view or print reports from the Batch Processor can do so. To avoid this, delete the report from the Batch Processor after you finish with it.
To print the Standard Audit Trail Report
1. In the Office Manager, click Maintenance, and then click Audit Trail Report (Standard).
The Audit Trail Report dialog box appears.


2. Set up the following options:
· Specify Date Range - Select Relative or Absolute, and then do one of the following:
· Relative – Using the drop-down lists, set the From and To values.
· Absolute – Type the From and To dates, or select them from the calendars.
· Provider/Staff - Select the providers and/or staff members you want to include in the report.
· To include inactive providers and/or staff, click the Show Inactive User icon.
· To include all active providers and/or staff, click the Select All icon (default setting).
· Audit Category - Select the categories or types that you want to include in the report. (The default setting is to include all categories or types.)
3. (Optional) To print the report as a text file, select Print to File, and then type a file name.
A message appears. To continue, click Yes.
4. To send the report to the Batch Processor, click OK.