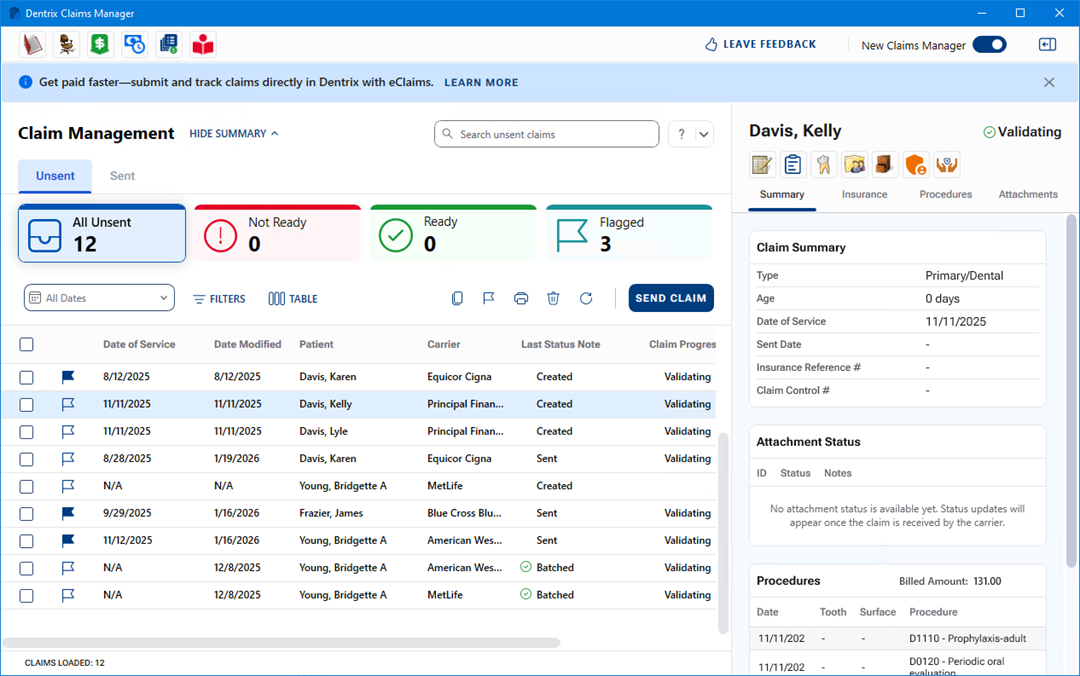
The Claims Manager side panel provides you with an overview of the selected patient's claim including the claim's current status. You can use the toolbar to open the Ledger, Patient Chart, Family File, or Document Center, or you can open the Insurance Claim window, the Dental Insurance Plan Information dialog box, or the Dental Insurance Benefits and Coverage window.
The Summary, Insurance, Procedures, and Attachments tabs in the side panel provide you with more detail about the selected claim. For example, claim tracking statuses appear in real time, and you can also view claim and NEA numbers. The Summary tab is selected by default.
To add or edit a claim status note
The Dentrix Claims Manager window appears.
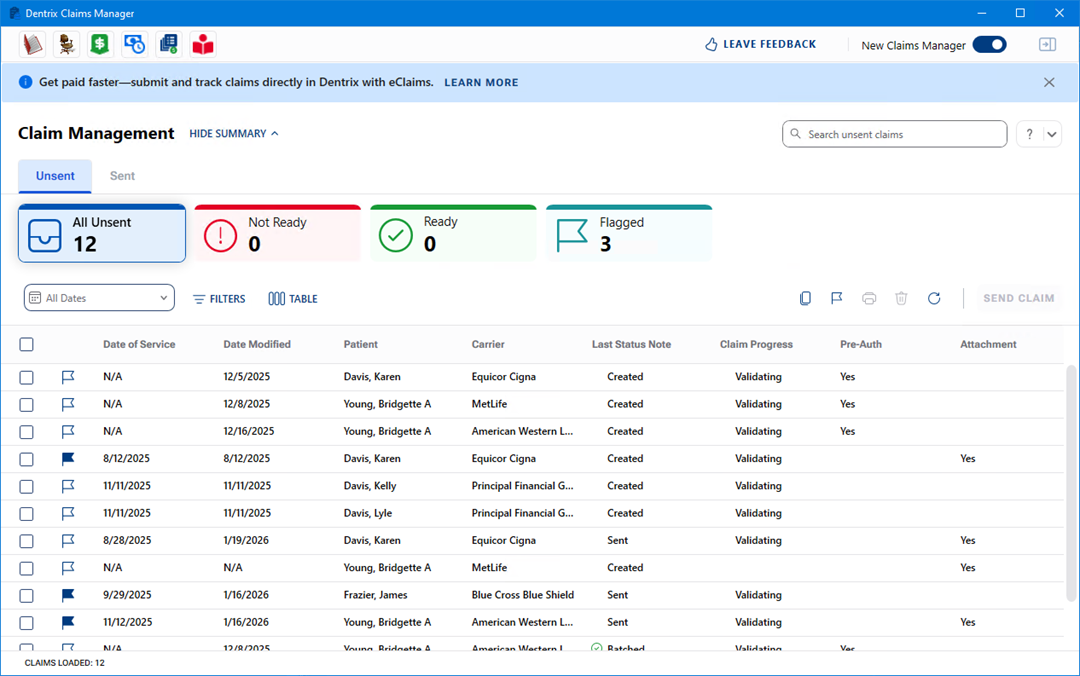
2. To view the side panel, select a patient from the claims list, and then click the side panel icon in the upper-right corner ![]() .
.
The side panel appears.
Notes:
Insurance Reference # – Displays the most recent Document Control (DC) number.
If the claim was delivered to the insurance carrier, the DC number assigned by the insurance carrier appears.
If the clearinghouse DentalXChange last handled the claim, the DentalXChange DC number appears.
Claim Control # – Displays DNT claim number assigned by Henry Schein One.
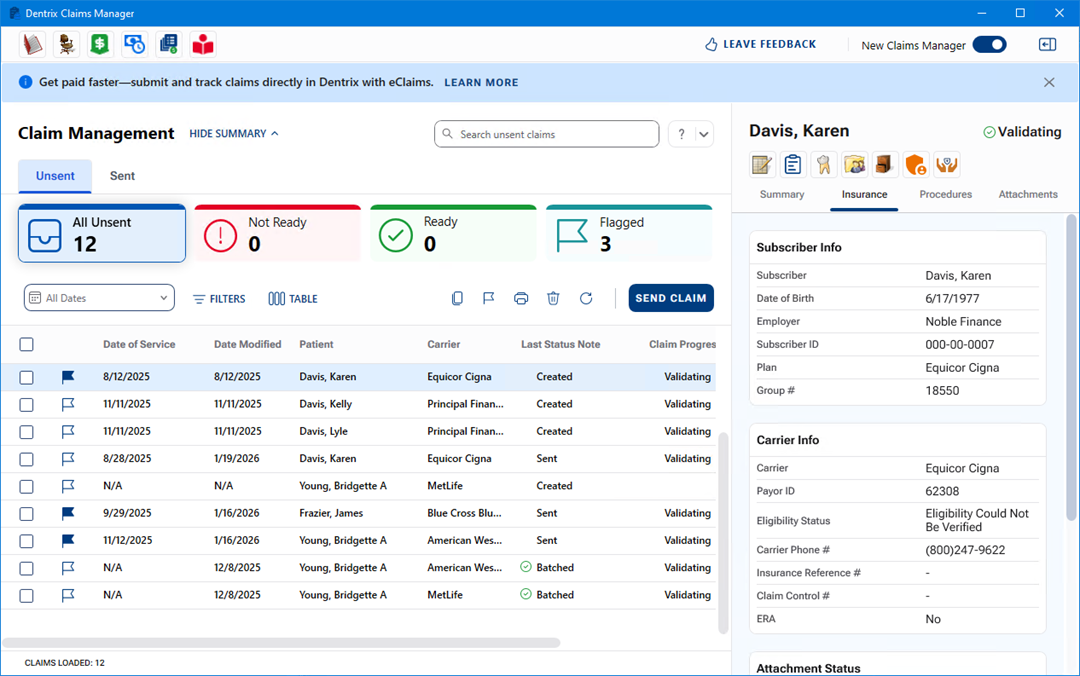
3. Click the Insurance tab.
The Insurance panel appears.
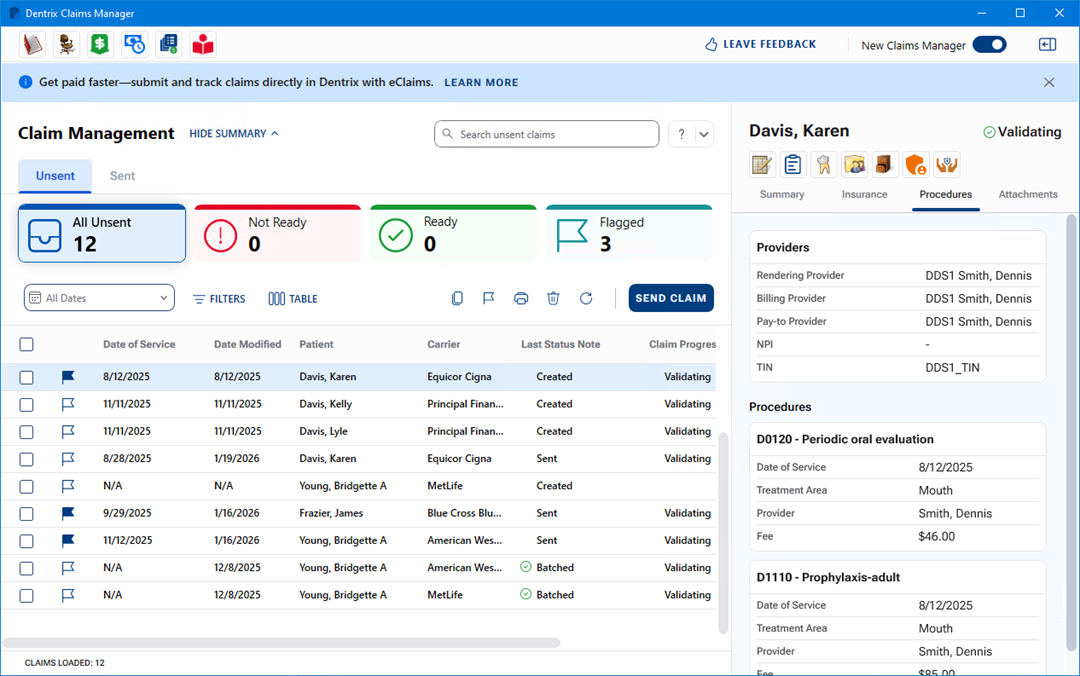
4. Click the Procedures tab.
The Procedures panel appears.
5. Click the Attachments tab.
The Attachments panel appears.
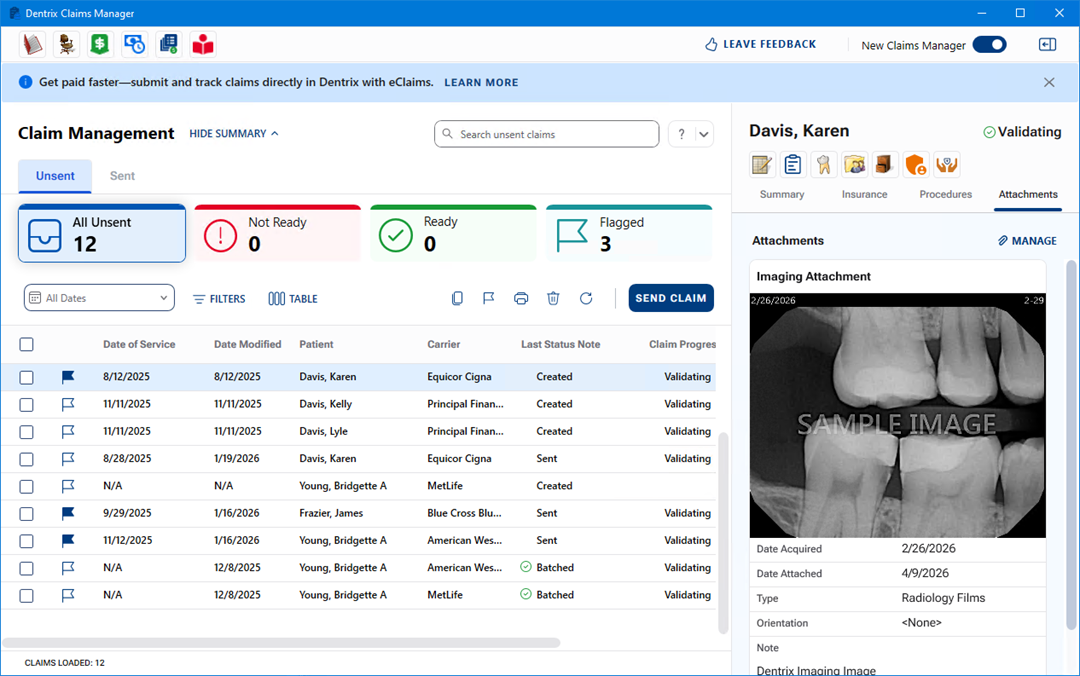
a. To add, edit, or delete the attachments for the selected claim, click Manage.
The Include Attachments dialog box appears.
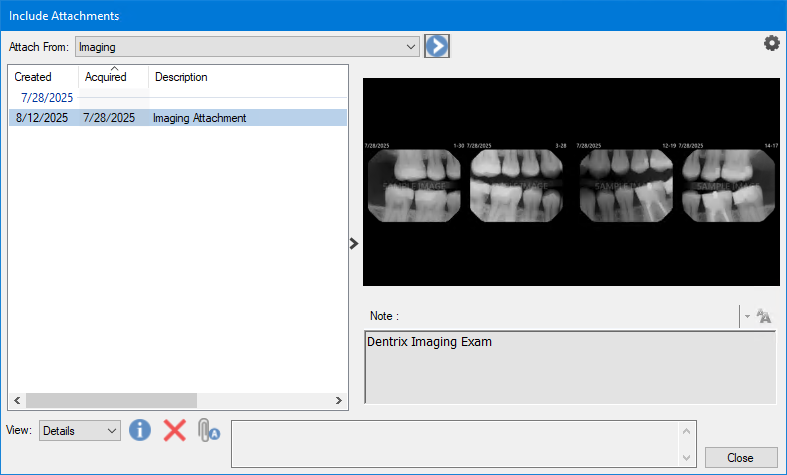
b. To add another image, click the Attach From chevron.
The Imaging Attachment dialog box appears.

c. Click the desired image or images, and then click Attach Image(s).
d. To view information about the attachment, click the Attachment Information icon ![]() in the Include Attachments dialog box.
in the Include Attachments dialog box.
e. To remove the attachment, click the Remove Attachment icon ![]() in the Include Attachments dialog box.
in the Include Attachments dialog box.