
You can import image files (.bmp, .png, .jpg, and .tiff files) to attach to a patient’s record.
Note: You can edit the date that images were imported or uploaded to the date you acquired the image from a referring dentist, a third party, or a patient.
To import an image
1.
In the Imaging toolbar, click the Launch Dentrix Imaging toolbar
icon ![]() .
.
The Dentrix Imaging window appears.
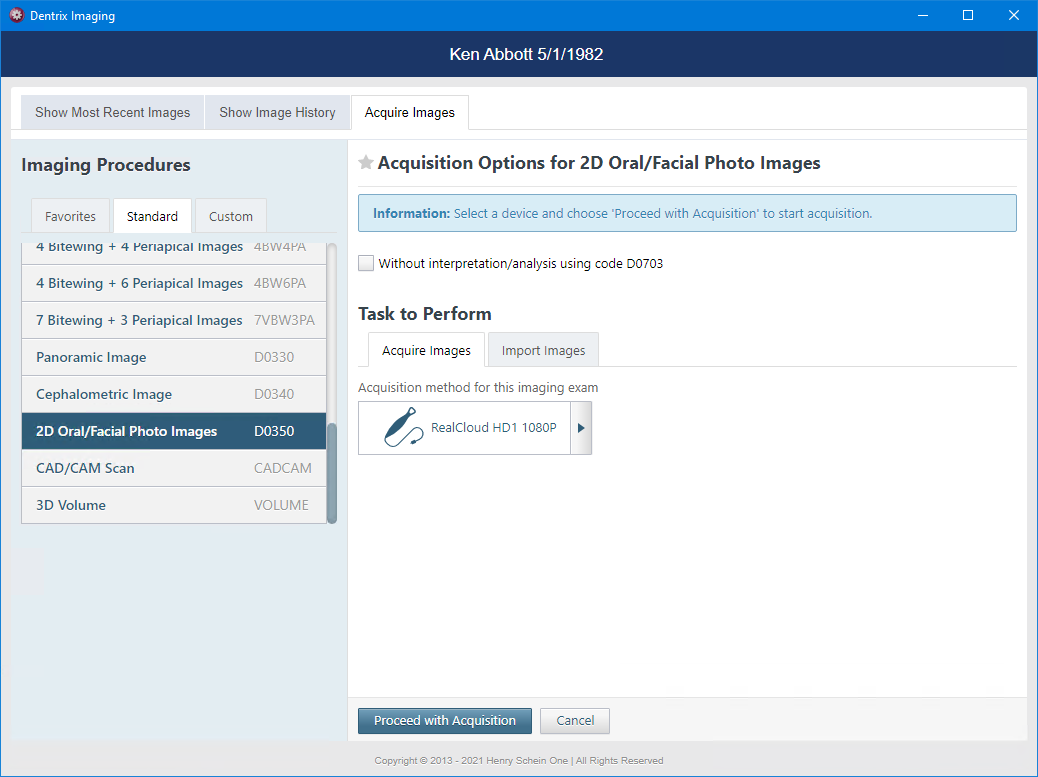
2. Click the Acquire tab.
3. Either leave the Favorites tab selected, or click the Standard or Custom tab.
Note: Custom and favorite imaging procedures are location specific.
4. Select the imaging procedure that you want to perform.
The options for the selected procedure become available.
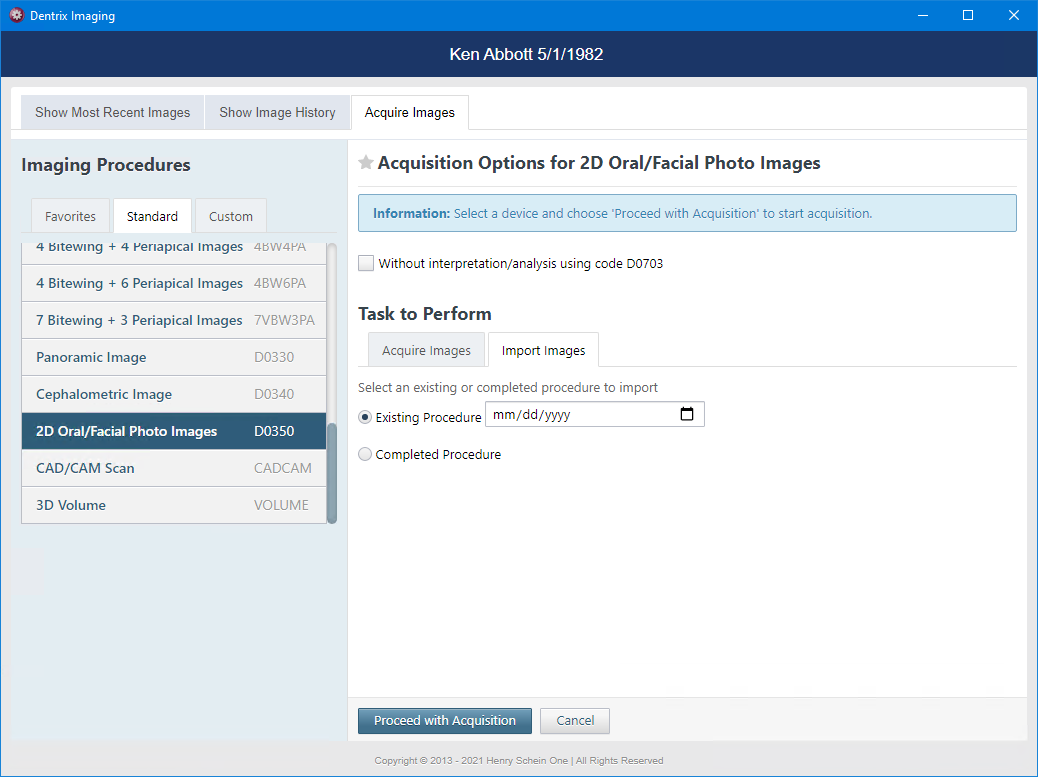
5. Click the Import tab.
Note: Depending on the acquisition method you selected, the tasks you must complete to import an image vary. For example, if you are importing an individual intraoral X-ray image, you must select the teeth from the Tooth chart that pertain to the importing session. Or, if you are importing intraoral X-ray images for a series with two types of sequences, you must select one of the following options:
· For a full-mouth series – Select FMX 18 or FMX 21.
· For a 3-periapical series – Select Maxillary or Mandibular.
· For a 4-bitewing and 3-periapical series – Select Maxillary or Mandibular.
· For a 7-bitewing and 3-periapical series – Select Maxillary or Mandibular.
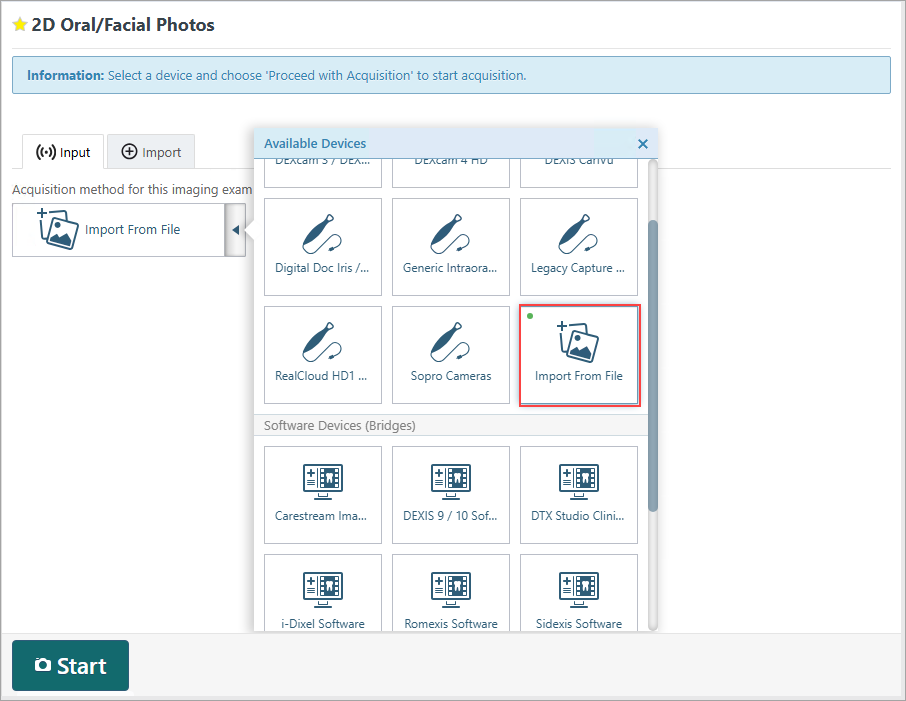
6. Do one of the following:
· Click the Input tab, select Import From File in the Available Devices pop-up list if it is not already selected.
· Click the Import tab.
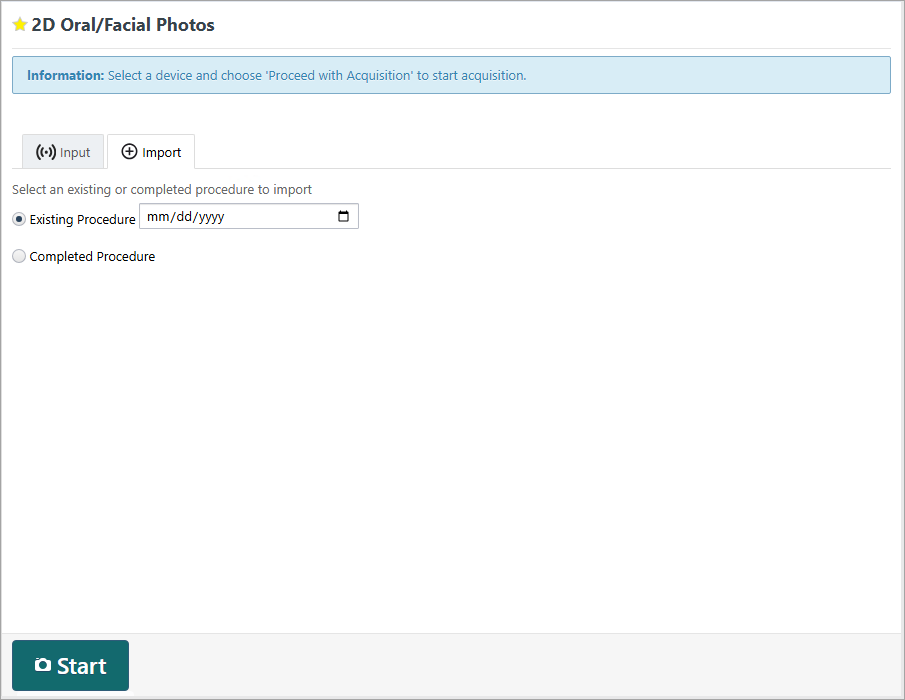
7. If you clicked the Import tab, select one of the following options (otherwise, skip this step):
· Existing Procedure – Use this for a procedure that was performed prior to today (and may already have been billed to the patient’s insurance carrier). Specify the date that the procedure was performed.
· Completed Procedure – Use this for a procedure that you are performing. Today’s date and time will be associated with the procedure.
8. Click Start.
9. Do one of the following:
· To import one or more intraoral or extraoral X-ray images if you selected Import From File as the acquisition device on the Acquire tab in step 7, click Start.
· To import one or more intraoral or extraoral photos, if you selected Import From File as the acquisition device on the Acquire tab in step 7, click Start.
· To import a CAD/CAM Scan, click Start.
· To import one or more intraoral or extraoral X-ray images if you selected the Import tab in step 7, click Start.

· To import one or more intraoral or extraoral photos if you selected the Import tab in step 7, click Start.

The Import File dialog box appears.

10. Select the desired image files, and then click Open.
For an intraoral X-ray series, intraoral photos, or extraoral photos, the selected image files appear as thumbnail images on the panel at the bottom of the Dentrix Imaging program.


11. For an intraoral X-ray series, intraoral photos, or extraoral photos, repeat steps 8 - 9 as needed to import additional images.
12. For X-ray images, from the Automatically Apply Enhancement list, select the type of enhancement that you want to apply automatically to the images (Entire Image, For Perio, For Endo), or select Not Enhanced to not apply any enhancement.

Note: When viewing an image after importing it, you can turn the enhancement off and on. The original, raw image is preserved. For more information about enhancements and turning them on and off, see Processing images.
13. For an intraoral X-ray series, do the following:
a. One at a time, drag the thumbnail images from the panel to the appropriate boxes of the template.

b. Do any of the following:
· To change the orientation of an image in the template, select it to view the toolbar, and then click any of the available buttons as needed: Flip Horizontal, Flip Vertical, Rotate Counterclockwise (- 90 degrees), and/or Rotate Clockwise (90 degrees).
Note: If an image is flipped, the Rotate Clockwise and Rotate Counterclockwise buttons rotate the image in the same direction as if the image was not flipped.

· To swap two images in the template, drag one of the images to the box with another image.
· To remove an image from the template, drag it back to the panel at the bottom.
14. For intraoral or extraoral photos, do the following:
a. Clear the check box of any thumbnail image on the panel that you do not want to save to the patient’s record.

b. Click Assign Images.
c. Do any of the following:
· To save one or more snapshots as intraoral images and assign tooth numbers, select the snapshots that pertain to the same teeth (clear snapshots that do not pertain to the same teeth), and then drag them to the Select Teeth, UR/UL/LR/LL, Upper Jaw, or Lower Jaw box.

If you drag snapshots to the Select Teeth box, select the applicable teeth, and then click Assign Teeth.

· To save one or more snapshots as extraoral images, select the snapshots that are extraoral images (clear snapshots that are not extraoral images), and then drag them to the Extraoral Photos box.

· To save the snapshots on the snapshot panel as intraoral images but not assign tooth numbers at this time, leave those snapshots on the snapshot panel.
Assigned intraoral images appear on the left side of the preview area; extraoral appear on the right.

15. For a CAD/CAM scan, the Set Model Orientation dialog box appears.

a. Adjust the orientation of the model as you want it to appear in Dentrix Imaging:
· Select the yellow circle to make it active, and then drag to rotate the model clockwise or counterclockwise.

· Select the green line to make it active, and then drag to rotate the model on the x-axis.
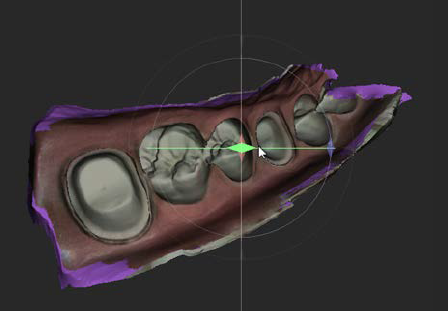
· Select the red line to make it active, and then drag to rotate the model on the y-axis.

· Click anywhere within the purple circle to make it and the yellow circle active, and then drag to move the model in any direction.

Note: When you save the orientation, that view of the model becomes the default, and you can adjust it further from Dentrix Imaging later on.
b. Click Save.
The resulting image appears in the Dentrix Imaging program.

16. Click Finish Acquisition (only for an individual intraoral or extraoral X-ray image, or a CAD/CAM Scan) or Begin Uploading (only for an intraoral X-ray series, intraoral photos, or extraoral photos).
Note: For an intraoral X-ray series, if not all thumbnail images have been mounted into the template when you click Begin Uploading, a confirmation message appears. If you choose to continue, only the mounted images are saved.
17. If any images fail to upload, a message appears and provides the option for you to recover the images. Click Recover Images to begin the recovery process.
18. For an intraoral X-ray series, intraoral photos, or extraoral photos, when the images are finished being saved to the patient’s record, click Continue.


19. For a set of intraoral photos (or an individual intraoral photo or X-ray), you can assign tooth numbers to a selected snapshot by clicking the Edit button.
For each snapshot that needs tooth numbers assigned to it, do the following:
a. Under Image Navigator, click an image thumbnail. You can skip this step if there is only one image thumbnail.
A larger version of the current image appears in the viewing area.

b. Click the Edit button.
The Assign Tooth Numbers dialog box appears.

c. Select the applicable tooth numbers.
d. Click Assign Teeth.