
You can quickly acquire an image for teeth that you select.
To acquire an image of selected teeth
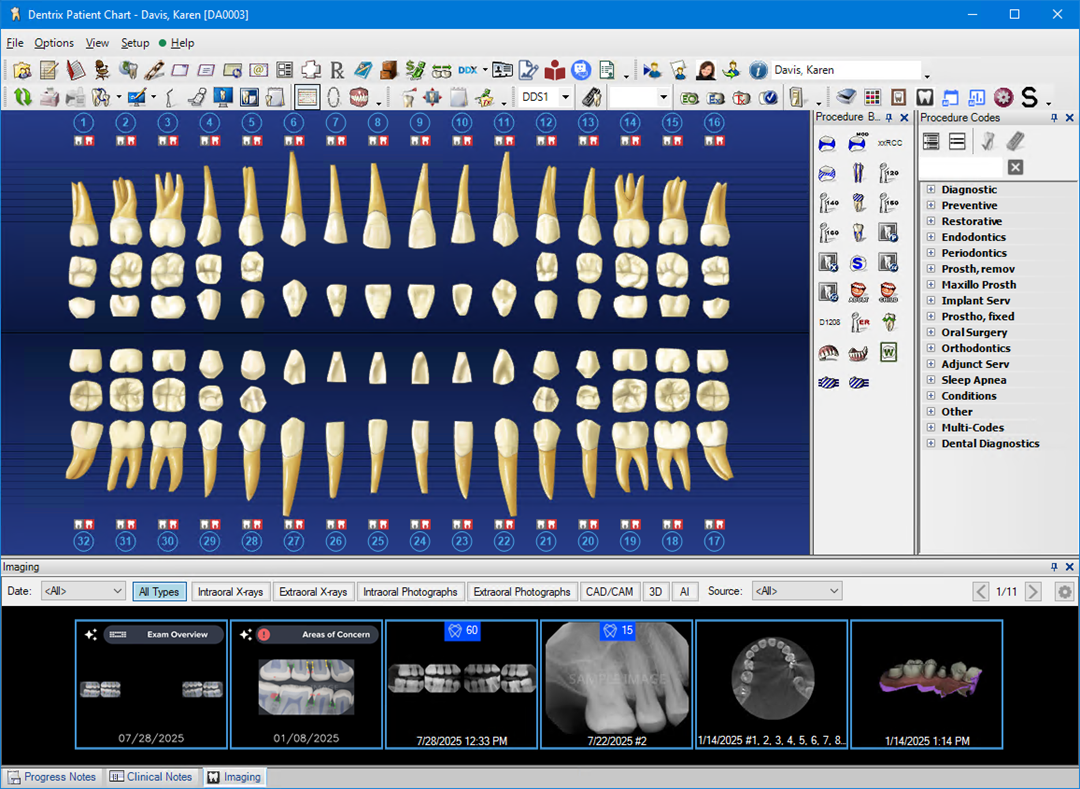
1. Open the Patient Chart and select a patient.
All previous images pertaining to the selected patient appear in the Imaging panel.
2. In
the Imaging toolbar, click the Launch Dentrix Imaging icon ![]() .
.
The Dentrix Imaging window appears.
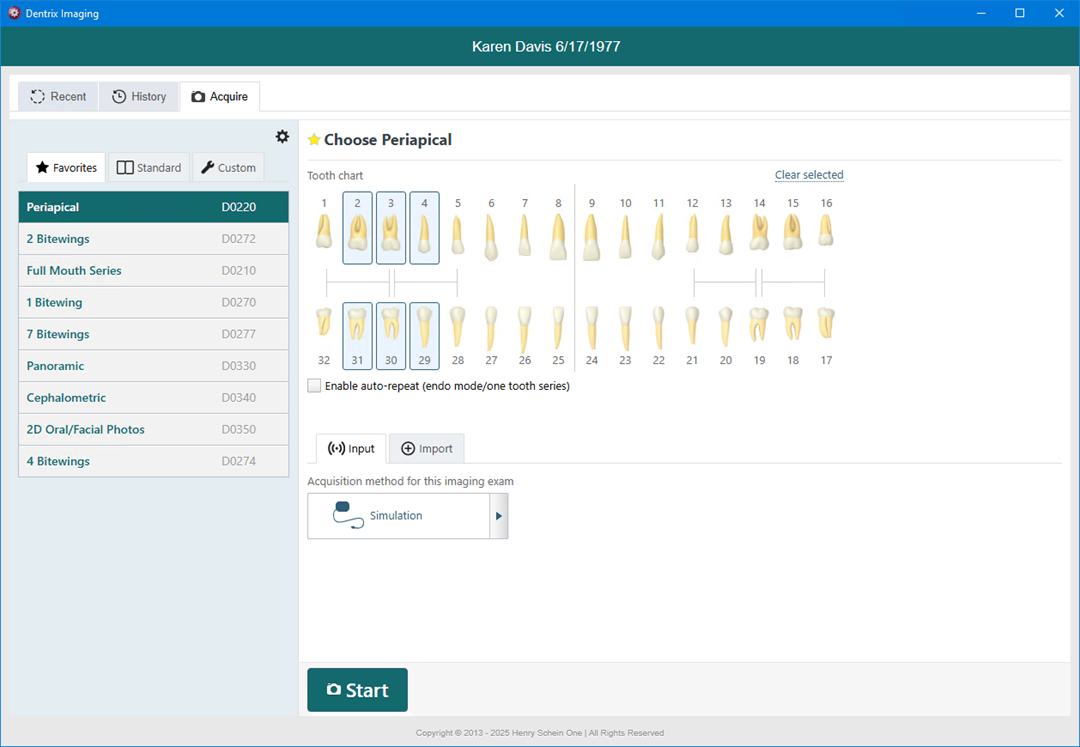
3. Click Acquire, and then click the desired procedure group (Favorites, Standard, or Custom).
4. Click Periapical, and then click the desired teeth from the Tooth chart.
5. Under Acquisition method for this imaging exam, select the desired acquisition method from the list.
6. Click Start.
Note: When you are acquiring a series of images, the series finishes automatically when the last image is taken and uploaded.
The Dentrix Imaging window appears with the History tab selected.
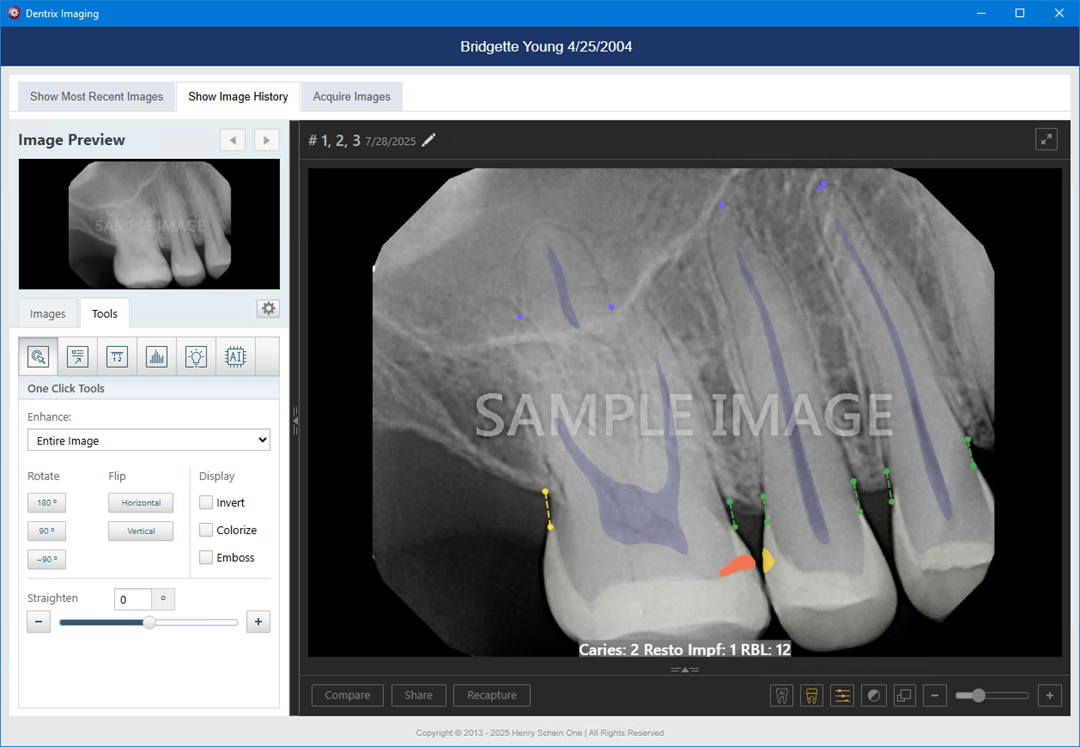
7. If necessary, use the toolbar buttons in the Tools tab to apply enhancements, annotations, measurements, density levels, and effects (invert, color, zoom, sharpen, and contrast) to the image.
8. Close the Dentrix Imaging window.
The image or images appear in the Imaging panel in the Patient Chart.