
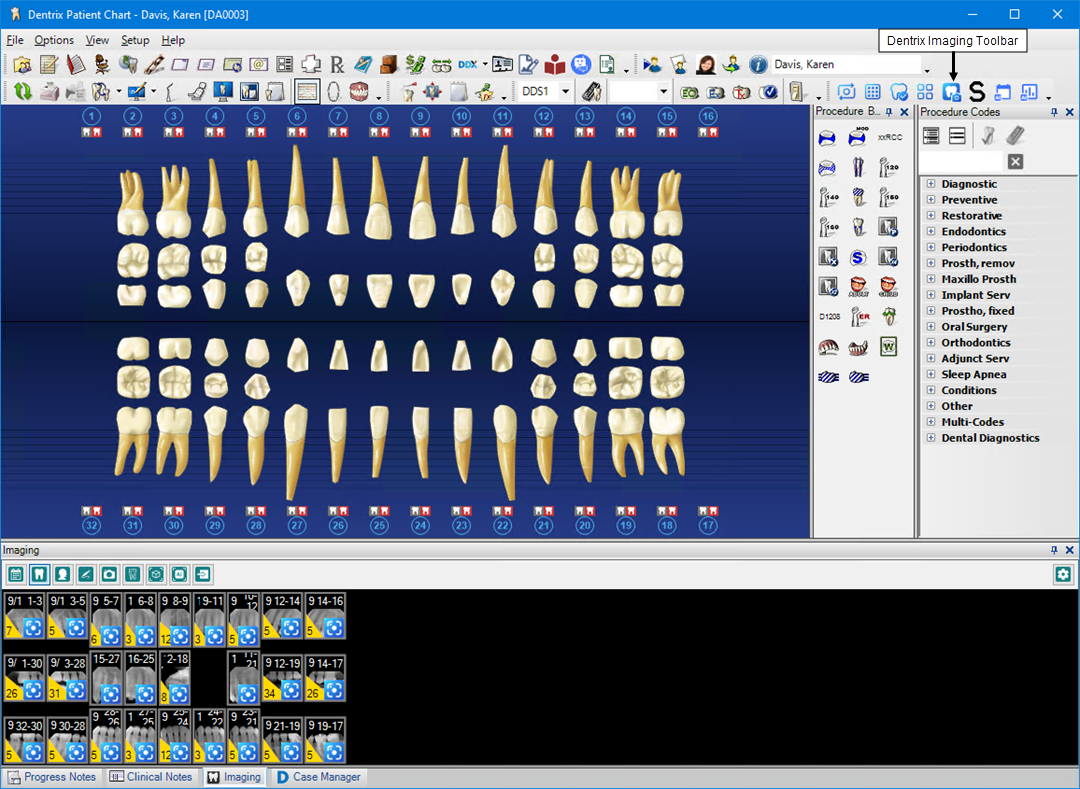
The Patient Chart includes the Imaging toolbar and the Imaging tab. The Imaging panel consists of a toolbar and a thumbnail bar.
To open the Imaging panel
1. To open the Imaging panel, click the Imaging tab adjacent to the Clinical Notes tab.
The Imaging panel appears in the Patient Chart window.
2. To change the date from the default setting of <All>, click the Date icon ![]() , and then click one of the following options from the options list:
, and then click one of the following options from the options list:
<3 months – To view images less than 3 months old.
<6 months – To view images less than 6 months old.
<12 months – To view images less than 12 months old.
<24 months – To view images less than 24 months old.
>24 Months – To view images greater than 24 months old.
3. To filter the types of images displayed in the Imaging panel, click one of the following icons:
![]() All Types – To view all image types.
All Types – To view all image types.
![]() Intraoral X-ray – To view intraoral X-rays only.
Intraoral X-ray – To view intraoral X-rays only.
![]() Pan/Ceph – To view Pan/Ceph images only.
Pan/Ceph – To view Pan/Ceph images only.
![]() IO Photo – To view intraoral photos only.
IO Photo – To view intraoral photos only.
![]() EO Photo – To view extraoral photos only.
EO Photo – To view extraoral photos only.
![]() Scans – To view CAD/CAM images only.
Scans – To view CAD/CAM images only.
![]() CBCT – To view CBCT scans only.
CBCT – To view CBCT scans only.
![]() AI – To view AI images only.
AI – To view AI images only.
![]() Source – To view the preferred source, select it from the list.
Source – To view the preferred source, select it from the list.
4. To page through the images, click the Previous Page or Next Page arrows as appropriate.
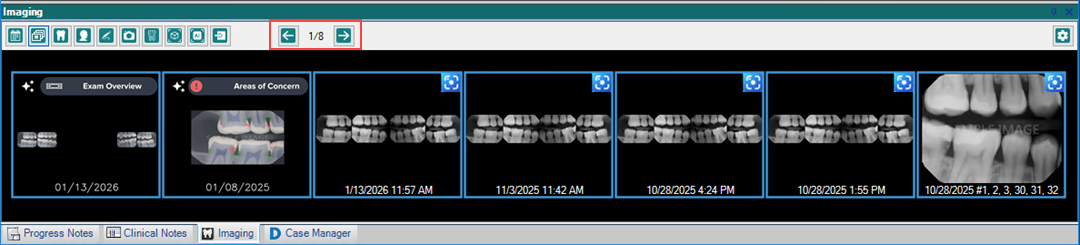
5. To view an image acquired using Dentrix Imaging, click it.
Dentrix Imaging opens the selected image.
Note: To view an image acquired with any other imaging software application, click it, and the image appears in the Diagnostic Viewer.