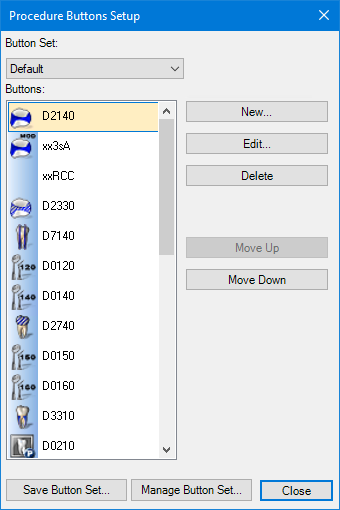
Dentrix includes 24 procedure buttons that you can use to quickly post procedures to a patient's chart. However, there is no limit to the number of procedure buttons that you can create and customize. You can assign each button to a procedure code, multi-code, or condition. In addition, the procedure button settings are computer specific, making it possible for you to customize the buttons according to the type of work performed in a specific room or operatory.
Note: Dentrix includes more than 80 charting icons that you can use to create your own procedure code buttons. You can also edit an icon's image, create a new one, or use text instead. However, you cannot assign more than one procedure code, multi-code, or condition to a single button.
To create a procedure button
1. In the Patient Chart, click Setup, and then click Procedure Buttons Setup.
The Procedure Buttons Setup dialog box appears.

2. Click New.
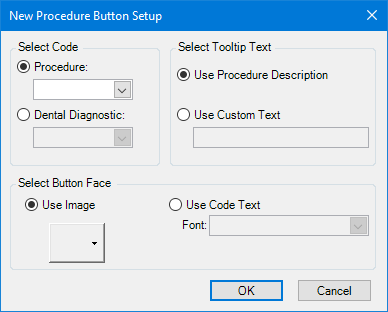
The New Procedure Button Setup dialog box appears.

3. Under Select Code, select Procedure, and then select a procedure code, multi-code, or condition from the list.
Note: To assign a diagnostic code to the selected button, select Dental Diagnostic, and then select a code from the list.
4. Under Select Button Face, do one of the following:
Use Image - Select to assign a button to the procedure code you selected, and then click the Use Image button.
Use Code Text - Select to assign text to the procedure code you selected instead of a button, and then select a font from the list.
5. Under Select Tooltip Text, do one of the following:
Use Procedure Description - Select to assign the ADA procedure description.
Use Custom Text - Select to create your own procedure description.
6. Click OK.