Adding sites in ePrescribe
For each location that you join to an existing group and enable for ePrescribe from OMSVision, you must add that location as a site from ePrescribe. A stand-alone location or the primary location of a group that you enable for ePrescribe from OMSVision is added automatically as a site in ePrescribe.
Note: If a user attempts to open ePrescribe while logged in to a location that has not been added as a site in ePrescribe, an error message appears, and the user will not be able to use ePrescribe until the location is added as a site.
To add a site in ePrescribe
Log in to OMSVision in the primary location of a group with a user account that has been enabled as an administrator for ePrescribe. Then, open ePrescribe in task mode.
Click the Settings tab.
Click the Site Management link.
The Site Management page opens and displays a list of locations that have already been added as sites in ePrescribe.
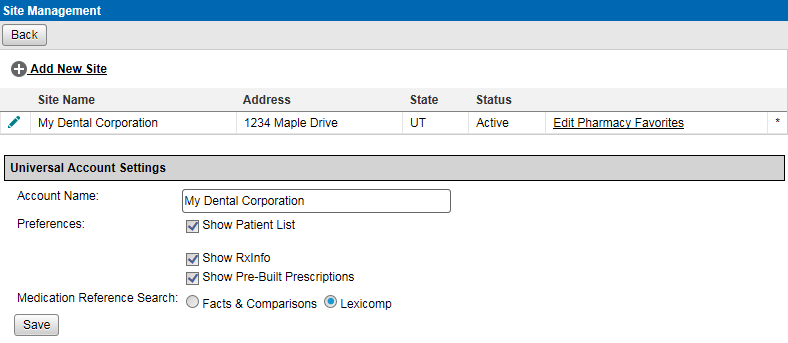
Click Add New Site.
The options for adding a new site become available.
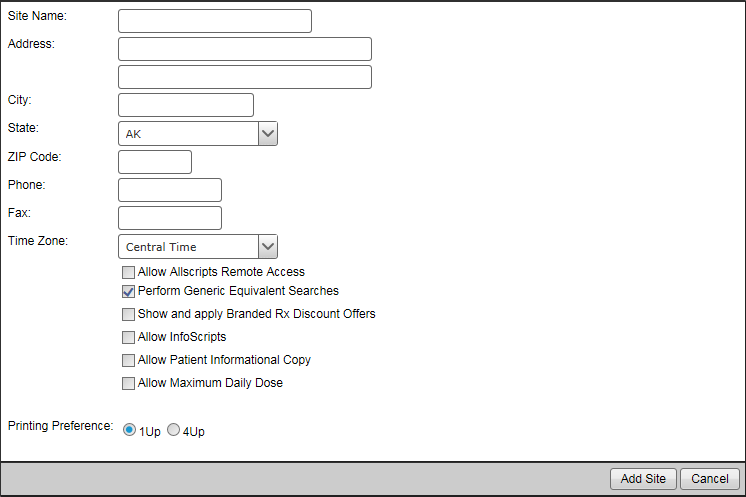
Set up the details for the site: name, address, phone number, fax number, time zone, general preferences, and printing preference.
Click Add Site.
Note: Do not confuse the Add Site button with the Save button (in the lower-left corner), which is for the Universal Account Settings section of the page.