

|
Adding and editing implant items
Implant items are the items that you use for implants. Implant items are helpful for tracking implants. You can add and edit implant items as needed.
To add or edit an item
1. Do one of the following:
· From the File menu, point to Implants > Implant Tracking, and then click Items. The Implant Items Table window appears.
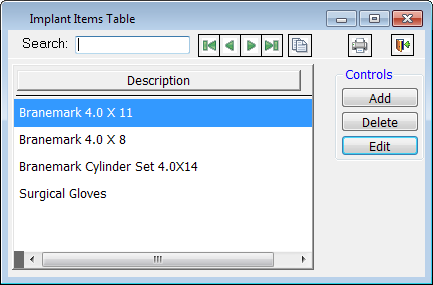
· In the Implant Center, on the Setup tab, click the Items tab.
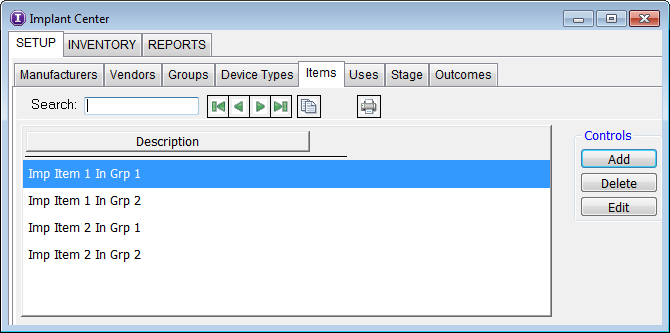
2. Do one of the following:
· To add an implant item, click Add.
· To edit an existing implant item, select an implant item, and then click Edit.
The Edit Implant Item dialog box appears.
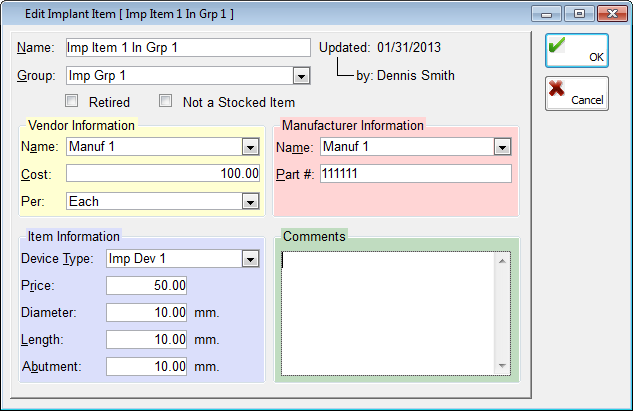
3. Set up the following options:
· Name - Type a name for the implant item. Make the name distinctive so that you can select the correct item when tracking implants. The name can be up to 50 characters long.
· Group - Select the group that the implant item belongs to.
· Retired - Select this check box if the item has been retired. With this option selected, you can finish up your inventory, but the system will not add a re-order to the Implant To-order table.
· Not a Stocked Item - Select this check box to indicate that this item will not be placed into your inventory but can still be associated with a patient's treatment and tracked in reports. Non-stocked items are associated with a patient by selecting an item from a list rather than clicking the Item button.
· Vendor Information - Indicate the implant vendor information:
a. Select the vendor Name.
b. Type the Cost of the part in a $,$$$,$$$.$$ format.
c. From the Per list, select the quantity that you purchase the part in: Each, Dozen, Lot, Case, or Gross.
· Item Information - Indicate the implant item information:
a. Select the Device Type.
b. Type the Price of the item in a $,$$$,$$$.$$ format.
c. Type the Diameter, Length, and Abutment (if relevant) of the item in millimeters in the corresponding fields. Each field has a maximum length of six characters. You must enter the diameter, length, and abutment for them to be displayed when you are tracking implants.
· Manufacturer Information - Indicate the implant manufacturer information:
a. Select the manufacturer Name.
b. Type the manufacturer's Part #. This field has a limit of 30 characters.
· Comments - Type any comments relevant to the implant item.
Note: The text next to Updated and by in the upper-right corner indicates the date and name of the employee who was logged on when the information was last changed or updated.
4. Click OK.
Need more help?
You can visit our website, contact OMSVision Customer Support, or suggest a new feature or improvement on User Voice.