

|
Adding and editing columns
Columns correspond to dental columns when making appointments in the Appointment Book. You can add and edit columns as needed.
To add or edit a column
1. In the Appointment Book, from the Tools button menu, click Columns.
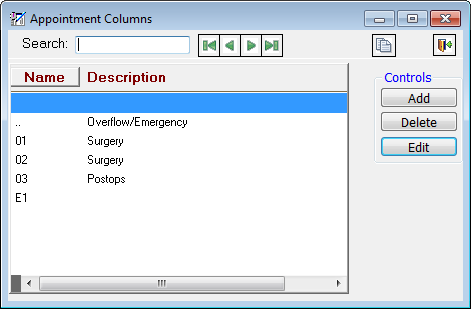
The Appointment Columns window appears.
2. Do one of the following:
· To add a column, click Add.
· To edit an existing column, select a column,and then click Edit. You cannot edit the Overflow/Emergency column.
The Edit Column dialog box appears.
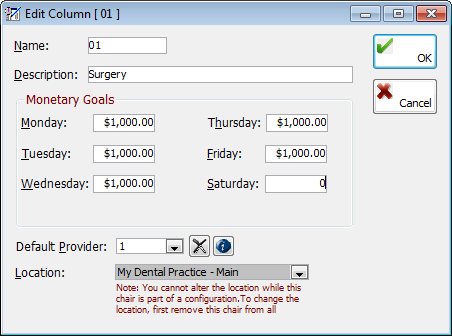
3. Set up the following options:
· Name – Type a unique name for the column as you want it to appear at the top of the column in the Appointment Book. This field has a limit of 10 characters.
· Description – Type a description for the column as you want it to appear below the column name at the top of the column in the Appointment Book. This field has a limit of 40 characters, but only 25 characters will be visible in the Appointment Book.
· Monetary Goals - Type the production goals for each day of the week.
· Default
Provider – Select the provider who you want to have assigned
automatically to appointments scheduled in the column.
You can click the Remove button
 to clear any previous selection. You do not need
to select a default provider if you schedule appointments for multiple
providers in this column.
to clear any previous selection. You do not need
to select a default provider if you schedule appointments for multiple
providers in this column.
· Location – Select the office where the column is located. You cannot change the location once a column is associated with a configuration.
4. Click OK.
Need more help?
You can visit our website, contact OMSVision Customer Support, or suggest a new feature or improvement on User Voice.