Managing structured visit notes templates
You can add, edit, duplicate, and delete structured visit note templates as needed.
To manage structured visit notes templates
1. On the Task pane of the hard tissue chart, from the Notes menu of the Notes: List section, point to Manage Templates, and then click SVN Templates.
The Structured Visit Note Templates dialog box appears.
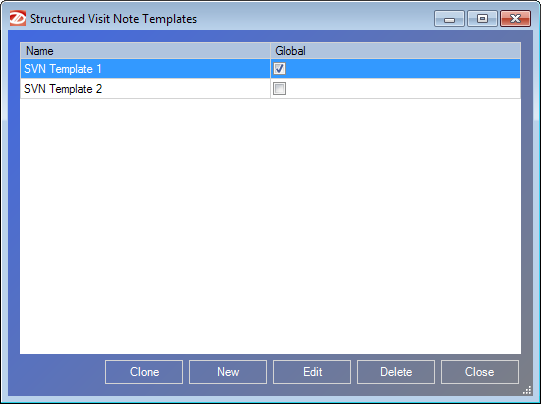
2. Do one of the following:
- To add a new template from scratch, click New.
- To create a new template that is based on an existing template, select the template that you want to copy, and then click Clone.
- To edit an existing template, select a template, and then click Edit.
- To delete an existing template, select a template, and then click Delete. On the confirmation message, click Yes. Ignore the steps that follow.
If you are adding, cloning, or editing a template, the Edit Structured Visit Note dialog box appears.
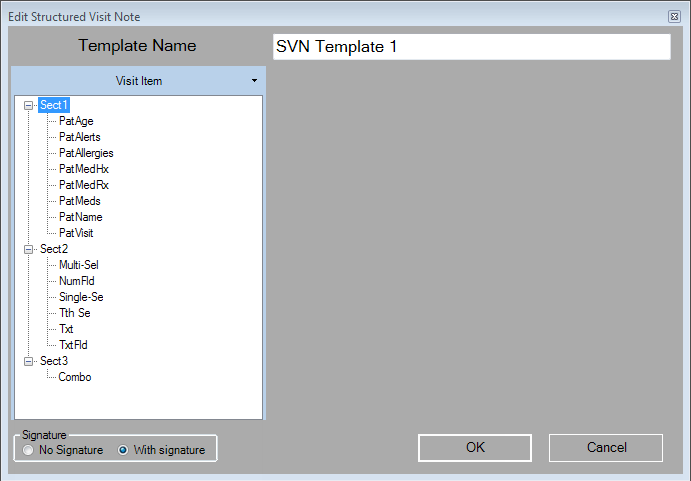
3. Type a Template Name.
4. Add, edit, and delete items for the template as needed.
· From the Visit Item menu, click Add New Item.
· With an item selected under Visit Item, from the Visit Item menu, click Edit Selected Item (or click the Edit link of an item on the template).
· With an item selected under Visit Item, from the Visit Item menu, click Delete Selected Item, and then click Yes on the confirmation message that appears.
If you are adding or editing an item, in the Edit Template Item dialog box that appears, set up the following options, and then click OK:
· Name - Type a brief name that identifies the item under Visit Item.
· Description - Type a description of the item.
· Type - Select a type for this item, and then set up the corresponding options (as applicable):
· Section Header - To categorize or group items. Type a Header.
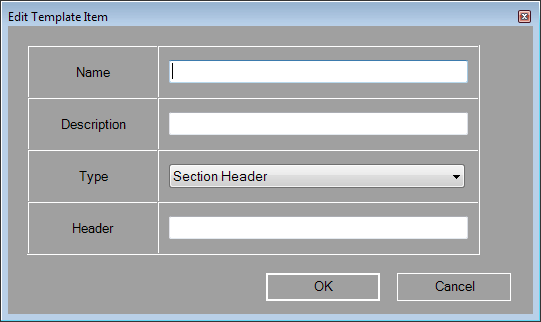
· Free Text Entry - To allow text entry. Type a Header, select a Category (an item that is a section header), type any Default Text.
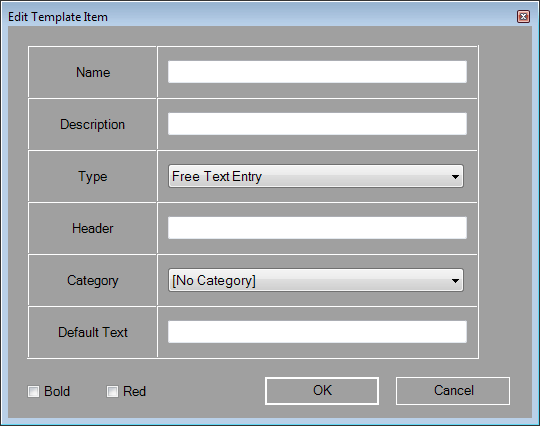
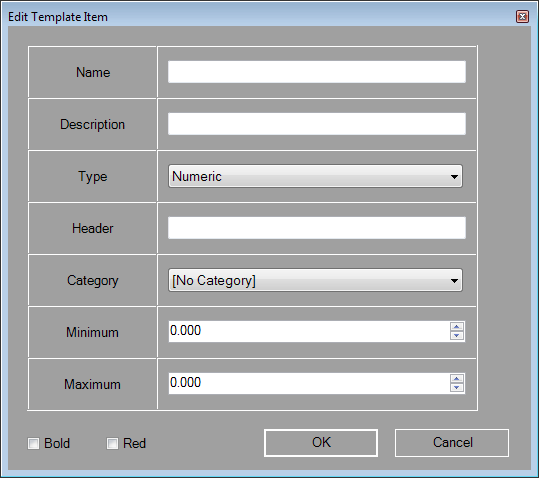
· Numeric - To allow the entry of a number. Type a Header, select a Category (an item that is a section header), set the Minimum value allowed, and set the Maximum value allowed.
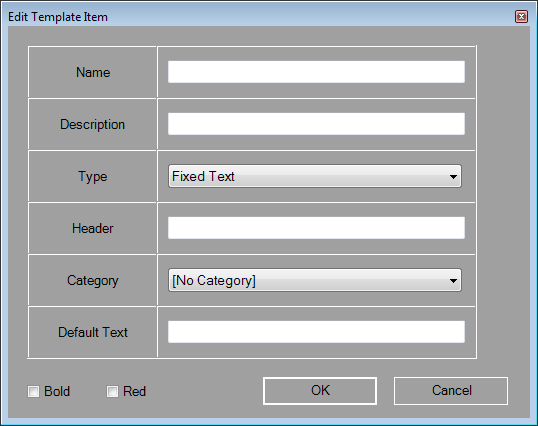
· Fixed Text - To insert static text, such as an explanation. Type a Header, select a Category (an item that is a section header), and type the desired text in the Default Text field.
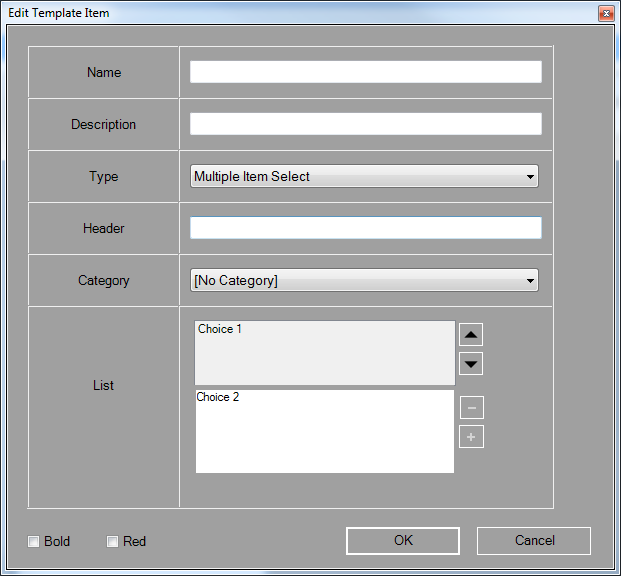
· Multiple Item Select
- To provide one or more choices and allow any or all of them to be selected.
Type a Header, select
a Category (an item
that is a section header), add choices to the List
by typing the text in the field and then clicking the Add
button  , and remove
any choices by selecting a choice and then clicking the Delete button
  .
.
Tip: You can reorder items in the list by selecting them and clicking the up or down arrows.
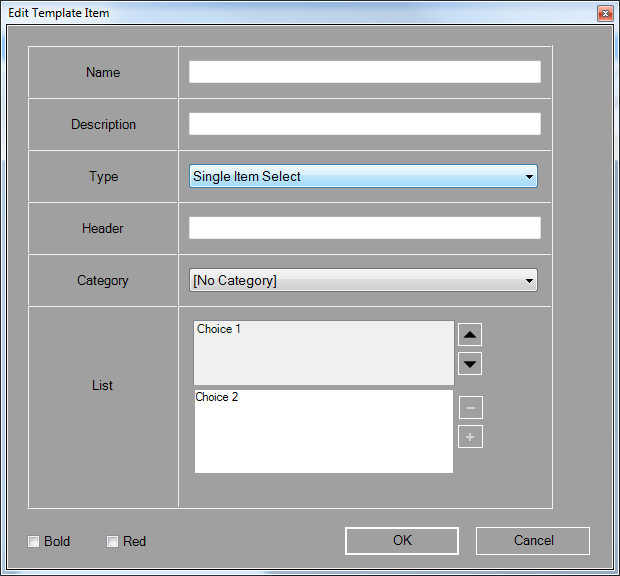
· Single Item Select
- To provide one or more choices but only allow one to be selected.
Type a Header, select
a Category (an item
that is a section header), add choices to the List
by typing the text in the field and then clicking the Add
button  , and remove
any choices by selecting a choice and then clicking the Delete button
  .
.
Tip: You can reorder items in the list by selecting them and clicking the up or down arrows.
· Merged Data - To merge specified patient information. Type a Header, select a Category (an item that is a section header), and select a Source (Patient Name, Visit Date, Patient Age, Medications, Medical History, Allergies, Alerts, or Medical Rx).

· Tooth/Surface Select - To allow the selection of a tooth or surface. Type a Header, and select a Category (an item that is a section header).

· Combination - To create a note that combines data from specified items on the template. Type a Header, select a Category (an item that is a section header), type any text, and insert merge fields for items at the location of the text cursor by selecting an item from the list and then clicking Insert.
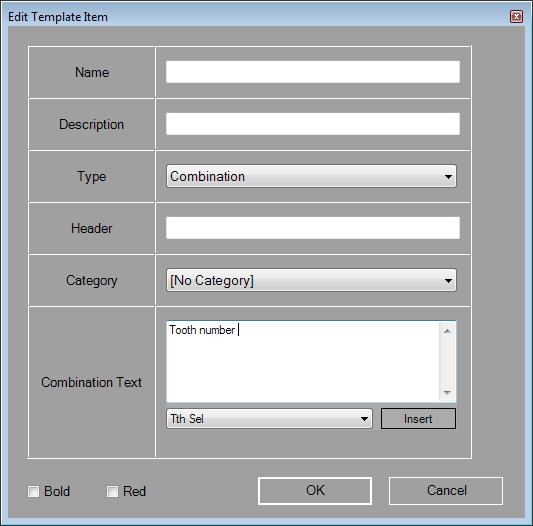
· Formatting - If applicable, select the Bold check box to make the Header text bold on the template when entering the note. Select the Red check box to make the Header text red on the template when entering the note.
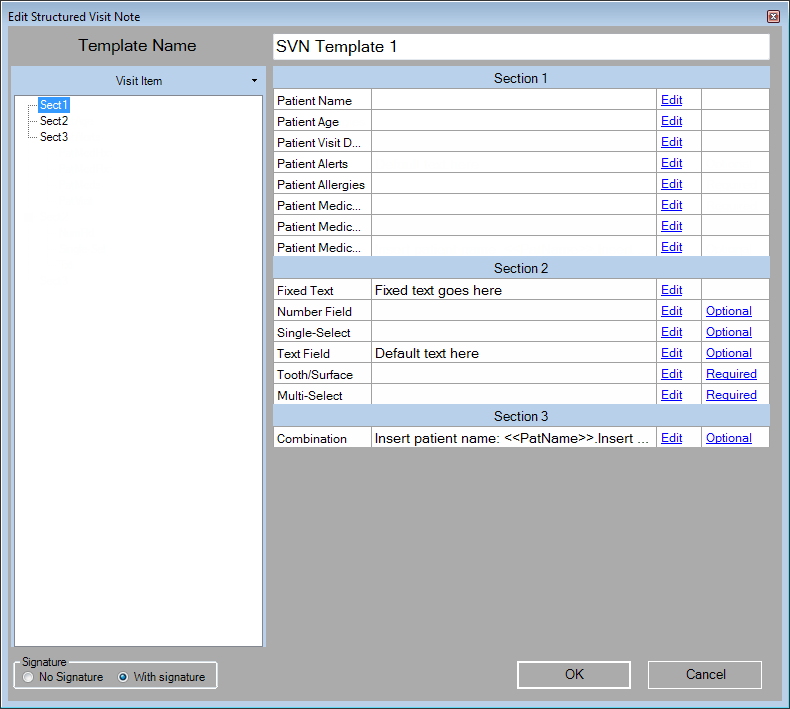
5. Drag the desired items from the list on the left to the right side of the dialog box.

6. If "Optional" appears next to an item on the template, the item is optional when entering the note. "Required" indicates that the information for the item should be specified when entering the note; however, you will be able to save the note without that information (so you can, for example, stop entering the note, do something somewhere else, and then continue entering the note). Click the Optional or Required link of any items on the template to switch between making those items required or optional.

7. Rearrange items on the template as needed by dragging them to the desired position.

8. Under Signature, select No Signature or With Signature to specify whether a provider's signature is not required or is required, respectively, for a note that is entered using this template.
|
Completed Template |
 |
9. Click OK.
Need more help?
You can visit our website, contact EndoVision Customer Support, or suggest a new feature or improvement on User Voice.


