
5/14/2024
This document explains how to install and configure the QuickBill 3.3.8.0 update.
Notes:
You should reconfigure QuickBill every time you update the Dentrix Enterprise program.
To save QuickBill settings and allow other users to work with billing statements, grant the "Users" group "Full control" of the following folders:
C:\Program Files (x86)\DXONE\QuickBill (the folder that contains the program files; the location may be different for your installation).
C:\DXONE (the writable folder that contains the Data, Doc, and Eclaims folders; the location may be different for your installation).
For information about setting up and using QuickBill, refer to the QuickBill User's Guide.
On the computer with QuickBill 3.1.0.5 installed, download and launch quickbill-update-3.3.8.0.exe.
Note: Contact Dentrix Enterprise Customer Support to get a copy of the update file.
The eServices - QuickBill - InstallShield Wizard starts.
To install the required C++ runtimes, click Install.
When the prerequisites are installed, the Preparing Setup screen appears.

Then, the Welcome page appears.

Click Next.
When the installation is complete, the Complete page appears.

Click Finish.
Log in to the Central clinic’s Office Manager, and go to Maintenance > Practice Setup > Electronic Billing Setup.
The QuickBill Setup dialog box appears.

Click Show Advanced to view advanced options, and verify that the Server URL is correct.

Add a QuickBill user account:
Click Setup Users. The QuickBill User Setup dialog box appears.

Click Add. The QuickBill User - New dialog box appears.

Enter the correct QuickBill ID and Name.
Optionally, to allow payment by credit card, select the Accept Credit Cards checkbox, and then select the option that corresponds to the types of credit cards that you will accept.
Click OK.
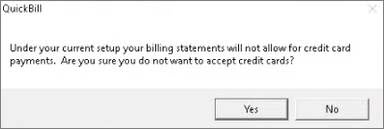
If a message about not accepting credit cards appears, click Yes (to continue) or No (to go back and allow credit card payments).
You are returned to the QuickBill User Setup dialog box.
Select the newly created user account, and then click Set as Default.
Note: An asterisk appears next to the default account.

Click Close to return to the QuickBill Setup dialog box.
Test the connection:
For Connection Method, make sure Internet is selected, and then click Test Connection.

On the message that appears if the test is successful, click OK.
Click OK to close the QuickBill Setup dialog box.