From Dentrix Enterprise (DXE), you can generate encounter and registration files to store in the National Data Warehouse (NDW) for the National Patient Information Reporting System (NPIRS).
Notes:
This feature is intended for IHS facilities only.
This data extraction utility is available only if the global setting NPIRS/NDW Data Extraction is enabled.
To store the necessary information for the files, there are now IHS standard code definitions, which can be customized, in your DXE database.
To generate files for NPIRS
In Office Manager, on the Data Extraction menu, click National Patient Information Reporting System (NPIRS).
The National Patient Information Reporting System (NPIRS) dialog box appears.
Set up the options on the following tabs:
Create Extraction
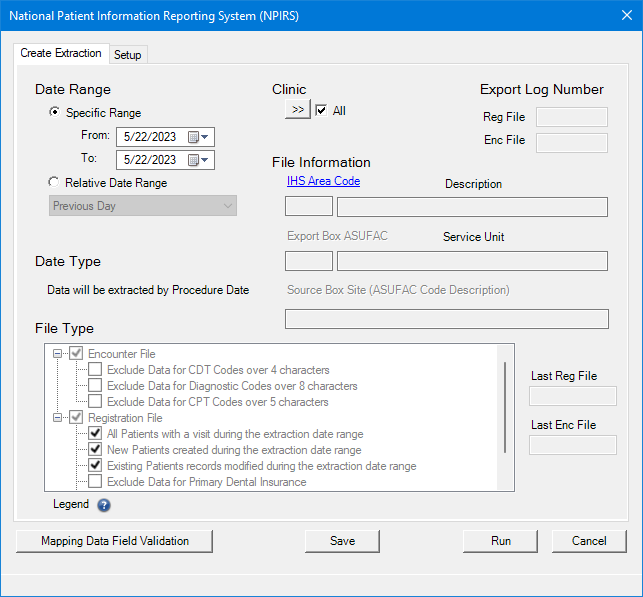
Data Range - To specify the date range of the data extraction, do one of the following:
To include patients with posted procedures that have dates within a range that you specify, select the Specific Range option. With this option selected, do one of the following:
Enter a date range (in a m/d/yyyy format) in the From and To boxes.
To select a date, do the following for From and To:
Click the corresponding calendar icon to view a month calendar.
![]()
Navigate to the correct month using the left and right arrows.
Note: To quickly change the year and month, click the month-year at the top of the calendar, navigate to the correct year using the left and right arrows, and then click the correct month.
Click the correct day.
To include patients with posted procedures that have dates within a range that is relative to the report date, select the Relative Date Range option. With this option selected, select one of the following relative date ranges from the list:
|
Previous Day Previous Week |
Previous Month Previous 3 Months Previous 6 Months |
Previous Fiscal Year Previous Calendar Year |
Note: Using a relative date range is recommended if you want to save the current report settings as the default settings so you do not have to manually enter a date range each time you generate the files.
Clinic - The clinics whose patient data will be exported. To specify clinics, do one of the following:
To include all clinics, leave the All checkbox selected.
To include specific clinics, do the following:
Click the search button  .
.
The Clinic Selection dialog box appears.
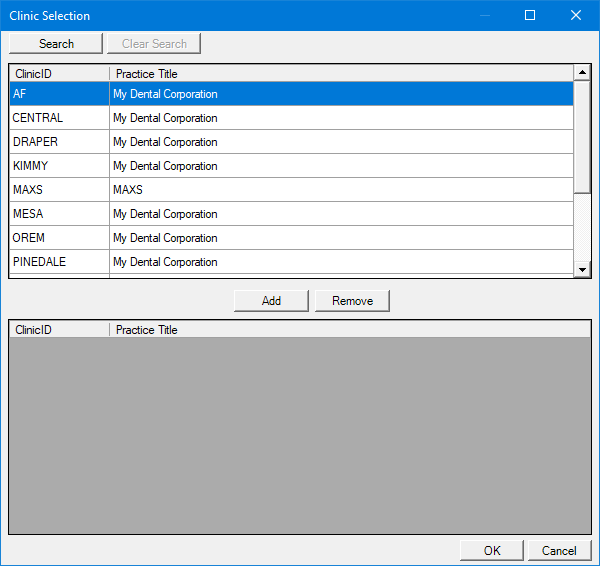
Note: If your user account has been granted the "View All Patients" security right for the Central clinic, all clinics appear in the upper list; otherwise, the clinics for which your user account has been granted the "My Clinics, View" security right (in the "Practice/Clinic Setup" category) appear in the upper list; however, if your user account has not been granted that right to any clinic, only the clinic that you are currently logged in to appears in the upper list.
To search for a clinic by ID and/or practice name, do the following:
Click Search.
Enter the first character or more of a clinic ID and/or practice title in the ClinicID and/or Practice Title boxes, respectively.
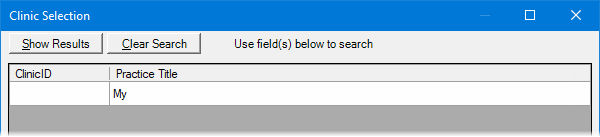
Click Show Results to view a list of matching clinics in the upper list.
Note: To return to viewing the list of all the clinics, click Search, click Clear Search to clear the search criteria that you entered, and then click Show Results.
In the upper list, select one or more clinics.
Note: To select multiple clinics, click a clinic, and then, while pressing the Ctrl key, click the other desired clinics. To select a range of adjacent clinics, click the first clinic of the desired range of clinics, and then, while pressing the Shift key, click the last clinic of the desired range of clinics.
Click Add.
Repeat steps b-d as needed to add other clinics.
Note: To remove a clinic that you added, select that clinic in the lower list, and then click Remove.
Click OK.
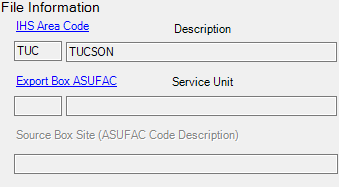
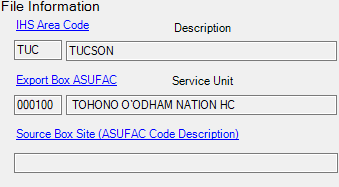
File Information:
IHS Area Code - To specify the IHS area code, do the following:
Click the IHS Area Code link.
The IHS Area Codes Selection dialog box appears.
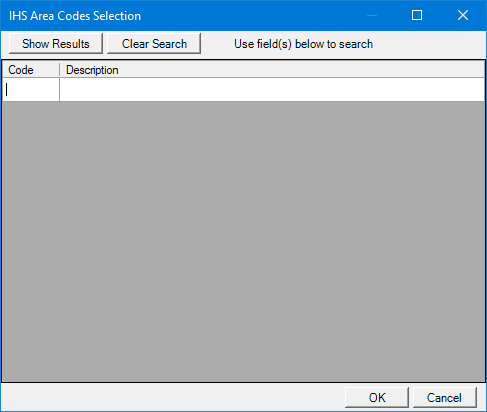
Do one of the following:
To get a list of all area codes, do not enter any search criteria.
To search for area codes by code and/or description, enter the first character or more of a code and/or description in the Code and/or Description boxes, respectively.
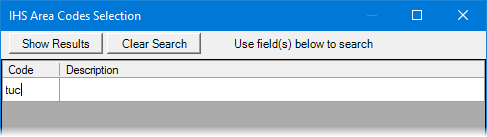
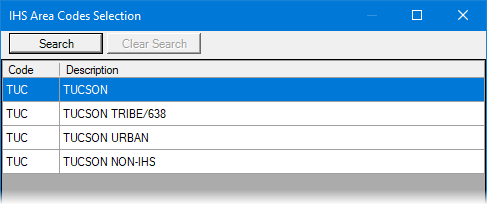
Click Show Results to view a list of matching area codes.
Note: To clear the search criteria that you entered so you can search again, click Search, and then click Clear Search. Then, repeat steps b-c.
Do one of the following:
Select an area code, and then click OK.
Double-click an area code.
Export Box ASUFAC - This link is available only if an IHS area code is selected.
To specify the export ASUFAC code, do the following:
Click the Export Box ASUFAC link.
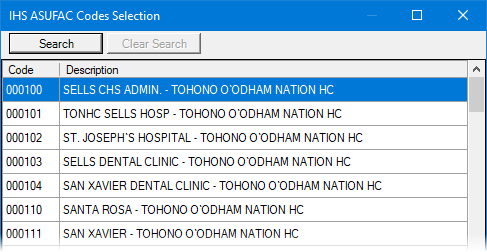
The IHS ASUFAC Codes Selection dialog box appears.
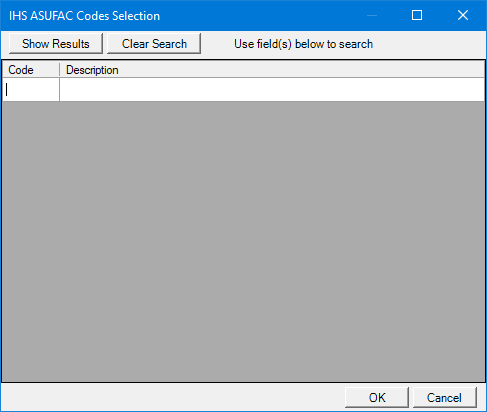
Do one of the following:
To get a list of all ASUFAC codes, do not enter any search criteria.
To search for ASUFAC codes by code and/or description, enter the first character or more of a code and/or description in the Code and/or Description boxes, respectively.

Click Show Results to view a list of matching ASUFAC codes.
Note: To clear the search criteria that you entered so you can search again, click Search, and then click Clear Search. Then, repeat steps b-c.
Do one of the following:
Select an ASUFAC code, and then click OK.
Double-click an ASUFAC code.
Source Box Site (ASUFAC Code Description) - This link is available only if an export ASUFAC code is selected. When you select an export ASUFAC code, the applicable description is selected automatically, but you can change it if necessary.
To specify a different source ASUFAC code description, do the following:
Click the Source Box Site (ASUFAC Code Description) link.
The IHS ASUFAC Codes Selection dialog box appears.
Do one of the following:
To get a list of all ASUFAC codes, do not enter any search criteria.
To search for ASUFAC codes by code and/or description, enter the first character or more of a code and/or description in the Code and/or Description boxes, respectively.
Click Show Results to view a list of matching ASUFAC codes.
Note: To clear the search criteria that you entered so you can search again, click Search, and then click Clear Search. Then, repeat steps b-c.
Do one of the following:
Select an ASUFAC code, and then click OK.
Double-click an ASUFAC code.
File Type - Select which files to generate:
Encounter File:
If applicable, select any of the following checkboxes:
Exclude Data for CDT Codes over 4 characters - With this checkbox selected, if a site has a custom code that is more than four characters long, and that code is posted during a visit, NPIRS excludes the code.
Exclude Data for Diagnostic Codes over 8 characters - With this checkbox selected, if a site has a custom code that is more than eight characters long, and that code is posted during a visit, NPIRS excludes the code.
Exclude Data for CPT Codes over 5 characters - With this checkbox selected, if a site has a custom code that is more than five characters long, and that code is posted during a visit, NPIRS excludes the code.
Registration File:
Select at least one of the following checkboxes to specify which patients' data to include:
All Patients with a visit during the extraction date range.
New Patients created during the extraction date range.
Existing Patients records modified during the extraction date range.
If applicable, select any of the following checkboxes:
Exclude Data for Primary Dental Insurance - With this checkbox selected, NPIRS excludes primary dental insurance plans (in the file, the fields for primary dental insurance plans are blank).
Exclude Data for Primary Medical Insurance - With this checkbox selected, NPIRS excludes primary medical insurance plans (in the file, the fields for primary medical insurance plans are blank).
Exclude Data for Secondary Dental Insurance - With this checkbox selected, NPIRS excludes secondary dental insurance plans (in the file, the fields for secondary dental insurance plans are blank).
Setup
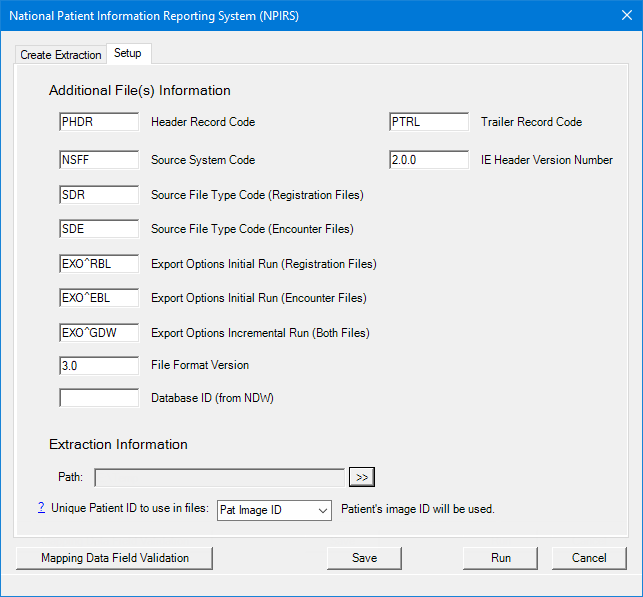
Additional File(s) Information - Make sure that all the following information for the files is correct:
Header Record Code - Such as PHDR.
Source System Code - Such as NSFF.
Source File Type Code (Registration Files) - Such as SDR.
Source File Type Code (Encounter Files) - Such as SDE.
Export Options Initial Run (Registration Files) - Such as EXO^RBL.
Export Options Initial Run (Encounter Files) - Such as EXO^EBL.
Export Options Incremental Run (Both Files) - Such as EXO^GDW.
File Format Version - Such as 3.0.
Database ID (from NDW) - An ID up to five digits long.
Trailer Record Code - Such as PTRL.
IE Header Version Number - Such as 2.0.0.
Extraction Information - To specify the directory where the exported files will be saved, do the following:
Click the Path search button  .
.
The Browse For Folder dialog box appears
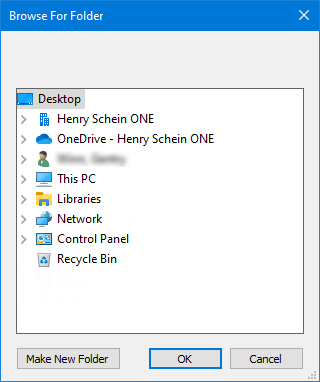
Select the correct folder.
Click OK.
Unique Patient ID to use in files - Select the ID (Pat Image ID, Pat External ID, Chart Number, Social Security #, or Other ID) that is used to identify patients in records sent and received through the HL7 interface so the patient in the Dentrix Enterprise practice management system matches the patient in the medical system or EHR. The Unique Registration Code field in Registration and Encounter files are populated with the selected unique ID.
Notes:
You can click the ? link to view an explanation regarding this option. Also, the same explanation appears any time you select a different option from the list.
"Are you sure you want to change the Patient Unique ID? If you are changing to match your EHR’s patient unique ID, please make sure that the patient unique ID is used to create the NPIRS Registration file from the EHR. If this ID is not in both Enterprise NPIRS Encounter file and the EHR NPIRS Registration file, the records in the Encounter file from Enterprise will not match to patients from the EHR NPIRS Registration file.
If you are changing this Patient Unique ID to use in both NPIRS files generated from Enterprise, just note that files already sent to NPIRS will have the current patient unique ID, so duplicate patient registration records may be added to the NDW database or an existing patient record may be overwritten by another patient's record due to unique ID collision."
Changing the ID requires the "NPIRS Unique Patient ID, Edit" security right.
To save the options on both tabs as the default for the next time you generate the files, click Save.
To verify mappings, do the following:
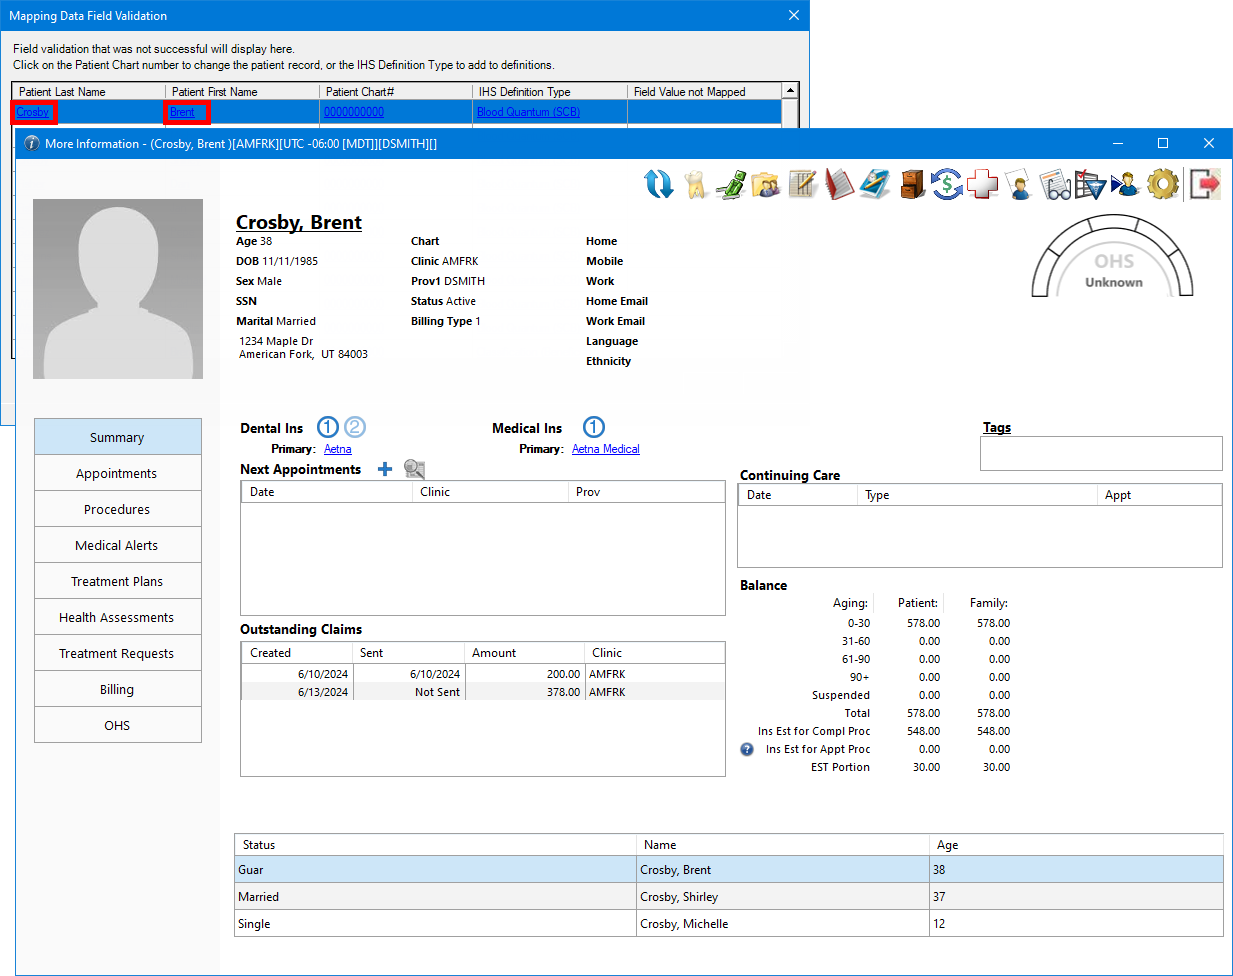
Click Mapping Data Field Validation.
The Mapping Data Field Validation dialog box appears.

Under Include, select the checkbox of each type of field you want to validate: Blood Quantum (SCB), Classification (Beneficiary) (SCB), Community (SCB), Facility (SCB), Insurance Category Code (SCB), and/or Tribe (SCB).
Click Validate Data.
For each patient listed in the Mapping Data Field Validation dialog box, do any of the following as needed:
To view patient information, click the corresponding Patient Last Name or Patient First Name link. The patient's More Information window appears.
To update patient information, do the following:
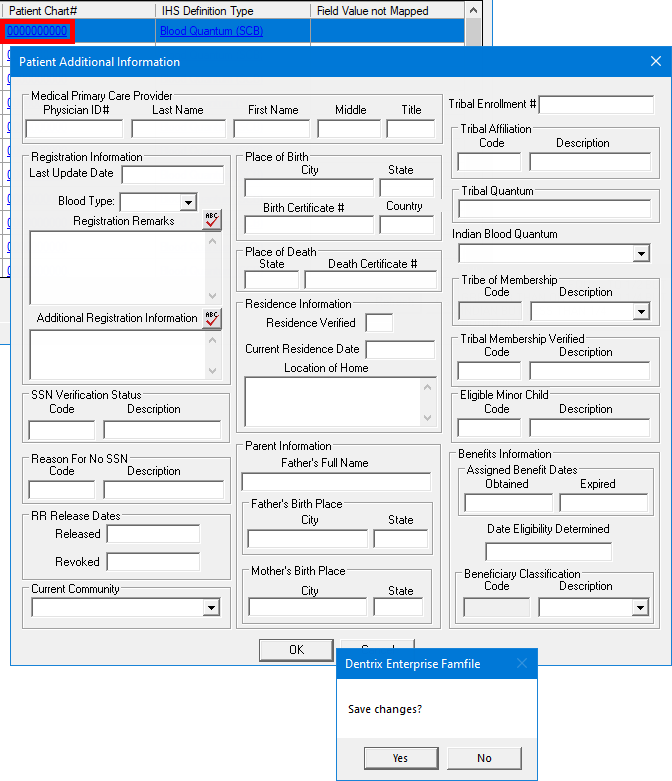
Click the corresponding Patient Chart # link.
Do one of the following:
For a blood quantum or beneficiary classification change, the Patient Additional Information dialog appears when you click the link. Make any necessary changes, click OK, and then click Yes.
For a community or tribe change, the Change Patient Record dialog box appears when you click the link. Select an option from the list, click Save, and then click OK.

To view information regarding other needed changes (such as an unmapped facility name or a missing insurance financial class type), click the corresponding Patient Chart # link. A message appears and explains what information could not be validated and where to specify the information. Click OK.
To add a definition, click the corresponding IHS Definition Type link.
Click Run.
On the message that appears when the extraction is complete, click OK.
Note: To view the extracted data, open the .txt files that were created in the specified export directory. For a detailed explanation of the NPIRS files, refer to the topic about understanding encounter and registration files for NPIRS.