
The UDS - Patient Related Revenue Report displays revenue totals for patients with procedures that were completed within a specified date range and for which claims have been created. This report uses the UDS (Uniform Data System) standards for reporting.
|
|
Why: |
To generate a record of revenue for UDS reporting for comparison with national data, and to provide revenue totals to grantees, partners, and communities |
|
When: |
As needed |
To generate the report
In DXOne Reporting, select UDS, and then double-click UDS - Patient Related Revenue.
The UDS - Patient Related Revenue dialog box appears.
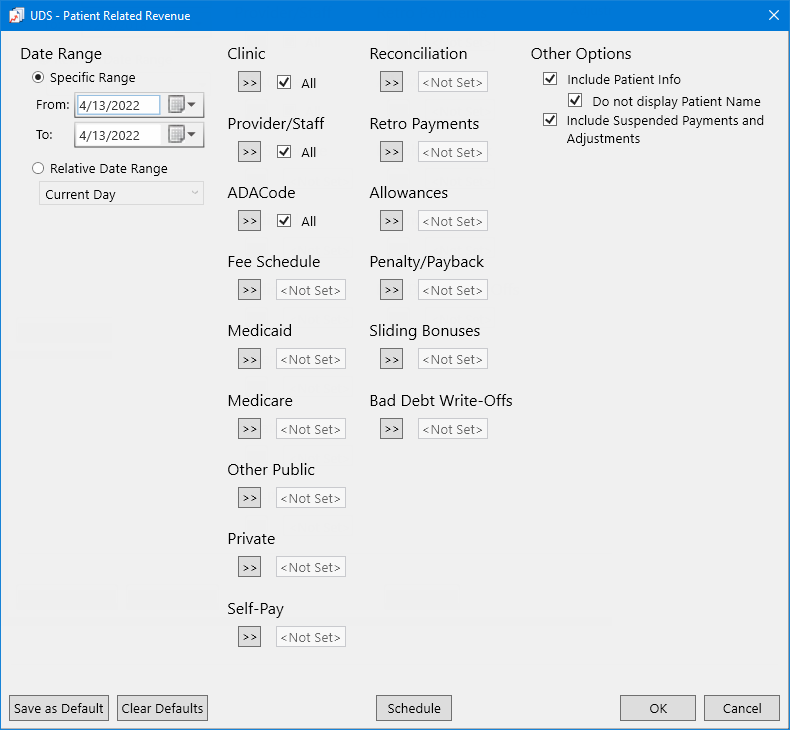
Set up the following options:
Date Range - To filter the report by date, do one of the following:
To include patients with procedures that have dates within a range that you specify, select the Specific Range option. With this option selected, do one of the following:
Enter a date range (in a m/d/yyyy format) in the From and To boxes.
To select a date, do the following for From and To:
Click the corresponding calendar icon to view a month calendar.
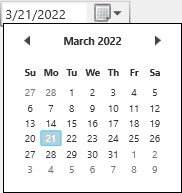
Navigate to the correct month using the left and right arrows.
Note: To quickly change the year and month, click the month-year at the top of the calendar, navigate to the correct year using the left and right arrows, and then click the correct month.
Click the correct day.
To include patients with procedures that have dates within a range that is relative to the report date, select the Relative Date Range option. With this option selected, select one of the following relative date ranges from the list:
|
Current Day Current MTD Current Fiscal YTD Current Calendar YTD |
Previous Day Previous Week Previous Month Previous 3 Months Previous 6 Months Previous Fiscal Year Previous Calendar Year |
Next Day Next Week Next Month Next 3 Months Next 6 Months Next Fiscal Year Next Calendar Year |
Note: For a patient to be included on the report, he or she must have a posted procedure with a date within the specific date range or relative date range. Also, the patient must have a corresponding claim for an insurance plan with a specified financial class, but the claim does not have to have been created within the specified date range.
Clinic - To filter the report by the clinics that are associated with procedures, do one of the following:
To include all clinics that you are allowed to generate the report for, select the All checkbox.
To include specific clinics, do the following:
Click the search button  .
.
The Select Clinics dialog box appears.
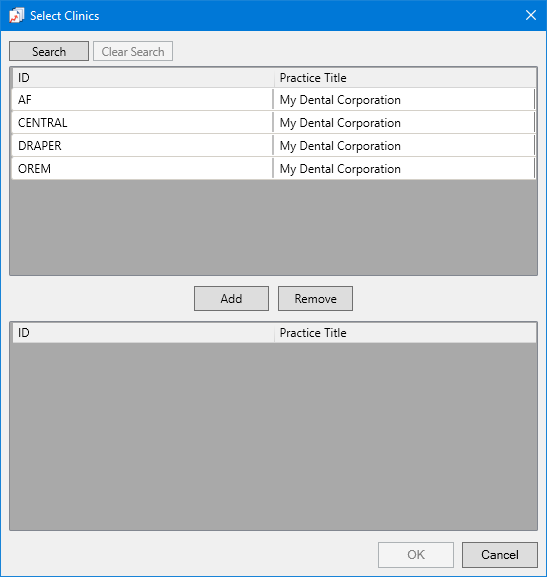
Note: Only the clinics that you are allowed to generate the report for are available.
If the list is long, to search for a clinic by ID and/or title, do the following:
Click Search.
The options for searching appear in the upper list.
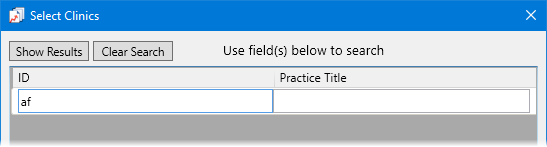
Enter the first character or more of a clinic's ID and/or title in the ID and Practice Title boxes, respectively.
Click Show Results to view a list of matching clinics.
Note: To return to viewing the list of all the clinics, click Search, click Clear Search to clear the search criteria that you entered, and then click Show Results.
In the upper list, select one or more clinics.
Note: To select multiple clinics, click a clinic, and then, while pressing the Ctrl key, click the other desired clinics. To select a range of adjacent clinics, click the first clinic of the desired range of clinics, and then, while pressing the Shift key, click the last clinic of the desired range of clinics.
Click Add.
Repeat steps b-d as needed to add other clinics.
Note: To remove a clinic that you added, select that clinic in the lower list, and then click Remove.
Click OK.
Provider/Staff - To filter the report by the providers that are associated with procedures, do one of the following:
To include all providers that you are allowed to generate the report for, select the All checkbox.
To include specific providers, do the following:
Click the search button .
The Select Providers/Staff dialog box appears.
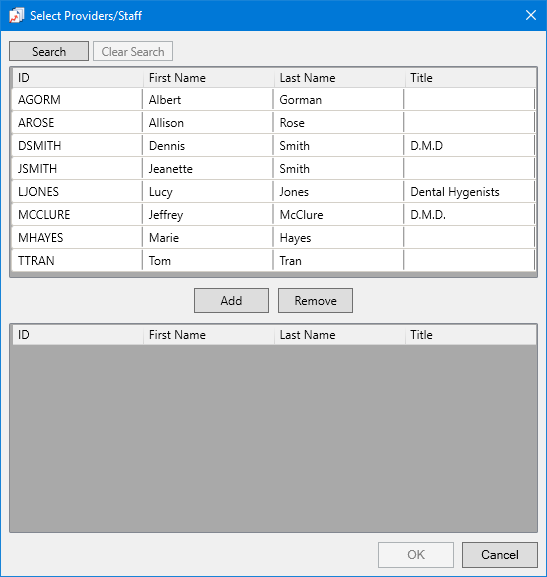
Note: Only the providers and staff that you are allowed to generate the report for are available.
If the list is long, to search for a provider by ID, first name, last name, and/or title, do the following:
Click Search.
The options for searching appear in the upper list.
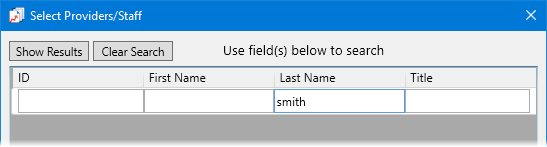
Enter the first character or more of a provider's ID, first name, last name,and/or title in the ID, First Name, Last Name, and Title boxes, respectively.
Click Show Results to view a list of matching providers and staff members.
Note: To return to viewing the list of all the providers and staff members, click Search, click Clear Search to clear the search criteria that you entered, and then click Show Results.
In the upper list, select one or more providers.
Note: To select multiple providers, click a provider, and then, while pressing the Ctrl key, click the other desired providers. To select a range of adjacent providers, click the first provider of the desired range of providers, and then, while pressing the Shift key, click the last provider of the desired range of providers.
Click Add.
Repeat steps b-d as needed to add other providers.
Note: To remove a provider that you added, select that provider in the lower list, and then click Remove.
Click OK.
Note: A procedure may appear on the report if its rendering provider is one of the specified providers for the report.
ADA Code - To filter the report by procedure code, do one of the following:
To include all procedure codes, select the All checkbox.
To include specific procedure codes, do the following:
Click the search button .
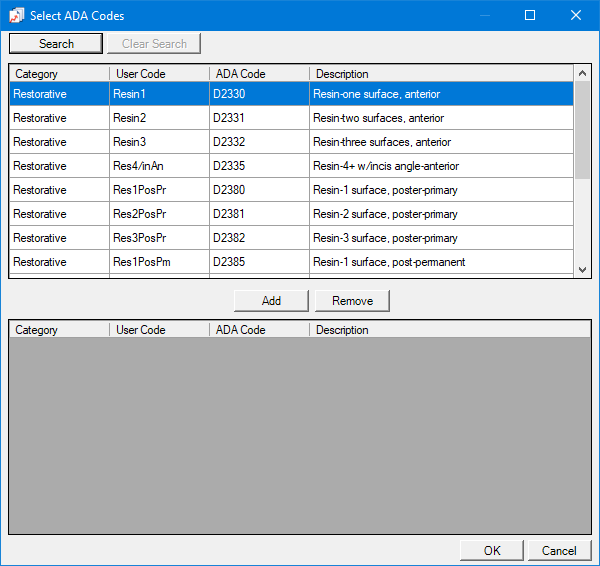
The Select ADACodes dialog box appears.
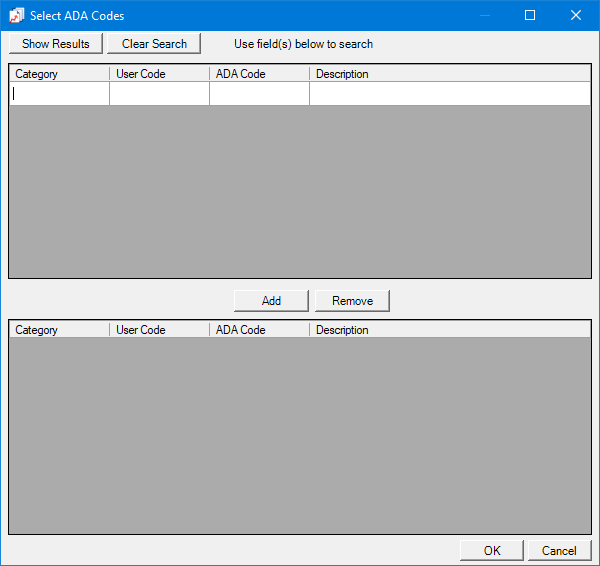
Do one of the following:
To get a list of all procedure codes, do not enter any search criteria.
To search for procedure codes by category, abbreviated description, ADA code, and/or description, enter the first character or more of a procedure code category, abbreviated description, ADA code, and/or ADA description in the Category, User Code, ADA Code, and/or Description boxes, respectively.
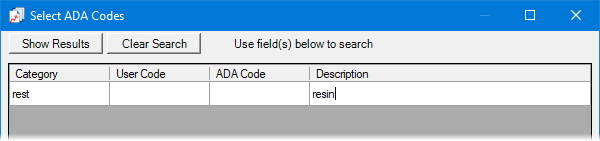
Click Show Results to view a list of matching procedure codes.
Note: To clear the search criteria that you entered so you can search again, click Search, and then click Clear Search. Then, repeat steps b-c.
In the upper list, select one or more procedure codes.
Note: To select multiple procedure codes, click a procedure code, and then, while pressing the Ctrl key, click the other desired procedure codes. To select a range of adjacent procedure codes, click the first procedure code of the desired range of procedure codes, and then, while pressing the Shift key, click the last procedure code of the desired range of procedure codes.
Click Add.
Repeat steps b-e as needed to add other procedure codes.
Note: To remove a procedure code that you added, select that procedure code in the lower list, and then click Remove.
Click OK.
Fee Schedule - To select or change which fee schedules are used for charges on the report, do the following:
Click the search button .
The Select Fee Schedules dialog box appears.

Do one of the following:
To get a list of all fee schedules, do not enter any search criteria.
To search for a fee schedule, enter the first character or more of a fee schedule's clinic ID, numeric identifier, and/or name in the Clinic, Fee Schedule #, and/or Fee Schedule Name boxes, respectively.
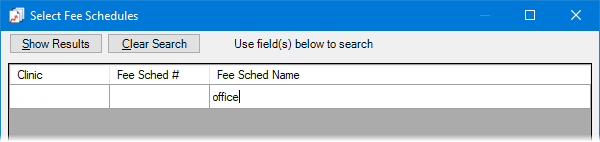
Click Show Results to view a list of matching fee schedules.

Note: To clear the search criteria that you entered so you can search again, click Search, and then click Clear Search. Then, repeat steps b-c.
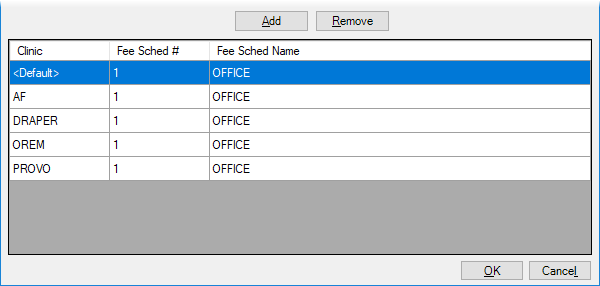
In the upper list, select one or more fee schedules.
Notes:
To use the same fee schedule for all or multiple clinics, select a fee schedule with "Default" in the Clinic column.
To use a fee schedule for a specific clinic, select a fee schedule with that clinic's ID in the Clinic column. If you do not select a fee schedule for a specific clinic, the report uses the "Default" fee schedule.
To select multiple fee schedules, click a fee schedule, and then, while pressing the Ctrl key, click the other desired fee schedules. To select a range of adjacent fee schedules, click the first fee schedule of the desired range of fee schedules, and then, while pressing the Shift key, click the last fee schedule of the desired range of fee schedules.
Click Add.
Repeat steps b-e as needed to add other fee schedules.
Note: To remove a fee schedule that you added, select that fee schedule In the lower list, and then click Remove.
Click OK.
Note: You must have at least one fee schedule selected ("<Set>" appears) to generate this report.
Important: In the "Full Charges This Period" column on the report, the fee for a procedure comes from either the selected fee schedule for the corresponding clinic or the "Default" fee schedule. Since the report uses the fee schedule selected for the report, the charge for a procedure on the report may be different from the amount charged in Ledger if the posted fee came from a fee schedule other than the one selected for the report.
Medicaid - To select or change which financial classes represent Medicaid payors, do the following:
Click the search button .
The Select Financial Class dialog box appears.
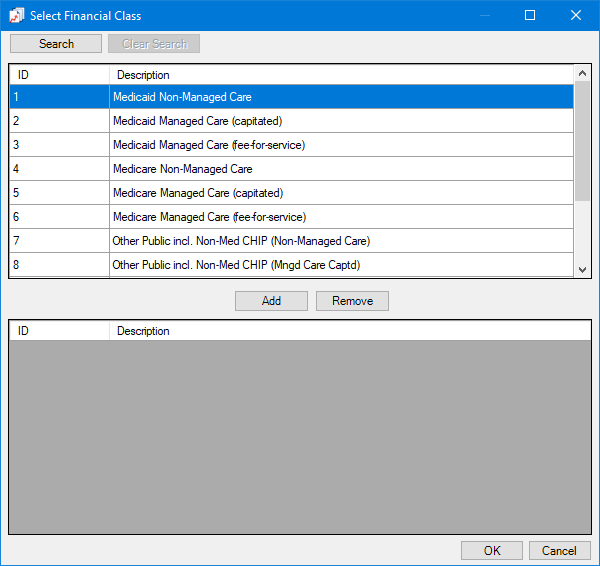
If the list is long, to search for a financial class, do the following:
Click Search.
Enter the first character or more of a financial class ID and/or description in the ID and/or Description boxes.
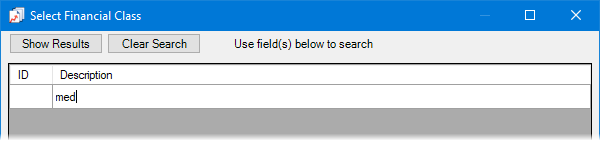
Click Show Results to view the matching financial classes.
Note: To return to viewing the list of all the financial classes, click Search, click Clear Search to clear the search criteria, and then click Show Results.
In the upper list, select one or more financial classes.
Note: To select multiple financial classes, click a financial class, and then, while pressing the Ctrl key, click the other desired financial classes. To select a range of adjacent financial classes, click the first financial class of the desired range of financial classes, and then, while pressing the Shift key, click the last financial class of the desired range of financial classes.
Click Add.
Repeat steps b-d as needed to add other financial classes.
Note: To remove a financial class that you have included, select that financial class in the lower list, and then click Remove.
Click OK.
Note: You must have at least one financial class selected ("<Set>" appears) to generate this report.
Medicare - To select or change which financial classes represent Medicare payors, do the following:
Click the search button .
The Select Financial Class dialog box appears.
If the list is long, to search for a financial class, do the following:
Click Search.
Enter the first character or more of a financial class ID and/or description in the ID and/or Description boxes.
Click Show Results to view the matching financial classes.
Note: To return to viewing the list of all the financial classes, click Search, click Clear Search to clear the search criteria, and then click Show Results.
In the upper list, select one or more financial classes.
Note: To select multiple financial classes, click a financial class, and then, while pressing the Ctrl key, click the other desired financial classes. To select a range of adjacent financial classes, click the first financial class of the desired range of financial classes, and then, while pressing the Shift key, click the last financial class of the desired range of financial classes.
Click Add.
Repeat steps b-d as needed to add other financial classes.
Note: To remove a financial class that you have included, select that financial class in the lower list, and then click Remove.
Click OK.
Note: You must have at least one financial class selected ("<Set>" appears) to generate this report.
Other Public - To select or change which financial classes represent other public payors (other than Medicaid and Medicare), do the following:
Click the search button .
The Select Financial Class dialog box appears.
If the list is long, to search for a financial class, do the following:
Click Search.
Enter the first character or more of a financial class ID and/or description in the ID and/or Description boxes.
Click Show Results to view the matching financial classes.
Note: To return to viewing the list of all the financial classes, click Search, click Clear Search to clear the search criteria, and then click Show Results.
In the upper list, select one or more financial classes.
Note: To select multiple financial classes, click a financial class, and then, while pressing the Ctrl key, click the other desired financial classes. To select a range of adjacent financial classes, click the first financial class of the desired range of financial classes, and then, while pressing the Shift key, click the last financial class of the desired range of financial classes.
Click Add.
Repeat steps b-d as needed to add other financial classes.
Note: To remove a financial class that you have included, select that financial class in the lower list, and then click Remove.
Click OK.
Note: You must have at least one financial class selected ("<Set>" appears) to generate this report.
Private - To select or change which financial classes represent private payors, do the following:
Click the search button .
The Select Financial Class dialog box appears.
If the list is long, to search for a financial class, do the following:
Click Search.
Enter the first character or more of a financial class ID and/or description in the ID and/or Description boxes.
Click Show Results to view the matching financial classes.
Note: To return to viewing the list of all the financial classes, click Search, click Clear Search to clear the search criteria, and then click Show Results.
In the upper list, select one or more financial classes.
Note: To select multiple financial classes, click a financial class, and then, while pressing the Ctrl key, click the other desired financial classes. To select a range of adjacent financial classes, click the first financial class of the desired range of financial classes, and then, while pressing the Shift key, click the last financial class of the desired range of financial classes.
Click Add.
Repeat steps b-d as needed to add other financial classes.
Note: To remove a financial class that you have included, select that financial class in the lower list, and then click Remove.
Click OK.
Note: You must have at least one financial class selected ("<Set>" appears) to generate this report.
Self-Pay - To select or change which financial classes represent self-pay payors, do the following:
Click the search button .
The Select Financial Class dialog box appears.
If the list is long, to search for a financial class, do the following:
Click Search.
Enter the first character or more of a financial class ID and/or description in the ID and/or Description boxes.
Click Show Results to view the matching financial classes.
Note: To return to viewing the list of all the financial classes, click Search, click Clear Search to clear the search criteria, and then click Show Results.
In the upper list, select one or more financial classes.
Note: To select multiple financial classes, click a financial class, and then, while pressing the Ctrl key, click the other desired financial classes. To select a range of adjacent financial classes, click the first financial class of the desired range of financial classes, and then, while pressing the Shift key, click the last financial class of the desired range of financial classes.
Click Add.
Repeat steps b-d as needed to add other financial classes.
Note: To remove a financial class that you have included, select that financial class in the lower list, and then click Remove.
Click OK.
Note: You must have at least one financial class selected ("<Set>" appears) to generate this report. In addition to the selected self-pay payors, the report includes insurance plans without a specified financial class as self-pay payors.
Reconciliation - To select or change which adjustment types represent reconciliations on the report, do the following:
Click the search button .
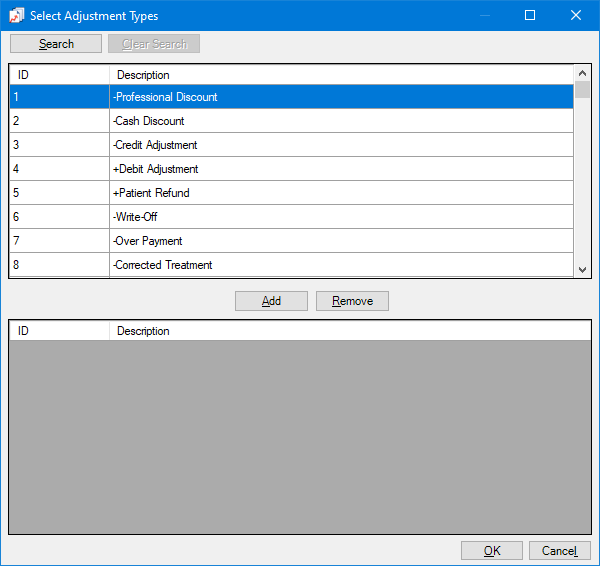
The Select Adjustment Types dialog box appears.
If the list is long, to search for an adjustment type, do the following:
Click Search.
The options for searching appear in the upper list.
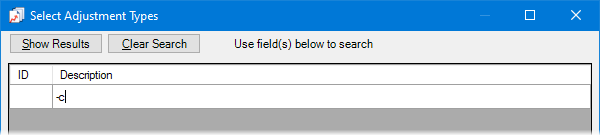
Enter the first character or more of an adjustment type's ID and/or description in the ID and Description boxes, respectively.
Note: The first character of a description is either a plus sign (+) for a debit adjustment or a dash (-) for a credit adjustment.
Click Show Results to view a list of matching adjustment types.
Note: To return to viewing the list of all the adjustment types, click Search, click Clear Search to clear the search criteria that you entered, and then click Show Results.
In the upper list, select one or more adjustment types.
Note: To select multiple adjustment types, click an adjustment type, and then, while pressing the Ctrl key, click the other desired adjustment types. To select a range of adjacent adjustment types, click the first adjustment type of the desired range of adjustment types, and then, while pressing the Shift key, click the last adjustment type of the desired range of adjustment types.
Click Add.
Repeat steps b-d as needed to add other adjustment types.
Note: To remove an adjustment type that you added, select that adjustment type in the lower list, and then click Remove.
Click OK.
Note: To be included on the report, a procedure must have one of the selected adjustment types applied to it. If no selections are set ("<Not set>" appears), only zero amounts (0.00) will appear in the corresponding columns on the report. Amounts for the selected adjustment types appear in the "Collection of Reconciliation on/Wrap Around Current Year" column and, if applicable, the "Collection of Reconciliation on/Wrap Around Previous Years" column on the report.
Retro Payments - To select or change which adjustment types represent retro payments on the report, do the following:
Click the search button .
The Select Adjustment Types dialog box appears.
If the list is long, to search for an adjustment type, do the following:
Click Search.
The options for searching appear in the upper list.
Enter the first character or more of an adjustment type's ID and/or description in the ID and Description boxes, respectively.
Note: The first character of a description is either a plus sign (+) for a debit adjustment or a dash (-) for a credit adjustment.
Click Show Results to view a list of matching adjustment types.
Note: To return to viewing the list of all the adjustment types, click Search, click Clear Search to clear the search criteria that you entered, and then click Show Results.
In the upper list, select one or more adjustment types.
Note: To select multiple adjustment types, click an adjustment type, and then, while pressing the Ctrl key, click the other desired adjustment types. To select a range of adjacent adjustment types, click the first adjustment type of the desired range of adjustment types, and then, while pressing the Shift key, click the last adjustment type of the desired range of adjustment types.
Click Add.
Repeat steps b-d as needed to add other adjustment types.
Note: To remove an adjustment type that you added, select that adjustment type in the lower list, and then click Remove.
Click OK.
Note: To be included on the report, a procedure must have one of the selected adjustment types applied to it. If no selections are set ("<Not set>" appears), only zero amounts (0.00) will appear in the corresponding column on the report. Amounts for the selected adjustment types appear in the "Collection of Other Retro Payments: P4P, Risk Pools, Withholds, etc." column on the report.
Allowances - To select or change which adjustment types represent allowances on the report, do the following:
Click the search button .
The Select Adjustment Types dialog box appears.
If the list is long, to search for an adjustment type, do the following:
Click Search.
The options for searching appear in the upper list.
Enter the first character or more of an adjustment type's ID and/or description in the ID and Description boxes, respectively.
Note: The first character of a description is either a plus sign (+) for a debit adjustment or a dash (-) for a credit adjustment.
Click Show Results to view a list of matching adjustment types.
Note: To return to viewing the list of all the adjustment types, click Search, click Clear Search to clear the search criteria that you entered, and then click Show Results.
In the upper list, select one or more adjustment types.
Note: To select multiple adjustment types, click an adjustment type, and then, while pressing the Ctrl key, click the other desired adjustment types. To select a range of adjacent adjustment types, click the first adjustment type of the desired range of adjustment types, and then, while pressing the Shift key, click the last adjustment type of the desired range of adjustment types.
Click Add.
Repeat steps b-d as needed to add other adjustment types.
Note: To remove an adjustment type that you added, select that adjustment type in the lower list, and then click Remove.
Click OK.
Note: To be included on the report, a procedure must have one of the selected adjustment types applied to it. If no selections are set ("<Not set>" appears), only zero amounts (0.00) will appear in the corresponding column on the report.
Penalty/Payback - To select or change which adjustment types represent penalties/paybacks on the report, do the following:
Click the search button .
The Select Adjustment Types dialog box appears.
If the list is long, to search for an adjustment type, do the following:
Click Search.
The options for searching appear in the upper list.
Enter the first character or more of an adjustment type's ID and/or description in the ID and Description boxes, respectively.
Note: The first character of a description is either a plus sign (+) for a debit adjustment or a dash (-) for a credit adjustment.
Click Show Results to view a list of matching adjustment types.
Note: To return to viewing the list of all the adjustment types, click Search, click Clear Search to clear the search criteria that you entered, and then click Show Results.
In the upper list, select one or more adjustment types.
Note: To select multiple adjustment types, click an adjustment type, and then, while pressing the Ctrl key, click the other desired adjustment types. To select a range of adjacent adjustment types, click the first adjustment type of the desired range of adjustment types, and then, while pressing the Shift key, click the last adjustment type of the desired range of adjustment types.
Click Add.
Repeat steps b-d as needed to add other adjustment types.
Note: To remove an adjustment type that you added, select that adjustment type in the lower list, and then click Remove.
Click OK.
Note: To be included on the report, a procedure must have one of the selected adjustment types applied to it. If no selections are set ("<Not set>" appears), only zero amounts (0.00) will appear in the corresponding column on the report.
Sliding Bonuses - To select or change which adjustment types represent sliding bonuses on the report, do the following:
Click the search button .
The Select Adjustment Types dialog box appears.
If the list is long, to search for an adjustment type, do the following:
Click Search.
The options for searching appear in the upper list.
Enter the first character or more of an adjustment type's ID and/or description in the ID and Description boxes, respectively.
Note: The first character of a description is either a plus sign (+) for a debit adjustment or a dash (-) for a credit adjustment.
Click Show Results to view a list of matching adjustment types.
Note: To return to viewing the list of all the adjustment types, click Search, click Clear Search to clear the search criteria that you entered, and then click Show Results.
In the upper list, select one or more adjustment types.
Note: To select multiple adjustment types, click an adjustment type, and then, while pressing the Ctrl key, click the other desired adjustment types. To select a range of adjacent adjustment types, click the first adjustment type of the desired range of adjustment types, and then, while pressing the Shift key, click the last adjustment type of the desired range of adjustment types.
Click Add.
Repeat steps b-d as needed to add other adjustment types.
Note: To remove an adjustment type that you added, select that adjustment type in the lower list, and then click Remove.
Click OK.
Note: To be included on the report, a procedure must have one of the selected adjustment types applied to it. If no selections are set ("<Not set>" appears), only zero amounts (0.00) will appear in the corresponding column on the report.
Bad Debt Write-Offs - To selector change which adjustment types represent bad debt write-offs on the report, do the following:
Click the search button .
The Select Adjustment Types dialog box appears.
If the list is long, to search for an adjustment type, do the following:
Click Search.
The options for searching appear in the upper list.
Enter the first character or more of an adjustment type's ID and/or description in the ID and Description boxes, respectively.
Note: The first character of a description is either a plus sign (+) for a debit adjustment or a dash (-) for a credit adjustment.
Click Show Results to view a list of matching adjustment types.
Note: To return to viewing the list of all the adjustment types, click Search, click Clear Search to clear the search criteria that you entered, and then click Show Results.
In the upper list, select one or more adjustment types.
Note: To select multiple adjustment types, click an adjustment type, and then, while pressing the Ctrl key, click the other desired adjustment types. To select a range of adjacent adjustment types, click the first adjustment type of the desired range of adjustment types, and then, while pressing the Shift key, click the last adjustment type of the desired range of adjustment types.
Click Add.
Repeat steps b-d as needed to add other adjustment types.
Note: To remove an adjustment type that you added, select that adjustment type in the lower list, and then click Remove.
Click OK.
Note: To be included on the report, a procedure must have one of the selected adjustment types applied to it. If no selections are set ("<Not set>" appears), only zero amounts (0.00) will appear in the corresponding column on the report.
Other Options - Select any of the following options as needed:
Include Patient Info - With this checkbox selected, the report lists patient names and includes the amounts for each payer category. With the checkbox clear, the report includes only the amounts for each payer category.
Do not display Patient Name - With this checkbox selected, the report does not include patient names. With this checkbox clear, the report includes patient names. This checkbox is available only if the Include Patient Info checkbox is selected.
Include Suspended Payments and Adjustments - With this checkbox selected, the report includes suspended payments and adjustments. With the checkbox clear, the report does not include suspended payments and adjustments.
Click Save as Default to save the current settings for the next time you run the report.
Click Clear Defaults to revert the dialog box options to the original defaults.
Click Schedule to schedule a report job.
Click OK to preview the report.
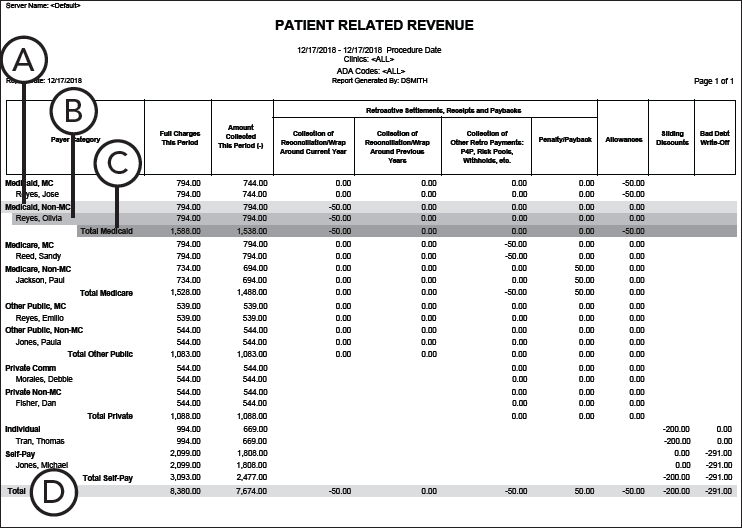
Important information this report provides
Patients on the report are grouped by financial class within each corresponding payer category.
Financial class - A breakdown of the charges, collections, retroactive collections, allowances, sliding discounts, and write-offs for payers of this financial class.
Patient - A breakdown of the charges, collections, retroactive collections, allowances, sliding discounts, and write-offs for a patient.
Note: The report includes patient breakdowns only if Include Patient Info is selected when setting up options for this report.
Payer category total - A breakdown of the total charges, collections, retroactive collections, allowances, sliding discounts, and write-offs for payers of the same type of financial class.
Grand total - A breakdown of the sum of the total charges, collections, retroactive collections, allowances, sliding discounts, and write-offs for payers in all categories.
Notes:
Sliding discounts and write-offs apply only to uninsured individuals, self-pay patients, and insured patient whose charges are not billed to insurance.
Retroactive collections and allowances apply only to insured patients.
The report includes suspended payments and adjustments only if Include Suspended Payments and Adjustments is selected when setting up options for this report.
