If Dentrix Image is installed, you can assign tooth number to any image automatically when it is acquired or manually in Dentrix Image. You can also assign tooth numbers to images from the Image panel in Chart. With tooth numbers assigned to images, you can view images on the Image panel by tooth.
To assign teeth to an image
With a patient selected in Chart, on the Image panel, right-click the image that you want to assign tooth numbers to, and then click Properties.
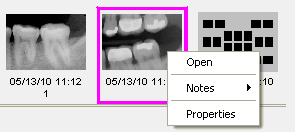
The Image Properties dialog box appears.
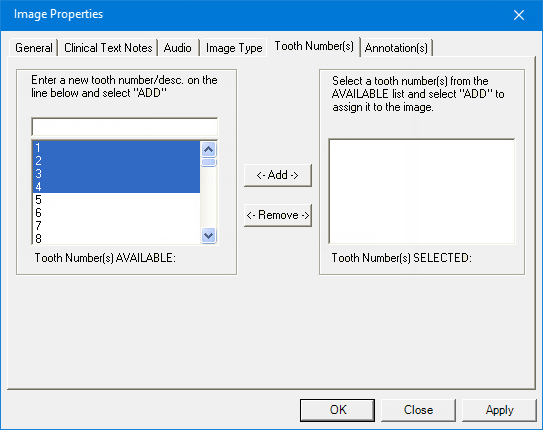
Click the Tooth Number(s) tab.
In the left list, select the tooth numbers that you want to assign to the image.
Click Add to copy the selected numbers to the right list.
Note: To remove a tooth number assignments, in the right list, select the tooth numbers that you want to unassign, and then click Remove.
Click OK.
Note: In Chart, if tooth numbers have been assigned to an image, either an X-ray icon (gray icon) appears on the left of the applicable tooth numbers on the graphical chart, or an intraoral icon (red icon) appears on the right of the applicable tooth numbers on the graphical chart.