If you use Microsoft Word 2007® or 2010®, you can choose to install an add-in for these versions of Microsoft Word during the Dentrix Enterprise installation process. With this add-in you can create custom document templates in Microsoft Word that can be merged from Dentrix Enterprise..
To create a custom document template using Word 2007 or 2010
In Microsoft Word, open a new, blank document.
Do any of the following:
Enter the text of the letter, label, or card.
To insert merge fields, do the following as needed:
When your text cursor is at a position in the document where you want to insert a merge field, on the Mailings tab, click Letter Merge Fields.

The DENTRIX Letter Merge Fields panel appears.
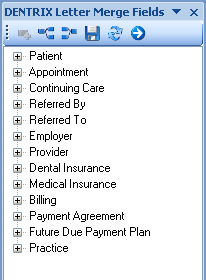
Expand and collapse the categories of the merge field list to locate the merge field you want to insert.
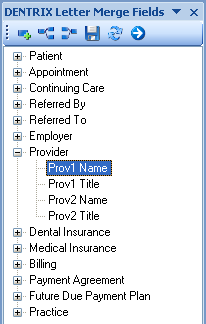
Double-click the desired item to place the merge field where your text cursor is located in the document.

Delete merge fields as needed. To delete a merge field from the letter template, click it once to select it with a gray color, and then click and drag to select the whole merge field. You should only see a blue select, no gray. Next, press the DELETE (or DEL) key on your keyboard. The merge field is removed from the document.
The following table explains the function of each button on the DENTRIX Letter Merge Fields panel's toolbar:
|
Click the Insert Field button to insert the selected merge field on the panel into the document. |
|
Click the Expand All button to expand all the merge field categories on the panel. |
|
Click the Collapse All button to collapse all the merge field categories on the panel. |
|
Click the Save Letter Merge Fields button to save the custom document template. |
|
Click the Reload Letter Merge Fields button to reload the items on the panel. |
|
Click the Insert Next button to insert a {Next} merge field into the document so that Word knows to repeat the letter merge for the next patient record. |
Save your custom document template: click
the Save Letter Merge Fields button
![]() on the DENTRIX Letter Merge Fields
panel's toolbar; and in the Microsoft
Word Save As dialog box, name your custom document template, and
then click Save. The name you
give the document can be no more than seven characters in length.
on the DENTRIX Letter Merge Fields
panel's toolbar; and in the Microsoft
Word Save As dialog box, name your custom document template, and
then click Save. The name you
give the document can be no more than seven characters in length.
When setting up merge data for a document template in Dentrix Enterprise, the name of the document you have created will go in the Merge Letter Template box of the Patient Report View dialog box.
Note: To make sure that you save the document in the correct document directory, in Office Manager, expand the Maintenance menu, point to Practice Setup, click Preferences, and then click the Paths tab. The Document Path box indicates where Dentrix Enterprise looks for your document templates to merge.