The Patient Notes Report displays any notes you have entered for a patient. You can indicate which patients to print based on name, provider, or billing type, and you can select which types of notes to include.
|
Why: |
To view notes and alerts by patient |
When: |
As needed |
Note: Generating a report in Office Manager requires the "Reports" security right. Viewing or printing a report in the Batch Processor requires the "Batch Processor, Print/Display Reports" security right.
To generate the Patient Notes Report
In Office Manager, on the Reports menu, point to Lists, and then click Patient Notes Report.
Notes:
Whether the list reports appear on the menu or not is determined by a setting.
Also, this option is available only if your user account has been granted the "Reports" security right.
The Patient Notes Report dialog box appears.
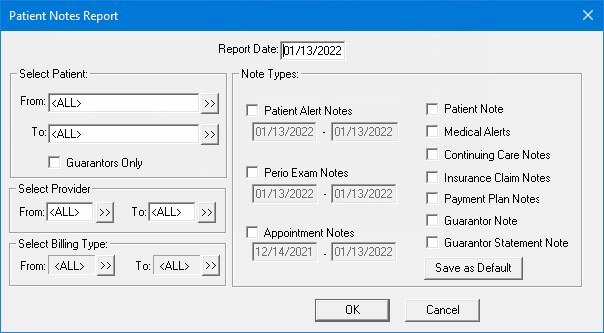
Set up the following options:
Report Date - By default, the date of the report is today's date, but you can change it. In the box, enter the date (in a mm/yy/dddd format) that you want to have appear at the top of the report.
Note: Dentrix Enterprise automatically adds slashes to dates when you enter six or eight numbers (mmddyy or mmddyyyy) and then press the Tab key.
Select Patient - Notes for the specified patients appear on the report. However, if you want to include notes only for heads-of-household, select the Guarantors Only checkbox. To specify patients/guarantors, do one of the following:
To include all patients/guarantors, leave <ALL> entered for both From and To.
To include a specific range of patients/guarantors, enter or select the starting patient/guarantor (alphabetically by last name) of the range for From and the ending patient/guarantor of the range for To.
To include a specific patient/guarantor, enter or select the same patient/guarantor for From and To.
To include an open-ended range of patients/guarantors, enter or select a patient/guarantor for either From or To, and leave <ALL> entered for the other option.
To select a patient/guarantor for From or To, do the following:
Click the corresponding search button
 .
.
The Select Patient dialog box appears.
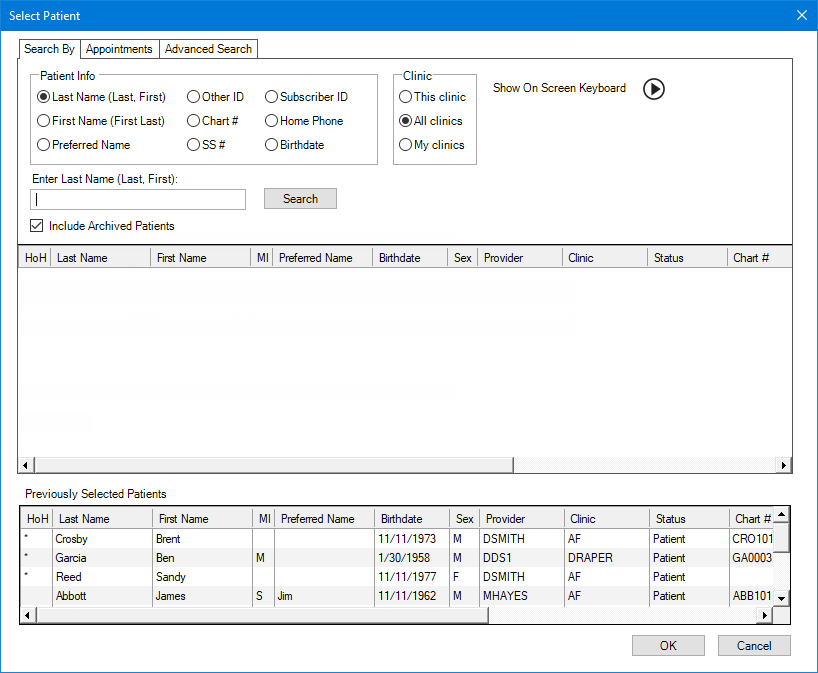
Search for and select a patient/guarantor.
Note: For information about all the search options that are available in the Select Patient dialog box, refer to the topic about selecting a patient.
Click OK.
Select Provider - Only notes for patients/guarantors whose preferred providers (Prov1 in Family File) are the specified providers may appear on the report. To specify providers, do one of the following:
To include all providers, leave <ALL> entered for both From and To.
To include a specific range of providers, select the starting provider (alphabetically by ID) of the range for From and the ending provider of the range for To.
To include a specific provider, select the same provider for both From and To.
To include an open-ended range of providers, select a provider for either From or To, and then type <ALL> for the other option.
To select a provider for From or To, do the following:
Click the corresponding search button
.
The Select Provider dialog box appears.
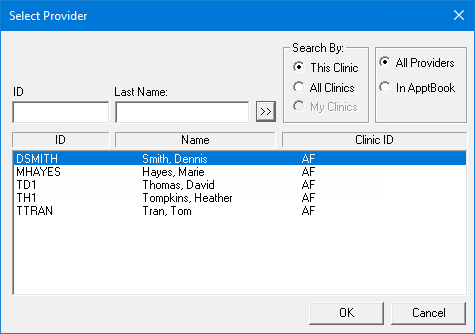
Either leave the ID and Last Name boxes empty to get a list of all providers, or enter all or part of a provider's ID or last name in the ID or Last Name box, respectively, to search for a provider.
Under Search By, select one of the following options: This Clinic, to search for the provider in the clinic that you are currently logged in to; All Clinics, to search for the provider in all clinics; or My Clinics, to search for the provider in the clinics to which you have been granted the "My Clinics, Select Provider " security right.
Notes:
The All Clinics option is available only if your user account has been granted the "View All Providers" security right for the Central clinic and if your user account has not been granted the "My Clinics, Select Provider" security right for the clinic that you are currently logged in to.
The My Clinics option is available only if your user account has been granted the "My Clinics, Select Provider" security right for at least one clinic and if your user account has not been granted the "View All Providers" security right for the Central clinic.
Either select the All Providers option to include providers who are associated with clinics (and who have a Log On User ID), or select the In ApptBook option to include providers who have been set up in Appointment Book.
Click
the search button .
The matching primary and secondary providers appear in the list.
Select the correct provider.
Click OK.
Select Billing Types - Only notes for patients/guarantors with the specified billing types may appear on the report. To specify billing types, do one of the following:
To include all billing types, select <ALL> for both From and To.
To include a specific range of billing types, select the starting billing type of the range for From and the ending billing type of the range for To.
To include a specific billing type, select the same billing type for both From and To.
To include an open-ended range of billing types, select a billing type for either From or To, and then select <ALL> for the other option.
To select a billing type for From or To, do the following:
Click the corresponding search button
.
The Select Billing Type dialog box appears.
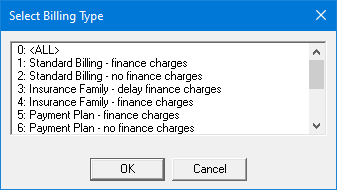
In the list, select a billing type.
Click OK.
Note Types - Select or clear the following checkboxes to specify which types of notes you want to include on the report and which types of notes you do not want to include, respectively:
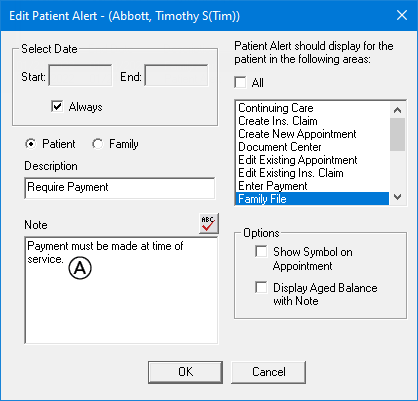
Patient Alert Notes - Notes that have been entered for patient alerts that have been entered for the patient or the patient's family. With this checkbox selected, to filter the notes by date, do one of the following:
To include notes that were entered only on the current date, leave the current date entered in both boxes.
To include the notes that were entered within a date range that you specify, enter the starting date (in a mm/dd/yyyy format) of the range in the first box and the ending date (in a mm/dd/yyyy format) of the range in the second box.
To include notes that were entered on a specific date, enter that date (in a mm/dd/yyyy format) in both boxes.
Note: Dentrix Enterprise automatically adds slashes to dates when you enter six or eight numbers (mmddyy or mmddyyyy) and then press the Tab key.
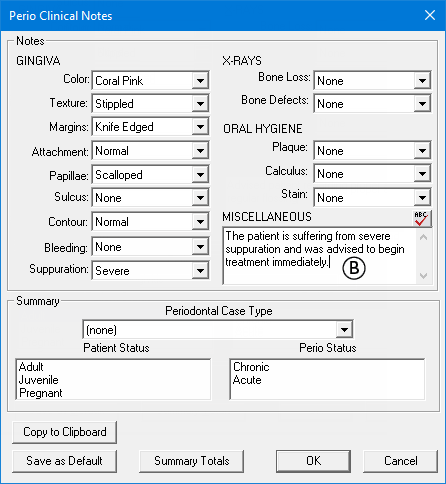
Perio Exam Notes - Diagnostics that have been entered for the patient in the Perio Clinical Notes dialog box (which you can access from the Diagnostics menu in Perio Chart). With this checkbox selected, to filter the notes by date, do one of the following:
To include notes that were entered only on the current date, leave the current date entered in both boxes.
To include the notes that were entered within a date range that you specify, enter the starting date (in a mm/dd/yyyy format) of the range in the first box and the ending date (in a mm/dd/yyyy format) of the range in the second box.
To include notes that were entered on a specific date, enter that date (in a mm/dd/yyyy format) in both boxes.
Note: Dentrix Enterprise automatically adds slashes to dates when you enter six or eight numbers (mmddyy or mmddyyyy) and then press the Tab key.
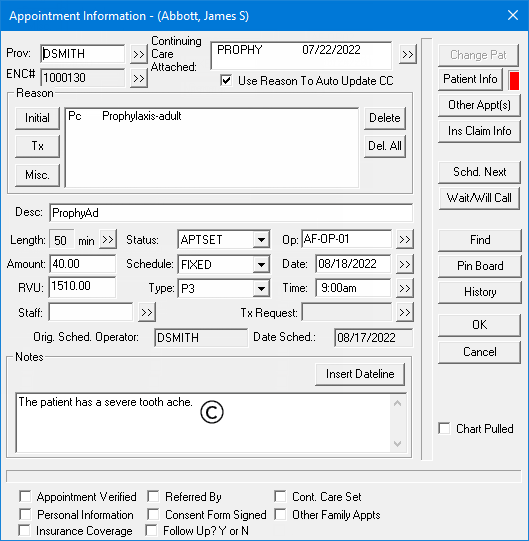
Appointment Notes - Notes that are attached to appointments for the patient. With this checkbox selected, to filter the notes by date, do one of the following:
To include notes that are attached to scheduled appointments for the past month, leave the one-month-prior-to-today date in the first box and the current date in the second box.
To include the notes that are attached to scheduled appointments for a date range that you specify, enter the starting date (in a mm/dd/yyyy format) of the range in the first box and the ending date (in a mm/dd/yyyy format) of the range in the second box.
To include notes that are attached to scheduled appointments for a specific date, enter that date (in a mm/dd/yyyy format) in both boxes.
Note: Dentrix Enterprise automatically adds slashes to dates when you enter six or eight numbers (mmddyy or mmddyyyy) and then press the Tab key.
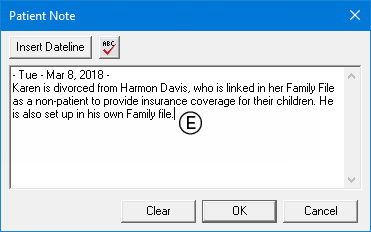
Patient Notes - Patient Notes that have been entered in Family File for the patient.
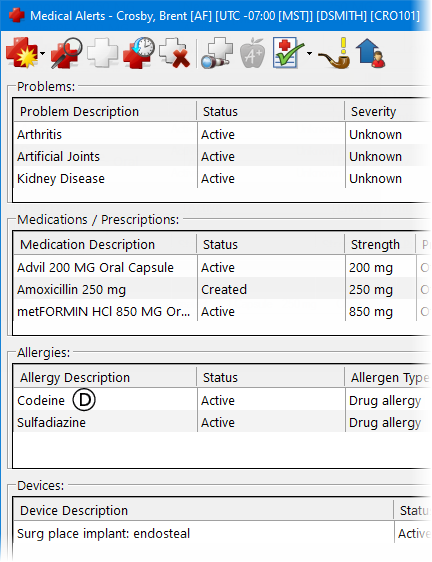
Medical Alerts - Notes that have been added to medical alerts that have been entered for the patient.
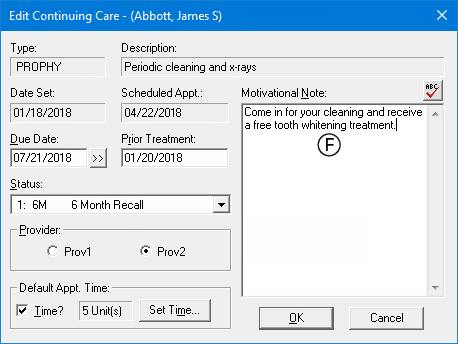
Continuing Care Notes - Motivational notes that have been added to the continuing care types that are assigned to the patient.
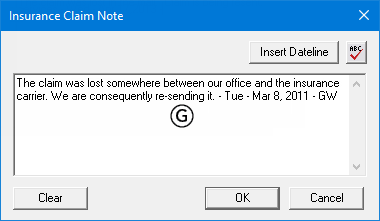
Insurance Claim Notes - Notes that have been entered on insurance claims for the patient.
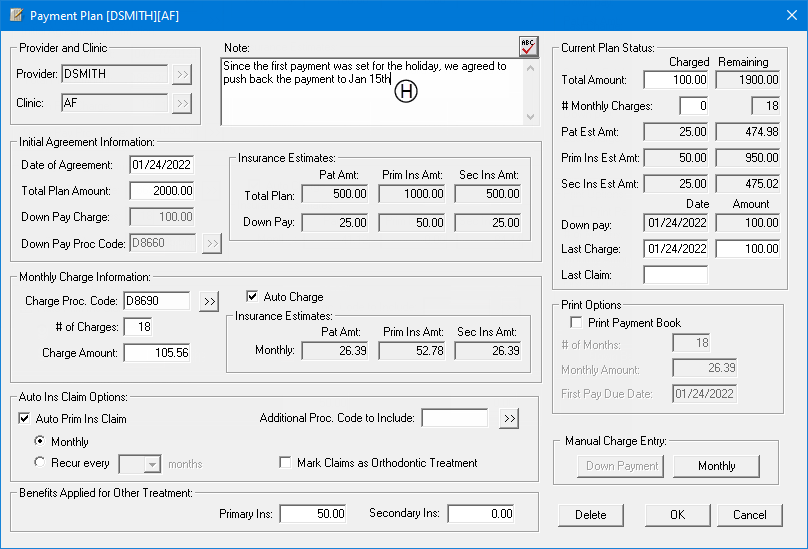
Payment Plan Notes - Notes that have been added to future due payment plans for the patient.
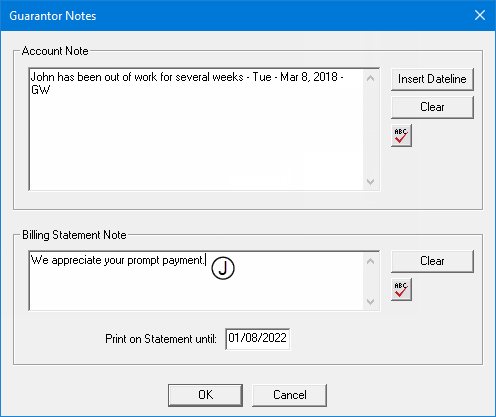
Guarantor Note - Account note for the patient's family record.
Guarantor Statement Note - Billing statement note for the patient's family record.
To save the selected options for the next time that you run the report, click Save As Default.
Click OK to send the report to the Batch Processor.
Preview and then print the report, or print the report without previewing it.

Patient Alert Notes - The patient alerts that are assigned to the patient. To access the notes for a patient alert, in Family File, click the Patient Alerts button, and then double-click a patient alert.
Perio Exam Notes - The notes that are attached to the patient’s perio exam. To access the notes for a perio exam, in Perio Chart, select an exam, and then click Diagnostics on the menu bar.
Appointment Notes - The notes that are attached to the patient’s appointment. To access the notes for an appointment, in Appointment Book, double-click an appointment tile.
Medical Alerts - The descriptions of problems, medications/prescriptions, allergies, and devices that are attached to the patient. To access medical alerts, in Family File, double-click the Medical Alerts block.
Patient Notes - The notes that are attached to the patient's Family File record. To access patient notes, in Family File, double-click the Patient Notes block.
Continuing Care Notes - The notes that are attached to a patient’s continuing care type. To access the notes for a continuing care type, in Family File, double-click the Continuing Care block, and then double-click a continuing care type.
Insurance Claim Notes - The notes that are attached to the patient's insurance claim. To access the notes for a claim, in Ledger, double-click an insurance claim, and then click Note on the menu bar.
Payment Plan Notes - The notes that are attached to a future due payment plan. To access the notes for a future due payment plan, in Ledger, expand the Transaction menu, click Process Future Due Payment Plan, select a future due payment plan, and then click Edit.
Guarantor Note - The account note that is attached to the patient's guarantor. To access the account note, in Ledger, click the Guarantor Notes button.
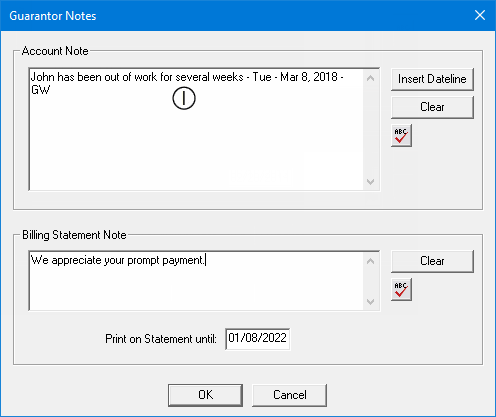
Guarantor Statement Note - The billing statement note that is attached to the patient's guarantor. To access the billing statement note, in Ledger, click the Guarantor Notes button.