The Patient Revenue List by Payer Report displays the total amount of charges, payments, and adjustments that have been posted to a given patient's record, on a given service date or entry date, and for a given payer.
|
Why: |
To track revenue by payer |
When: |
As needed |
To generate the report
In DXOne Reporting, select Lists, and then double-click Patient Revenue List By Payer.
The Patient Revenue List By Payer dialog box appears.

Set up the following options:
Date Range - To filter the report by date, do one of the following:
To include transactions that have dates (based on the Date Type) within a range that you specify, select the Specific Range option. With this option selected, do one of the following:
Enter a date range (in a m/d/yyyy format) in the From and To boxes.
To select a date, do the following for From and To:
Click the corresponding calendar icon to view a month calendar.

Navigate to the correct month using the left and right arrows.
Note: To quickly change the year and month, click the month-year at the top of the calendar, navigate to the correct year using the left and right arrows, and then click the correct month.
Click the correct day.
To include transactions that have dates (based on the Date Type) within a range that is relative to the report date, select the Relative Date Range option. With this option selected, select one of the following relative date ranges from the list:
Current Day Current MTD Current Fiscal YTD Current Calendar YTD |
Previous Day Previous Week Previous Month Previous 3 Months Previous 6 Months Previous Fiscal Year Previous Calendar Year |
Next Day Next Week Next Month Next 3 Months Next 6 Months Next Fiscal Year Next Calendar Year |
Date Type - Select one of the following options:
Entry Date - To include a transaction based on the date that it was created (entered into the database).
Procedure Date - To include a transaction based on the date that was specified for it.
Notes:
Most of the time, a transaction will have the same entry and procedure date. They will differ only if you backdate the transaction.
Using a relative date range is recommended if you want to save the current report settings as the default settings so you do not have to manually enter a date range each time you run the report.
Patient - To filter the report by the patients who are associated with transactions, do one of the following:
To include all patients in the clinics that you are allowed to generate the report for, select the All checkbox for both From and To.
To include a specific range of patients, select the starting patient (alphabetically by last name) of the range for From and the ending patient of the range for To.
To include a specific patient, select the same patient for both From and To.
To include an open-ended range of patients, select a patient for either From or To, and then select the All checkbox for the other option.
To select a specific patient for From or To, do the following:
Click the corresponding search button
 .
.
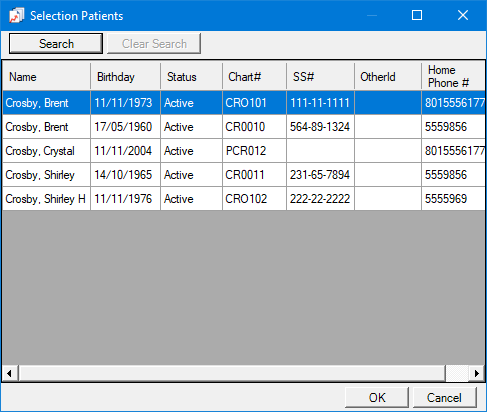
The Selection Patients dialog box appears.

Note: Only the patients in the clinics that you are allowed to generate the report for are available.
Do one of the following:
To get a list of all patients, do not enter any search criteria.
To search for patients by last name, birth date, status, chart number, Social Security Number, ID, and/or home phone number, enter the first character or more of a patient's last name, birth date, status, chart number, Social Security Number, ID, and/or home phone number in the Name, Birthday, Status, Chart#, SS#, OtherId, and Home Phone # boxes, respectively.

Note: To clear any text that you have entered, click Clear Search.
Click Show Results to view a list of patients.
Note: To clear the list so you can search again, click Search.
In the list, select a patient.
Click OK.
Clinic - To filter the report by the clinics that are associated with transactions, do one of the following:
To include all clinics that you are allowed to generate the report for, select the All checkbox.
To include specific clinics, do the following:
Click the search button .
The Select Clinics dialog box appears.

Note: Only the clinics that you are allowed to generate the report for are available.
If the list is long, to search for a clinic by ID and/or title, do the following:
Click Search.
The options for searching appear in the upper list.

Enter the first character or more of a clinic's ID and/or title in the ID and Practice Title boxes, respectively.
Click Show Results to view a list of matching clinics.
Note: To return to viewing the list of all the clinics, click Search, click Clear Search to clear the search criteria that you entered, and then click Show Results.
In the upper list, select one or more clinics.
Note: To select multiple clinics, click a clinic, and then, while pressing the Ctrl key, click the other desired clinics. To select a range of adjacent clinics, click the first clinic of the desired range of clinics, and then, while pressing the Shift key, click the last clinic of the desired range of clinics.
Click Add.
Repeat steps b-d as needed to add other clinics.
Note: To remove a clinic that you added, select that clinic in the lower list, and then click Remove.
Click OK.
Patient Status - To filter the report by the statuses that are associated with patients who have transactions entered in their records, do one of the following:
To include all patient statuses, select the All checkbox.
To include specific patient statuses, do the following:
Click the search button .
The Select Patient Status dialog box appears.

To search for a patient status by ID and/or name, do the following:
Click Search.
The options for searching appear in the upper list.

Enter the first character or more of a patient status's ID and/or name in the ID and Patient Status boxes, respectively.
Click Show Results to view a list of matching patient statuses.
Note: To return to viewing the list of all the patient statuses, click Search, click Clear Search to clear the search criteria that you entered, and then click Show Results.
In the upper list, select one or more patient statuses.
Note: To select multiple patient statuses, click a patient status, and then, while pressing the Ctrl key, click the other desired patient statuses. To select a range of adjacent patient statuses, click the first patient status of the desired range of patient statuses, and then, while pressing the Shift key, click the last patient status of the desired range of patient statuses.
Click Add.
Repeat steps b-d as needed to add other patient statuses.
Note: To remove a patient status that you added, select that patient status in the lower list, and then click Remove.
Click OK.
Patient Tag - Do one of the following:
To not filter the report by a patient tag, clear the Run By Patient Tag checkbox.
To filter the report by the tags that are assigned to patients who have transactions entered in their records, select the Run By Patient Tag checkbox. With this checkbox selected, the options to filter the report by tag are available. Do one of the following:
To include patients with any patient tag, select the All checkbox.
To include patients with specific tags, do the following:
Click the search button ![]() .
.
The Patient Tag Selection dialog box appears.

If the list is long, to search for a patient tag, do the following:
Click Search.
The options for searching appear in the upper list.

Enter the first character or more of a patient tag name in the Tag Name box.
Click Show Results to view a list of matching patient tags.
Note: To return to viewing the list of all the patient tags, click Search, click Clear Search to clear the search criteria that you entered, and then click Show Results.
In the upper list, select one or more patient tags.
Note: To select multiple patient tags, click a patient tag, and then, while pressing the Ctrl key, click the other desired patient tags. To select a range of adjacent patient tags, click the first patient tag of the desired range of patient tags, and then, while pressing the Shift key, click the last patient tag of the desired range of patient tags.
Click Add.
Repeat steps b-d as needed to add other patient tags.
Note: To remove a patient tag that you added, select that patient tag in the lower list, and then click Remove.
Click OK.
Other Options - Select or clear the following checkboxes as needed:
Excel Friendly - With this check box selected, the report displays the data in a format that you can easily export to a spreadsheet program. With this checkbox clear, the report displays data in its standard format.
Do not display Patient Name - With this checkbox selected, the report does not display patient names. With this checkbox clear, the report displays patient names.
Click Save as Default to save the current settings for the next time you run the report.
Click Clear Defaults to revert the dialog box options to the original defaults.
Click Schedule to schedule a report job.
Click OK to preview the report.

Important information this report provides
You can hide the patient names by selecting the Do not display Patient Name check box when setting up the options to run this report. You can also display this report in a format that you can easily export to a spreadsheet program. The list is sorted by patient, date, and then payer.
Payer Name, Patient Name, and Date of Service/Entry Date - The following details appear:
The name of the primary dental insurance carrier of a claim that has a completed procedure attached to it. If the procedure is not attached to a primary dental claim, the payer is blank. If the procedure is attached to a primary medical claim and then to primary dental claim, the payer is blank. For a transaction on a date that is not associated with a payer, the payer is blank.
The last name, first name, and middle initial of the patient.
The date of service (if the report was run by Procedure Date) or entry date (if the report was run by Entry Date).
Total Charges by Service Date/Entry Date - The sum of the charges affecting the family balance:
Completed procedures
Charge adjustments
Insurance charge adjustments.
Finance and late charges.
Charge initial balances.
Charge special adjustments.
Total Payments by Service Date/Entry Date - The sum of the payments affecting the family balance:
Guarantor payments.
Insurance payments.
Total Adjustments by Service Date/Entry Date - The sum of the other credits affecting the family balance:
Credit adjustments.
Credit initial balances.
Credit special adjustments.
Notes:
The allocation date, as it relates to showing a portion of a payment, should not be considered on the report however allocations as they tie back to charges should be considered.
For example, a given patient has the following on a given date:
A completed procedure for $100.00 that is attached to a claim for a given payer (Aetna).
A guarantor payment of $50.00, with $25.00 of it being applied to the completed procedure, and the remaining $25.00 is suspended.
Then, the $25.00 that was applied the completed procedure and is attached to a claim appears on the line where Aetna is the payer. The guarantor payment of $25.00 appears on a line where the payer is blank because this portion is not associated with a payer.
Allocated credits should be inherited from the associated charge clinic. This essentially means that the report is run by rendering clinic. Any portion of a credit that is not associated with a charge will use the clinic associated with that credit.

