The Patient Information Accessed Report helps you track when any patient's record has been viewed.
|
Why: |
To ensure that patient information is being viewed in accordance with patient privacy standards in your office, and to inform the doctor, office manager, and business owner of any situations so that appropriate action can be taken if necessary |
When: |
Monthly, and as needed |
To generate the report
In DXOne Reporting, select Audit, and then double-click Patient Information Accessed.
The Patient Information Accessed dialog box appears.
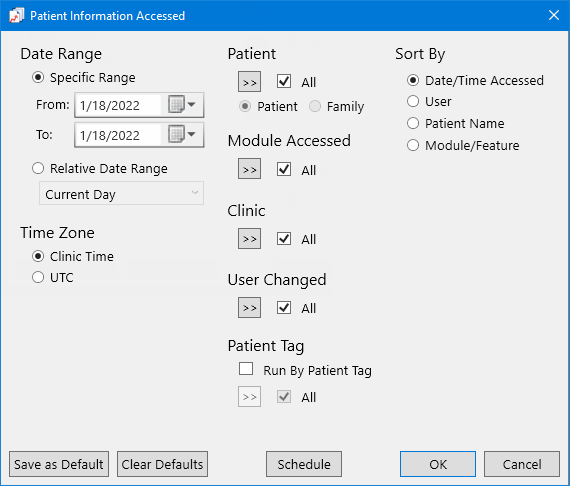
Set up the following options:
Date Range - To filter the report by date, do one of the following:
To include the accessing of patient information on dates (based on the Time Zone) within a range that you specify, select the Specific Range option. With this option selected, do one of the following:
Enter a date range (in a m/d/yyyy format) in the From and To boxes.
To select a date, do the following for From and To:
Click the corresponding calendar icon to view a month calendar.

Navigate to the correct month, using the left and right arrows.
Note: To quickly change the year and month, click the month-year at the top of the calendar, navigate to the correct year, using the left and right arrows, and then click the correct month.
Click the correct day.
To include the accessing of patient information on dates (based on the Time Zone) within a range that is relative to the report date, select the Relative Date Range option. With this option selected, select one of the following relative date ranges from the list:
Current Day Current MTD Current Fiscal YTD Current Calendar YTD |
Previous Day Previous Week Previous Month Previous 3 Months Previous 6 Months Previous Fiscal Year Previous Calendar Year |
Next Day Next Week Next Month Next 3 Months Next 6 Months Next Fiscal Year Next Calendar Year |
Note: Using a relative date range is recommended if you want to save the current report settings as the default settings so you do not have to manually enter a date range each time you run the report.
Time Zone - Select one of the following options:
Clinic Time - To use the clinic time zone to determine if an access is within the date range for the report.
UTC - To use Coordinated Universal Time to determine if an access is within the date range for the report.
Patient - To filter the report by patient, do one of the following:
To include all patients in the clinics that you are allowed to generate the report for, select the All checkbox.
To include a specific patient, do the following:
Click the search button  .
.
The Selection Patients dialog box appears.

Note: Only the patients in the clinics that you are allowed to generate the report for are available.
Do one of the following:
To get a list of all patients, do not enter any search criteria.
To search for a patient by last name, birth date, status, chart number, Social Security Number, ID, and/or home phone number, enter the first character or more of a patient's last name, birth date, status, chart number, Social Security Number, ID, and/or home phone number in the Name, Birthday, Status, Chart#, SS#, OtherId, and Home Phone # boxes, respectively.

Note: To clear any text that you have entered, click Clear Search.
Click Show Results to view a list of patients.

Note: To clear the list so you can search again, click Search.
In the list, select a patient.
Click OK.
Under Patient, select one of the following options:
Patient - The report includes only the selected patient.
Family - The report includes the selected patient and all family members.
Note: These options are available only if you are running the report for a specific patient (the All checkbox is clear).
Module Accessed - To filter the report by the patient-specific areas of Dentrix Enterprise, do one of the following:
To include all available areas of Dentrix Enterprise, select the All checkbox.
To include specific areas of Dentrix Enterprise, do the following:
Click the search button .
The Select Module dialog box appears.

To search for an area of Dentrix Enterprise by name, do the following:
Click Search.
The options for searching appear in the upper list.
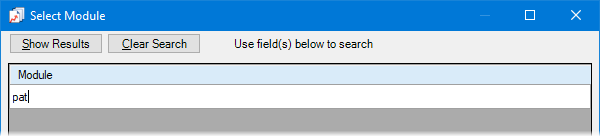
Enter the first character or more of an area of Dentrix Enterprise in the Module box.
Click Show Results to view a list of matching modules.
Note: To return to viewing the list of all the modules, click Search, click Clear Search to clear the search criteria that you entered, and then click Show Results.
In the upper list, select one or more modules.
Note: To select multiple modules, click a module, and then, while pressing the Ctrl key, click the other desired modules. To select a range of adjacent modules, click the first module of the desired range of modules, and then, while pressing the Shift key, click the last module of the desired range of modules.
Click Add.
Repeat steps b-d as needed to add other modules.
Note: To not include a module that you added, select that module in the lower list, and then click Remove.
Click OK.
Clinic - To filter the report by the preferred clinics of patients, do one of the following:
To include all clinics that you are allowed to generate the report for, select the All checkbox.
To include specific clinics, do the following:
Click the search button .
The Select Clinics dialog box appears.

Note: Only the clinics that you are allowed to generate the report for are available.
If the list is long, to search for a clinic by ID and/or title, do the following:
Click Search.
The options for searching appear in the upper list.

Enter the first character or more of a clinic's ID and/or title in the ID and Practice Title boxes, respectively.
Click Show Results to view a list of matching clinics.
Note: To return to viewing the list of all the clinics, click Search, click Clear Search to clear the search criteria that you entered, and then click Show Results.
In the upper list, select one or more clinics.
Note: To select multiple clinics, click a clinic, and then, while pressing the Ctrl key, click the other desired clinics. To select a range of adjacent clinics, click the first clinic of the desired range of clinics, and then, while pressing the Shift key, click the last clinic of the desired range of clinics.
Click Add.
Repeat steps b-d as needed to add other clinics.
Note: To not include a clinic that you added, select that clinic in the lower list, and then click Remove.
Click OK.
User Changed - To filter the report by the users who accessed patient information, do one of the following:
To include all users that you are allowed to generate the report for, select the All checkbox.
To include specific users, do the following:
Click the search button .
The Select Users dialog box appears.
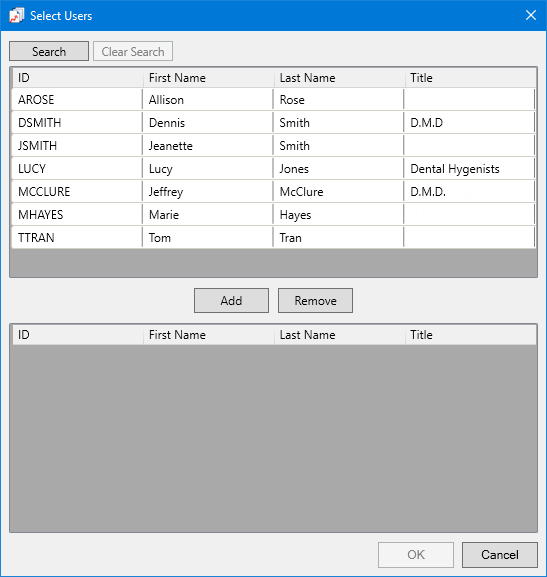
Note: Only the users that you are allowed to generate the report for are available.
If the list is long, to search for a user by ID, first name, last name, and/or title, do the following:
Click Search.
The options for searching appear in the upper list.
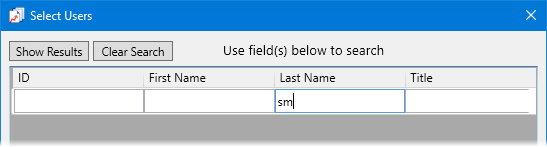
Enter the first character or more of a user's ID, first name, last name, and/or title in the ID, First Name, Last Name, and Title boxes, respectively.
Click Show Results to view a list of matching users.
Note: To return to viewing the list of all the users, click Search, click Clear Search to clear the search criteria that you entered, and then click Show Results.
In the upper list, select one or more users.
Note: To select multiple users, click a user, and then, while pressing the Ctrl key, click the other desired users. To select a range of adjacent users, click the first user of the desired range of users, and then, while pressing the Shift key, click the last user of the desired range of users.
Click Add.
Repeat steps b-d as needed to add other users.
Note: To not include a user that you added, select that user in the lower list, and then click Remove.
Click OK.
Patient Tag - Do one of the following:
To not filter the report by a patient tag, clear the Run By Patient Tag checkbox.
To filter the report by the tags that are assigned to patients, select the Run By Patient Tag checkbox. With this checkbox selected, the options to filter the report by tag are available. Do one of the following:
To include health assessments for patients with any patient tag, select the All checkbox.
To include health assessments for patients with specific tags, do the following:
Click the search button ![]() .
.
The Patient Tag Selection dialog box appears.

If the list is long, to search for a patient tag, do the following:
Click Search.
The options for searching appear in the upper list.

Enter the first character or more of a patient tag name in the Tag Name box.
Click Show Results to view a list of matching patient tags.
Note: To return to viewing the list of all the patient tags, click Search, click Clear Search to clear the search criteria that you entered, and then click Show Results.
In the upper list, select one or more patient tags.
Note: To select multiple patient tags, click a patient tag, and then, while pressing the Ctrl key, click the other desired patient tags. To select a range of adjacent patient tags, click the first patient tag of the desired range of patient tags, and then, while pressing the Shift key, click the last patient tag of the desired range of patient tags.
Click Add.
Repeat steps b-d as needed to add other patient tags.
Note: To not include a patient tag that you added, select that patient tag in the lower list, and then click Remove.
Click OK.
Sort By - Select one of the following options:
Date/Time Accessed - To sort the entries on the report by the dates and times that the specified areas of Dentrix Enterprise were accessed.
User - To sort the entries on the report by the user who accessed one of the specified areas of Dentrix Enterprise.
Patient Name - To sort the entries on the report by the name of the patient whose information was accessed.
Module/Feature - To sort the entries on the report by the specified areas of Dentrix Enterprise.
Click Save as Default to save the current settings for the next time you run the report.
Click Clear Defaults to revert the dialog box options to the original defaults.
Click Schedule to schedule a report job.
Click OK to preview the report.
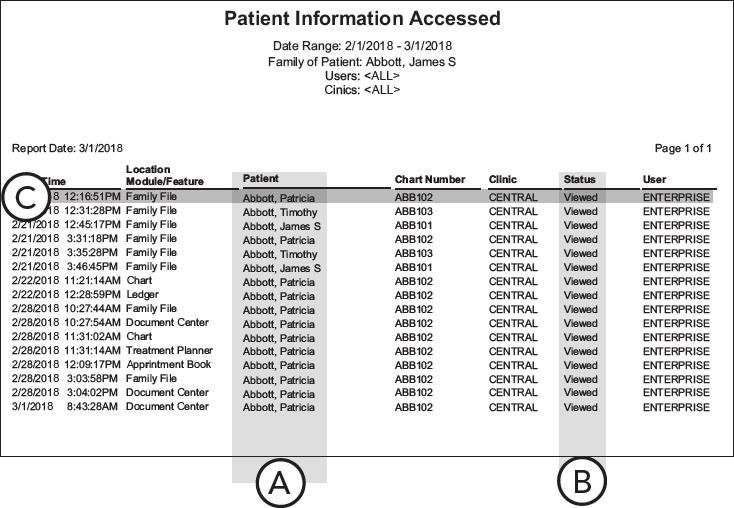
Important information this report provides
The report contains the following information:
Patient - The patient whose record was accessed.
Status - An indicator that the patient's information was viewed. A patient record is considered to have been viewed in the following situations:
When you select a patient in the Select Patient dialog box and then click OK.
When you select a patient in the Select Patient dialog box and then click More Patient Information.
When you double-click a patient's appointment and then click Patient Info.
When you switch from one module to another (patient-specific modules only) with a patient selected. For example, if you open a patient's Patient Chart and then switch to that patient's Family File record, Dentrix Enterprise logs two entries for the report.
When accessing the same patient record later in the day (in the same module, at the same clinic, on the same date, and by the same user after a specified number of minutes has elapsed since the last time that patient's record was accessed).
Other information - Each entry on the report provides the date and time when the patient information was accessed, the module from which it was accessed, the clinic from which it was accessed, the user that accessed it, and the chart number of the patient whose record it was.
