You can create a consent form from a template dynamically using consent form prompts. When you add text to a consent form using a template that has prompts, Dentrix Enterprise will show messages that prompt you to enter responses to user-defined questions.
Note: Creating consent form prompts requires the "Consent Forms, Template Setup" security right.
To create a consent form prompt
In Treatment Planner, expand the Supporting Information section on the Navigation panel.
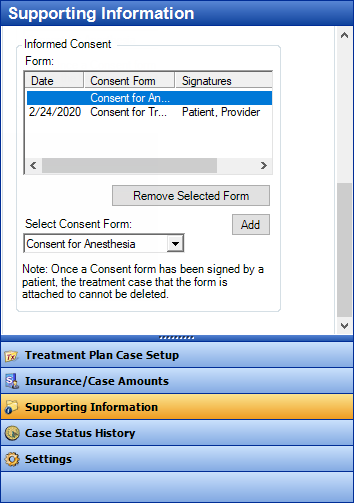
Under Informed Consent, click Add.
The Consent Form dialog box appears.
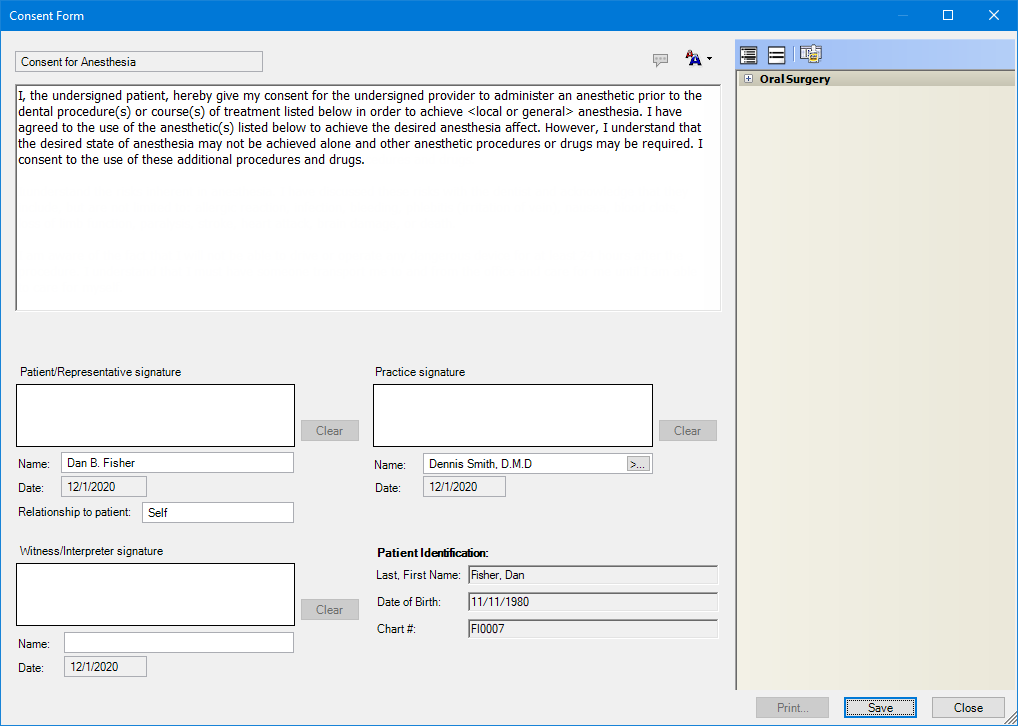
Click the Template
Setup button  .
.
The Template Setup dialog box appears.
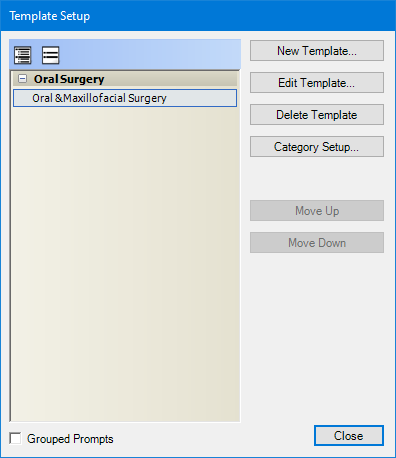
Do one of the following:
Expand a category, select a template, and then click Edit Template.
Click New Template.
The Edit Consent Form Template or New Consent Form Template dialog box appears.
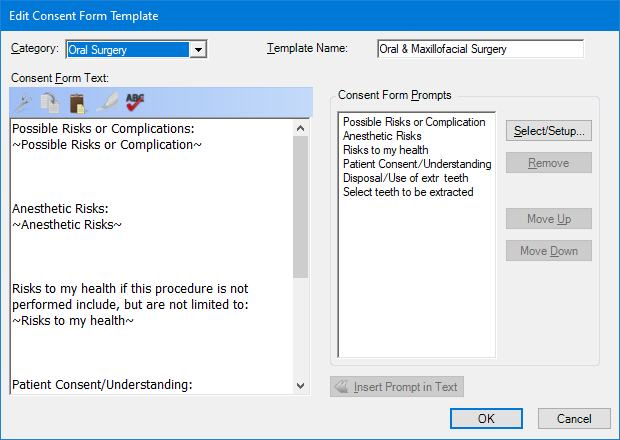
Under Consent Form Prompts, click Select/Setup.
The Consent Form Prompts dialog box appears.
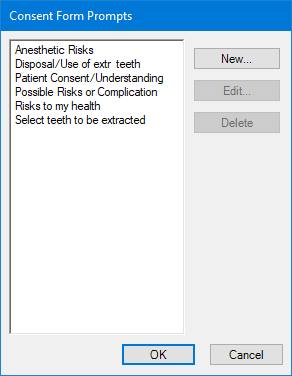
Click New.
The New Prompt dialog box appears.
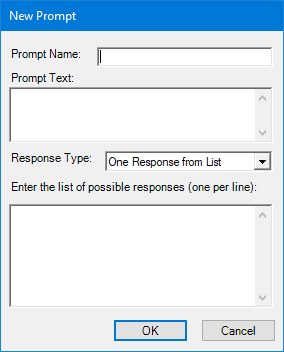
Set up the following options:
Prompt Name - This name is used to identify the prompt in the list and template text.
Note: When you insert a prompt into the text of a template, a placeholder (which uses the format "~[prompt name]~") appears in the text.
Prompt Text - This is a question or statement that explains how to respond to the prompt. When you are adding text to a consent form using a template with this prompt, you will see this text when the prompt appears. This text does not get inserted into the consent form text.
Response Type - The selected type and its corresponding options (if applicable) determine how you can respond. Select one of the following types, and then set up the options for it as applicable:
Confirmation Only - To provide a yes or no response to the prompt text.
One Response from List - To provide a list of options from which you can select only one response to the prompt text. Enter a list of possible responses (one per line) in the lower box.
Checkbox Responses - To provide a list of options from which you can select one or more responses to the prompt text. Enter a list of possible responses (one per line) in the lower box.
Date - To provide a date response to the prompt text. Do one of the following: enter a date in the Select a default date box if you want the prompt to use that date, clear the date from the Select a default date box if you want the prompt to not have a default date, or select the Default to "Today" checkbox if you want the prompt to use the system date by default. When you are adding text to a consent form using a template with this prompt, you will be able to change the date.
Number/Amount - To provide a number or an amount as a response to the prompt text. Optionally, enter a number that you want to be the default response to the prompt text. When you are adding text to a consent form using a template with this prompt, you will be able to change the number.
Text - To provide text as a response to the prompt text. Optionally, enter the text you want to be the default response to the prompt text. When you are adding text to a consent form using a template with this prompt, you will be able to change the text.
Select Tooth - To provide a way to select teeth as a response to the prompt text. To allow only one tooth to be selected, leave the Allow multiple selections checkbox cleared. To allow more than one tooth to be selected, select the Allow multiple selections checkbox.
Select Surfaces - To provide a way to select surfaces as a response to the prompt text.
Select Quadrant - To provide a way to select quadrants as a response to the prompt text. To allow only one quadrant to be selected, leave the Allow multiple selections checkbox cleared. To allow more than one quadrant to be selected, select the Allow multiple selections checkbox.
Select Sextant - To provide a way to select sextants as a response to the prompt text. To allow only one sextant to be selected, leave the Allow multiple selections checkbox cleared. To allow more than one sextant to be selected, select the Allow multiple selections checkbox.
Click OK.
In the Consent Form Prompts dialog box, click OK.
In the Edit Consent Form Template or New Consent Form Template dialog box, click Cancel because you do not want to attach the prompt to the template; you were only accessing a template so that you could create a prompt.
In the Template Setup dialog box, click Close.
In the Consent Form dialog box, click Close because you do not want to attach the consent form to the case; you were only accessing a form so that you could create a prompt.