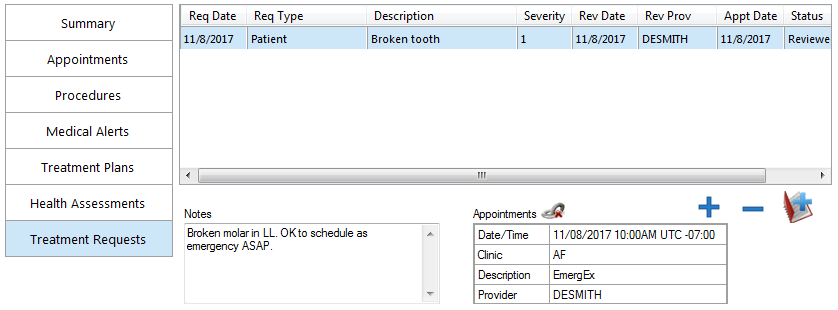
You can add a treatment request as needed.
Note: Adding treatment requests requires the "Treatment Request, Add/Edit" security right.
To add a treatment request
Do one of the following:
In Treatment Request Manager,
click the Add Treatment Request
button ![]() .
.

On the
Treatment
Requests tab of More Information, click the Add
Request button ![]() .
.

If applicable, do one of the following:
If the Password - Treatment Request, Add/Edit dialog box appears, user verification has been assigned to the "Treatment Request, Add/Edit" task. Do one of the following:
If your user account has been granted the "Treatment Request, Add/Edit" security right, enter your credentials in the User ID and Password boxes, and then click OK.
If your user account has not been granted the "Treatment Request, Add/Edit" security right, have a user with permission temporarily override this restriction so you can add a treatment request this one time. The overriding user enters his or her credentials in the User ID and Password boxes and then clicks OK.

If a message appears, informing you that you do not have rights to this operation, your user account has not been granted the "Treatment Request, Add/Edit" security right. To have a user with permission temporarily override this restriction so you can add a treatment request this one time, do the following:
On the message, click Yes.

In the Password - Treatment Request, Add/Edit dialog box, the overriding user enters his or her credentials in the User ID and Password boxes and then clicks OK.

If you are adding a request from Treatment Request Manager, the Select Patient dialog box appears, so proceed to the next step; otherwise, skip to step 4.

In the Enter Last Name box, enter the last name of a patient, select the correct patient in the list of results, and then click OK.
Note: For information about all the search options that are available in the Select Patient dialog box, refer to the topic about selecting a patient.
The New - Treatment Request dialog box appears.

Set up the following options as needed:
Request Date - Today's date is selected by default as the date of the treatment request, but you can specify a different date if necessary. To specify the date that the treatment request was submitted, received, or entered, do one of the following:
To enter a date, do any of the following:
To change the month, click the month portion of the date and then enter a month as a 1-digit or 2-digit number.
To change the day, click the day portion of the date and then enter a day as a 1-digit or 2-digit number.
To change the year, click the year portion of the date and then enter a year as a 2-digit or 4-digit number.
To select a date, do the following:
Click the calendar icon to view a month calendar.
![]()
Navigate to the correct month using the left and right arrows.
Note: To quickly change the year and month, click the month-year at the top of the calendar, navigate to the correct year using the left and right arrows, and then click the correct month.
Click the correct day.
Description - Enter a brief description, such as the reason, for the treatment request.
Request Type - Select a type, such as the source, to assign to the treatment request. You can manage request types in the Practice Definitions.
Note: System-only request types are not available for selection from the list. A system-only type is one that has been set up to allow requests of that type to be added only through HL7 messages.
Severity - Select a severity to prioritize the treatment request by. The available severity levels are 1-5 and cannot be customized.
Status - Select a status to track the treatment request by. You can manage request statuses in the Practice Definitions.
Scheduled by Date - To specify the date that the treatment request must be scheduled by, do one of the following:
To enter a date, do any of the following:
To change the month, click the month portion of the date and then enter a month as a 1-digit or 2-digit number.
To change the day, click the day portion of the date and then enter a day as a 1-digit or 2-digit number.
To change the year, click the year portion of the date and then enter a year as a 2-digit or 4-digit number.
To select a date, do the following:
Click the down-pointing arrow to view a month calendar.

Navigate to the correct month using the left and right arrows.
Note: To quickly change the year and month, click the month-year at the top of the calendar, navigate to the correct year using the left and right arrows, and then click the correct month.
Click the correct day.
Notes - Enter any additional information regarding the treatment request.
Reviewed - To mark the treatment request as having been reviewed, select the checkbox. However, this can be done at a later time.
Do one of the following:
To save the treatment request, click Add. Then, on the message that appears, click OK.
To save the treatment request and schedule an appointment for it (with or without the request having been reviewed), click Create Appt. However, you can schedule the appointment at a later time.