You can add, edit, or delete a picture for a patient's profile.
Note: Managing patient pictures requires the "Patient Picture, Edit" security right.
To manage a patient picture
In More Information, do any of the following as needed:
To add a picture, do the following:
Click the placeholder picture in the box.

If applicable, do one of the following:
If the Password - Patient Picture, Edit dialog box appears, user verification has been assigned to the "Patient Picture, Edit" task. Do one of the following:
If your user account has been granted the "Patient Picture, Edit" security right, enter your credentials in the User ID and Password boxes, and then click OK.
If your user account has not been granted the "Patient Picture, Edit" security right, have a user with permission temporarily override this restriction so you can add a patient picture this one time. The overriding user enters his or her credentials in the User ID and Password boxes and then clicks OK.
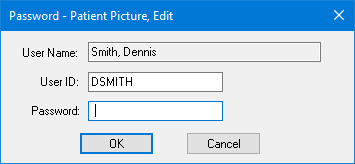
If a message appears, informing you that you do not have rights to this operation, your user account has not been granted the "Patient Picture, Edit" security right. To have a user with permission temporarily override this restriction so you can add a patient picture this one time, do the following:
On the message, click Yes.

In the Password - Patient Picture, Edit dialog box, the overriding user enters his or her credentials in the User ID and Password boxes and then clicks OK.

The Dentrix Patient Picture dialog box appears.
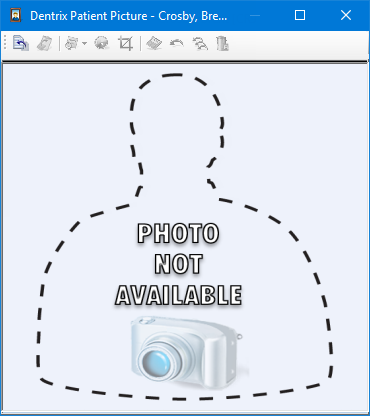
Click
the Import from File button  .
.
The Import dialog box appears.
Select an image file (such as a .bmp, .gif, .jpg, .png, or .tif file), and then click Open.
The selected picture appears in the viewing area.
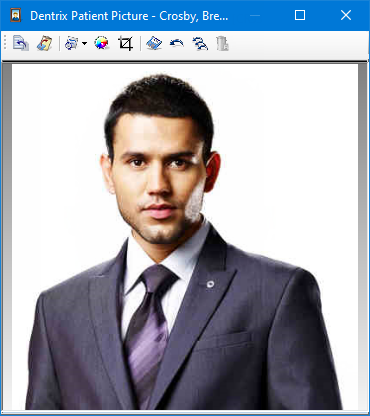
To modify the picture, do any of the following:
To rotate or flip the image, do the following:
Click the Rotate
button  to view the menu.
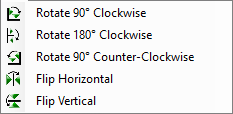
Click either a rotation option (Rotate 90o Clockwise, Rotate 180o Clockwise, or Rotate 90o Counter-Clockwise) or a flip option (Flip Horizontal or Flip Vertical).
To adjust the colors of the image, do the following:
Click the Image
Adjustments button  .
.
The Image Adjustments dialog box appears.
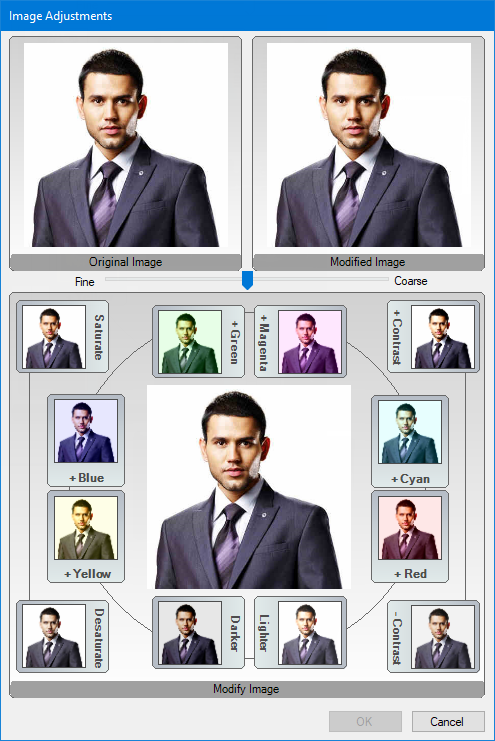
Note: The Original Image displays the image before any changes were made. The Modified Image displays how the image will look after applying your changes.
Do any of the following:
Move the Fine/Coarse slider to alter the increments by which the other features will make adjustments.
Click the image with the Saturate border to saturate the image. Click the image with the Desaturate border to desaturate the image.
Click the image with the +Contrast border to increase the contrast of the image. Click the image with the -Contrast border to decrease the contrast of the image.
Click the image with a color border (+Blue, +Yellow, +Cyan, +Red, +Green, or +Magenta) to increase the amount of that color in the image. Every time you click the color, it increases the color content by the increment selected on the Fine/Coarse slider bar.
Click the image with the Lighter border to lighten the image. Click the image with the Darker border to darken the image.
Note: You can undo all changes in the Image Adjustments dialog box by clicking the Original Image.
Click OK.
The adjusted image appears in the viewing area.
To crop the image to an area that you select, do the following:
Click the Crop
Image button  .
.
The mouse pointer changes to a cropping tool.

To define the crop area on the image click and drag the cropping tool over the portion of the image that you want to keep to create a dotted selection box.

Release the left mouse button.
The cropped image expands to fill the viewing area.
Undo - To undo the last operation
performed on the image, click the Undo
button  .
.
Undo All - To undo all edits made
to the image since the last time it was saved, click the Undo
All button  .
.
Click
the Save button  .
.
A confirmation message appears.
Click Yes.
Close the Dentrix Patient Picture dialog box.
To edit the picture, do the following:
Click the picture in the box.

If applicable, do one of the following:
If the Password - Patient Picture, Edit dialog box appears, user verification has been assigned to the "Patient Picture, Edit" task. Do one of the following:
If your user account has been granted the "Patient Picture, Edit" security right, enter your credentials in the User ID and Password boxes, and then click OK.
If your user account has not been granted the "Patient Picture, Edit" security right, have a user with permission temporarily override this restriction so you can edit a patient picture this one time. The overriding user enters his or her credentials in the User ID and Password boxes and then clicks OK.

If a message appears, informing you that you do not have rights to this operation, your user account has not been granted the "Patient Picture, Edit" security right. To have a user with permission temporarily override this restriction so you can edit a patient picture this one time, do the following:
On the message, click Yes.

In the Password - Patient Picture, Edit dialog box, the overriding user enters his or her credentials in the User ID and Password boxes and then clicks OK.

The Dentrix Patient Picture dialog box appears.
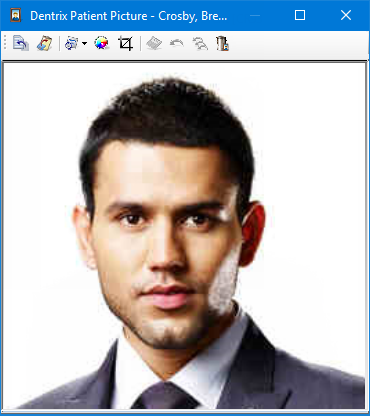
Do any of the following:
To rotate or flip the image, do the following:
Click the Rotate
button  to view the menu.

Click either a rotation option (Rotate 90o Clockwise, Rotate 180o Clockwise, or Rotate 90o Counter-Clockwise) or a flip option (Flip Horizontal or Flip Vertical).
To adjust the colors of the image, do the following:
Click the Image
Adjustments button  .
.
The Image Adjustments dialog box appears.

Note: The Original Image displays the image before any changes were made. The Modified Image displays how the image will look after applying your changes.
Do any of the following:
Move the Fine/Coarse slider to alter the increments by which the other features will make adjustments.
Click the image with the Saturate border to saturate the image. Click the image with the Desaturate border to desaturate the image.
Click the image with the +Contrast border to increase the contrast of the image. Click the image with the -Contrast border to decrease the contrast of the image.
Click the image with a color border (+Blue, +Yellow, +Cyan, +Red, +Green, or +Magenta) to increase the amount of that color in the image. Every time you click the color, it increases the color content by the increment selected on the Fine/Coarse slider bar.
Click the image with the Lighter border to lighten the image. Click the image with the Darker border to darken the image.
Note: You can undo all changes in the Image Adjustments dialog box by clicking the Original Image.
Click OK.
The adjusted image appears in the viewing area.
To crop the image to an area that you select, do the following:
Click the Crop
Image button  .
.
The mouse pointer changes to a cropping tool.

To define the crop area on the image click and drag the cropping tool over the portion of the image that you want to keep to create a dotted selection box.

Release the left mouse button.
The cropped image expands to fill the viewing area.
Undo - To undo the last operation
performed on the image, click the Undo
button  .
.
Undo All - To undo all edits made
to the image since the last time it was saved, click the Undo
All button  .
.
Click
the Save button  .
.
A confirmation message appears.
Click Yes.
Close the Dentrix Patient Picture dialog box.
To remove the picture, do the following:
Click the picture in the box.

If applicable, do one of the following:
If the Password - Patient Picture, Edit dialog box appears, user verification has been assigned to the "Patient Picture, Edit" task. Do one of the following:
If your user account has been granted the "Patient Picture, Edit" security right, enter your credentials in the User ID and Password boxes, and then click OK.
If your user account has not been granted the "Patient Picture, Edit" security right, have a user with permission temporarily override this restriction so you can delete a patient picture this one time. The overriding user enters his or her credentials in the User ID and Password boxes and then clicks OK.

If a message appears, informing you that you do not have rights to this operation, your user account has not been granted the "Patient Picture, Edit" security right. To have a user with permission temporarily override this restriction so you can delete a patient picture this one time, do the following:
On the message, click Yes.

In the Password - Patient Picture, Edit dialog box, the overriding user enters his or her credentials in the User ID and Password boxes and then clicks OK.

The Dentrix Patient Picture dialog box appears.

Click
the Delete Image button  .
.
A confirmation message appears.
Click Yes.
Close the Dentrix Patient Picture dialog box.