You can attach radiographs, images, models, documents, and perio charts to dental pre-treatment estimates.
Note: Adding attachments to pre-treatment estimates requires the "Insurance Claims, Edit" security right.
To include attachments with a dental pre-treatment estimate
In the pre-treatment estimate window, double-click the Claim Information block.
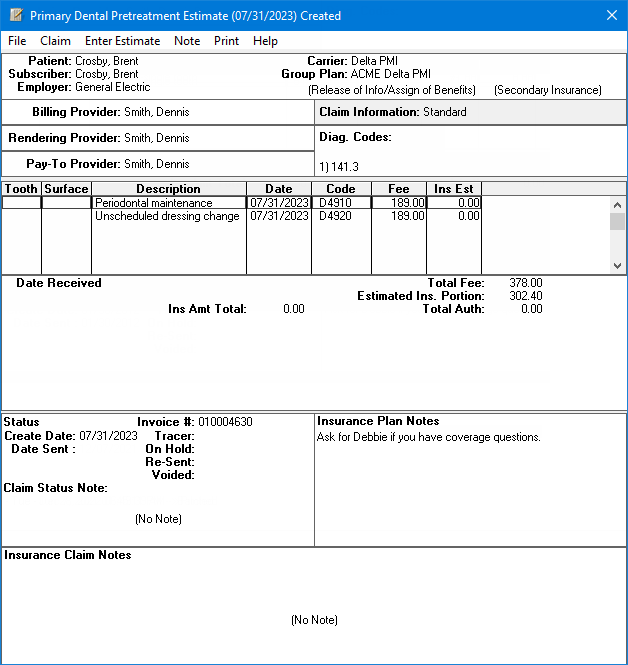
Note: The Claim Information block displays "Standard" unless the information has been changed; in which case, it displays "Non-Standard."
If applicable, do one of the following:
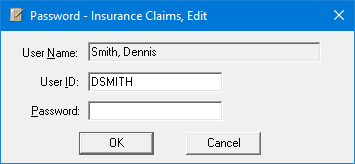
If the Password - Insurance Claims, Edit dialog box appears, user verification has been assigned to the "Insurance Claims, Edit" task. Do one of the following:
If your user account has been granted the "Insurance Claims, Edit" security right, enter your credentials in the User ID and Password boxes, and then click OK.
If your user account has not been granted the "Insurance Claims, Edit" security right, have a user with permission temporarily override this restriction so you can change standard pre-treatment estimate information this one time. The overriding user enters his or her credentials in the User ID and Password boxes and then clicks OK.
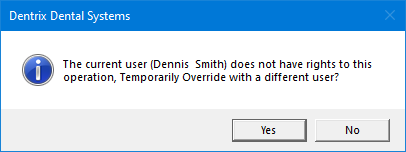
If a message appears, informing you that you do not have rights to this operation, your user account has not been granted the "Insurance Claims, Edit" security right. To have a user with permission temporarily override this restriction so you can change standard pre-treatment estimate information this one time, do the following:
On the message, click Yes.
In the Password - Insurance Claims, Edit dialog box, the overriding user enters his or her credentials in the User ID and Password boxes and then clicks OK.

The Insurance Claim Information dialog box appears.

Under Attachments, set up the following options as needed:
Radiographs(s) Enclosed - If you are attaching radiographs, select this checkbox. With this checkbox selected, enter the number of radiographs in the corresponding How Many? box.
Oral Image(s) Enclosed - If you are attaching oral images, select this checkbox. With this check box selected, enter the number of oral images in the corresponding How Many? box.
Model(s) Enclosed - If you are attaching models, select this checkbox. With this checkbox selected, enter the number of models in the corresponding How Many? box.
Other Attachments. - If you are including another type of attachment, select this checkbox.
Insurance Ref # - If any of the aforementioned checkboxes are selected, this box is available. Enter the correct reference number.
Include Attachment(s) - If any of the aforementioned checkboxes are selected, this button is available. Do the following:
Click the button.
The Include Attachments dialog box appears.
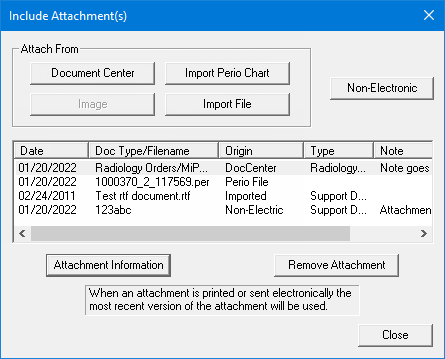
Do any of the following:
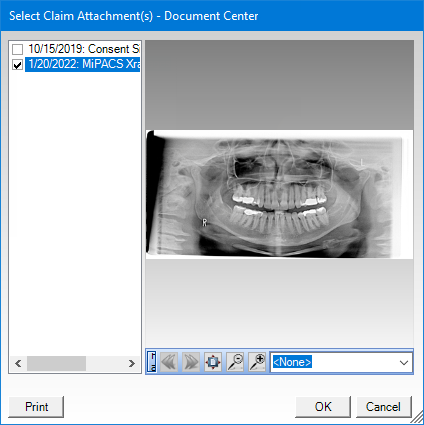
To attach images (such as .pngs and .jpgs) from the patient's Document Center record, click Document Center. The Select Claim Attachment(s) - Document Center dialog box appears. As needed, do the following for each image that is listed in the left pane: select its date and description to preview that image on the right, and then select its checkbox if you want to include that image. Then, click OK.
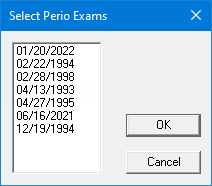
To attach any saved periodontal examination for the patient, click Import Perio Chart. The Select Perio Exams dialog box appears. Select the date of the desired exam, and then click OK.
To attach any digital images that are stored for the patient in Dentrix Image, click Image.
Note: This button is available only if Dentrix Image (developed and maintained by DEXIS) is installed.
To attach any file with an .rtf or .txt extension, click Import File. The Open dialog box appears. Locate and select the desired file, and then click Open.
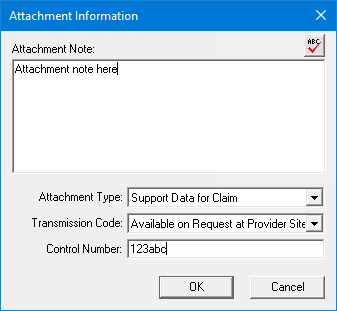
To include an attachment with a printed pre-treatment estimate, click Non-Electronic. The Attachment Information dialog box appears. In the Attachment Note box, enter a note. From the Attachment Type list, select the option that corresponds to the type attachment (Referral Form, Dental Models, Diagnostic Report, Explanation of Benefits, Operative Note, Support Data for Claim, Periodontal Charts, Radiology Films, or Radiology Reports). From the Transmission Code list, select the option that corresponds to how the attachment can be obtained (Available on Request at Provider Site, By Mail, By E-mail, or By Fax). In the Control Number box, enter the correct control number. Then, click OK.
Notes:
To
check the spelling of the note text, click the Check
Spelling button ![]() (this button is available only if a certain preference
setting has been enabled).
(this button is available only if a certain preference
setting has been enabled).
Non-electronic attachments will not be sent with electronic pre-treatment estimates.
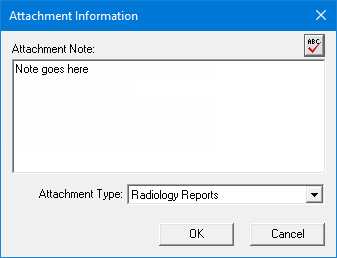
To view or enter attachment information for an attachment in the list, select that attachment, and then click Attachment Information. The Attachment Information dialog box appears. In the Attachment Note, enter a note. From the Attachment Type list, select the option that corresponds to the type attachment (Referral Form, Dental Models, Diagnostic Report, Explanation of Benefits, Operative Note, Support Data for Claim, Periodontal Charts, Radiology Films, or Radiology Reports). If the selected attachment is non-electronic, from the Transmission Code list, select the option that corresponds to how the attachment can be obtained (Available on Request at Provider Site, By Mail, By E-mail, or By Fax). If the selected attachment is non-electronic, in the Control Number box, enter the correct control number. Then, click OK.

Note: To
check the spelling of the note text, click the Check
Spelling button ![]() (this button is available only if a certain preference
setting has been enabled).
(this button is available only if a certain preference
setting has been enabled).
To remove an attachment from the pre-treatment estimate, select that attachment in the list, click Remove Attachment. On the confirmation message that appears, click Yes.
Click Close to return to the Insurance Claim Information dialog box.
Note: Clicking Clear does not remove any attachments. To remove an attachment, if none of the checkboxes under Attachments are selected, select at least one checkbox, click Include Attachment(s), select an attachment in the list, click Remove Attachment, and then click Yes.
Click OK.