In Dentrix Enterprise, you can search for payments by check or bank number, amount, payment date, payment type, clinic, patient, or insurance carrier. Also, you can print a report that lists the payments found by the search. Use this feature when you want to search for (and print a list of) insurance payments that were entered as a batch.
Note: Printing the list of matching payments requires the "Batch Processor, Print/Display Reports" security right.
To search for payments
In Ledger, on the File menu, click Search Payments.
The Search Payments dialog box appears.
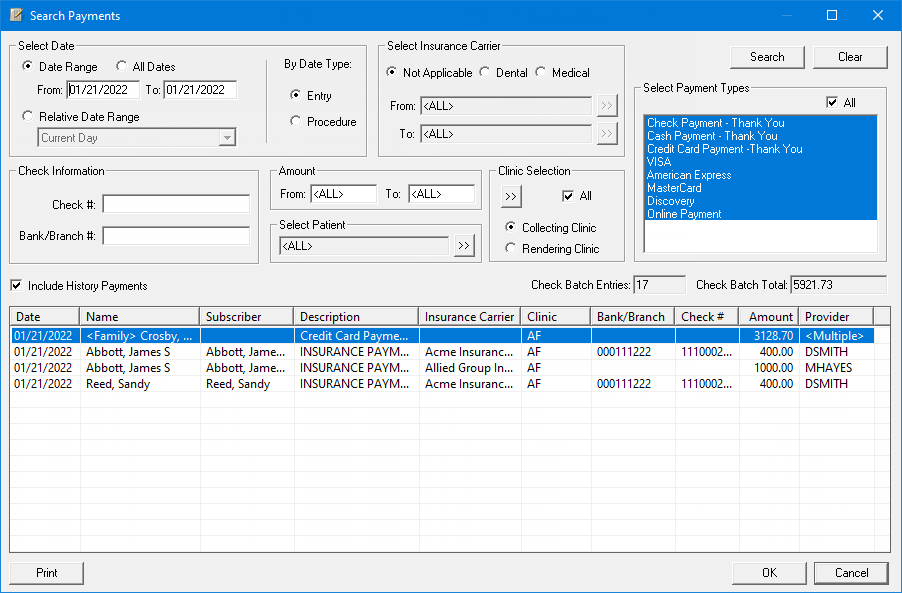
Set up the following search options:
Select Date - To search for payments by date, do one of the following:
To include payments that have dates within a range that you specify, select the Date Range option. With this option selected, enter a date range (in a m/d/yyyy format) in the From and To boxes.
Note: Dentrix Enterprise automatically adds slashes to dates when you enter six or eight numbers (mmddyy or mmddyyyy) and then press the Tab key.
To include payments that have date any date, select the All Dates options.
To include payments that have dates within a range that is relative to today, select the Relative Date Range option. With this option selected, select one of the following relative date ranges from the list:
Current Day Current MTD Current Fiscal YTD Current Calendar YTD |
Previous Day Previous Week Previous Month Previous 3 Months Previous 6 Months Previous Fiscal Year Previous Calendar Year |
By Date Type - Select one of the following options:
Entry - To include a payment based on the date that it was created (entered into the database).
Procedure - To include a payment based on the date that was specified for it.
Note: Most of the time, a payment will have the same entry and procedure date. They will differ only if you backdate the payment.
Select Insurance Carrier - Do one of the following:
To include only patient payments, select the Not Applicable option.
To include only insurance payments that were received from dental insurance carriers, select the Dental option. With this option selected, do one of the following:
To include all dental insurance carriers, leave <ALL> selected for both From and To.
To include a specific range of dental insurance carriers, select the starting insurance carrier (alphabetically by name) of the range for From and the ending insurance carrier of the range for To.
To include a specific dental insurance carrier, select the same insurance carrier for both From or To.
To include an open-ended range of dental insurance carriers, select an insurance carrier for either From or To, and leave <ALL> selected for the other option.
To select a specific insurance carrier for From or To, do the following:
Click the corresponding search button
![]() .
.
The Select Dental Insurance Plan dialog box appears.
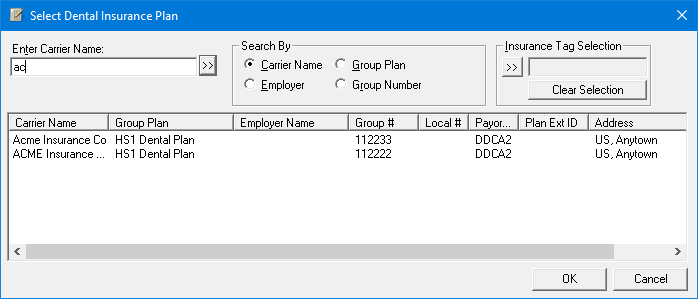
To search for plans that have particular insurance tags, do the following:
Under Insurance
Tag Selection, click the search button ![]() .
.
The Insurance Tag Selection dialog box appears.
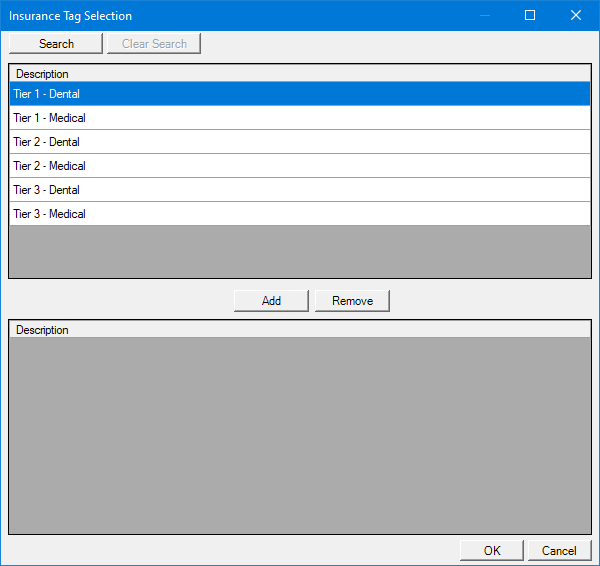
Note: If the upper list is long, to filter it by name, click Search, enter all or the first part of a tag name, and then click Show Results to view the matches.
In the upper list, select the desired tags.
Note: To select multiple tags, click a tag, and then, while pressing the Ctrl key, click the other desired tags. To select a range of adjacent tags, click the first tag of the desired range of tags, and then, while pressing the Shift key, click the last tag of the desired range of tags.
Click Add.
The selected tags now appear in the lower list.
Note: To remove a tag from the lower list, select it, and then click Remove.
Click OK.
Note: To clear all the selected insurance tags at one time, click Clear Selection.
Under Search By, select one of the following options:
Carrier Name to search by carrier name.
Employer to search by employer name.
Note: This option is available only if an employer has already been assigned to the current patient.
Group Plan to search by group plan name.
Group Number to search by group plan number.
In the In the Enter Carrier Name, Enter Employer Name, Enter Group Plan Name, or Enter Group Number box (the name varies according to the selected Search By option), enter all or part of a carrier name, employer name, group plan name, or group plan number, respectively.
Click
the search button ![]() .
.
The matching insurance plans appear in the list.
Do one of the following:
Double-click the correct plan.
Select the correct plan, and then click OK.
To include only insurance payments that were received from medical insurance carriers, select the Medical option. With this option selected, do one of the following:
To include all medical insurance carriers, leave <ALL> selected for both From and To.
To include a specific range of medical insurance carriers, select the starting insurance carrier (alphabetically by name) of the range for From and the ending insurance carrier of the range for To.
To include a specific medical insurance carrier, select the same insurance carrier for both From or To.
To include an open-ended range of medical insurance carriers, select an insurance carrier for either From or To, and leave <ALL> selected for the other option.
To select a specific insurance carrier for From or To, do the following:
Click the corresponding search button
![]() .
.
The Select Medical Insurance Plan dialog box appears.
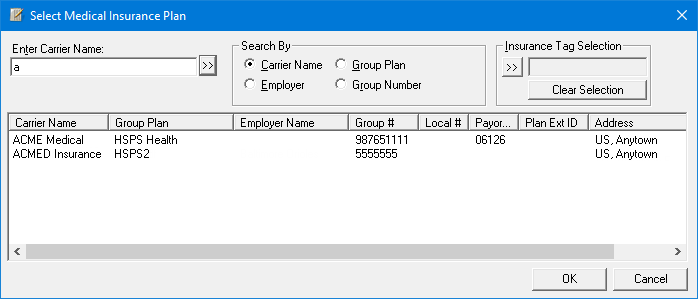
To search for plans that have particular insurance tags, do the following:
Under Insurance
Tag Selection, click the search button ![]() .
.
The Insurance Tag Selection dialog box appears.

Note: If the upper list is long, to filter it by name, click Search, enter all or the first part of a tag name, and then click Show Results to view the matches.
In the upper list, select the desired tags.
Note: To select multiple tags, click a tag, and then, while pressing the Ctrl key, click the other desired tags. To select a range of adjacent tags, click the first tag of the desired range of tags, and then, while pressing the Shift key, click the last tag of the desired range of tags.
Click Add.
The selected tags now appear in the lower list.
Note: To remove a tag from the lower list, select it, and then click Remove.
Click OK.
Note: To clear all the selected insurance tags at one time, click Clear Selection.
Under Search By, select one of the following options: Carrier Name to search by carrier name, Employer to search by employer name, Group Plan to search by group plan name, or Group Number to search by group plan number.
In the Enter [Carrier Name/Employer Name/Group Plan Name/Group Number] box (the name varies according to the selected Search By option), enter all or part of a carrier name, employer name, group plan name, or group plan number (depending on the selected Search By option).
Click
the search button ![]() .
.
The matching insurance plans appear in the list.
Do one of the following:
Double-click the correct plan.
Select the correct plan, and then click OK.
Check Information - To search for payments by the check number and/or bank number:
Check # - To include payments that have a check number that matches what you enter in the box, enter a check number up to 25 characters in length.
Bank/Branch # - To include payments that have a bank or branch number that matches what you enter in the box, enter a bank or branch number up to 19 characters in length.
Amount - To search for payments by amount, do one of the following:
To include payments for any amount, leave <ALL> entered in the From and To boxes.
To include payments for an amount that is within a specific range of amounts, enter the starting amount of the range in the From box and the ending amount of the range in the To box.
To include payments for a specific amount, enter the same amount in the From and To boxes.
To include payments for an amount that is within an open-ended range of amounts, enter an amount in either the From or To box, and leave <ALL> entered in the other box.
Select Patient - To search for payments by patient, do one of the following:
To include payments that are associated with any patient, leave <ALL> selected.
To include payments that are associated with a specific patient, do the following:
Click the search button ![]() .
.
The Select Patient dialog box appears.
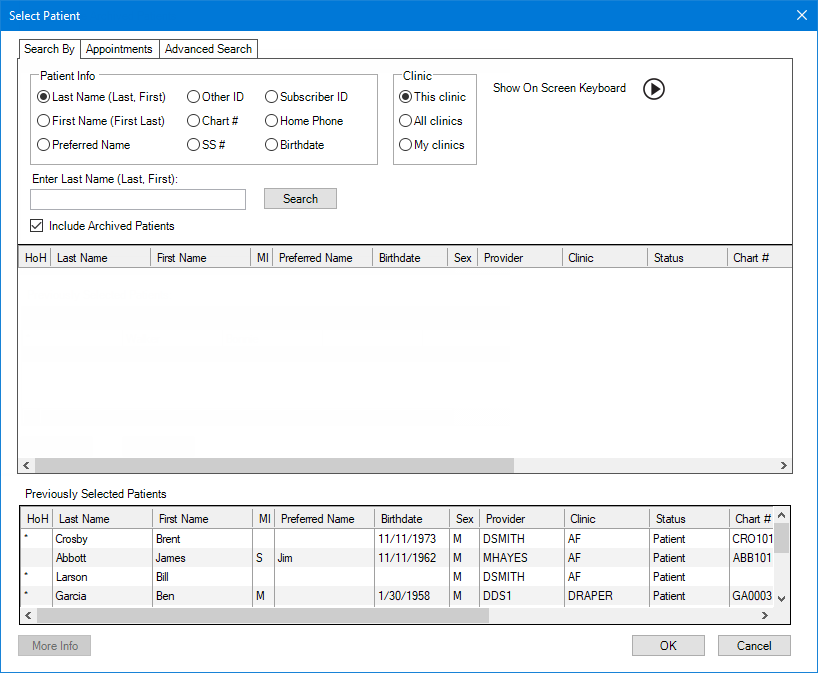
In the Enter Last Name box, enter the last name of a patient.
Note: For information about all the search options that are available in the Select Patient dialog box, refer to the topic about selecting a patient.
Do one of the following:
Double-click the correct patient in the list of results.
Select the correct patient in the list of results, and then click OK.
Clinic Selection - To search for payments by clinic, do the following:
Do one of the following:
If your user account has not been granted the "View All Patients" security right for the Central clinic, the search includes only payments that are associated with the clinic that you are currently logged in to.
If your user account has been granted the "View All Patients" security right for the Central clinic, to include payments that are associated with all clinics, select the All checkbox.
If your user account has been granted the "View All Patients" security right for the Central clinic, to include payments that are associated with specific clinics, do the following:
Click the search button ![]() .
.
Note: This button is available only if your user account has been granted the "View All Patients" security right for the Central clinic.
The Select Clinic(s) dialog box appears.
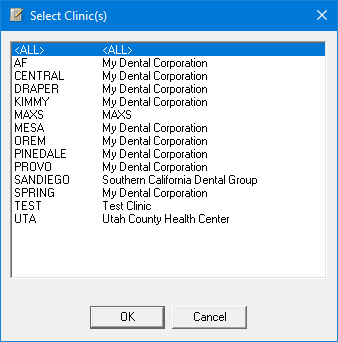
In the list, select the desired clinics, or select <ALL> (to include all clinics; the All checkbox will be selected automatically after you click OK).
Note: To select multiple clinics, click a clinic, and then, while pressing the Ctrl key, click the other desired clinics. To select a range of adjacent clinics, click the first clinic of the desired range of clinics, and then, while pressing the Shift key, click the last clinic of the desired range of clinics.
Click OK.
Select one of the following options:
Collecting Clinic - To include a payment if the collecting clinic is one of the specified clinics.
Rendering Clinic - To include a payment if the rendering clinic of the charge that the payment is applied to is one of the specified clinics.
Select Payment Types - To search for payments by type, do one of the following:
To include a payment of any type, select the All checkbox.
To include payments of specific types, select those payment types.
Note:
To select multiple payment types, click a payment type, and then, while pressing the Ctrl key, click the other desired payment types. To select a range of adjacent payment types, click the first payment type of the desired range of payment types, and then, while pressing the Shift key, click the last payment type of the desired range of payment types.
To quickly deselect all but the first payment type, if the All checkbox is selected, clear the checkbox.
Include History Payments - To search for payments that have been moved to history (when closing a month), select this checkbox.
Click Search.
If there are more than 1,000 payments that match your search criteria, a message appears and asks if you want to view the 1,000 most recent payments. Click Yes to display the results, click No to return to the Search Payments dialog box so you can refine your search criteria.
The search results appear in the list in the bottom portion of the dialog box.
Notes:
To sort the search results by any column, click a column header.
To clear the search criteria, click Clear.
To print the list of matching payments, click Print.
A confirmation message appears.
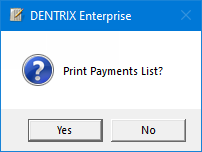
Click Yes.
If applicable, do one of the following:
If the Password - Batch Processor, Print/Display Reports dialog box appears, user verification has been assigned to the "Batch Processor, Print/Display Reports" task. Do one of the following:
If your user account has been granted the "Batch Processor, Print/Display Reports" security right, enter your credentials in the User ID and Password boxes, and then click OK.
If your user account has not been granted the "Batch Processor, Print/Display Reports" security right, have a user with permission temporarily override this restriction so you can print the report this one time. The overriding user enters his or her credentials in the User ID and Password boxes and then clicks OK.
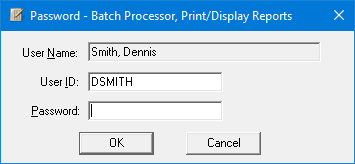
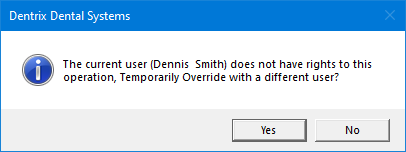
If a message appears, informing you that you do not have rights to this operation, your user account has not been granted the "Batch Processor, Print/Display Reports" security right. To have a user with permission temporarily override this restriction so you can print the report this one time, do the following:
On the message, click Yes.
In the Password - Batch Processor, Print/Display Reports dialog box, the overriding user enters his or her credentials in the User ID and Password boxes and then clicks OK.

To view a payment, select that payment in the list, and then click OK. The Search Payment dialog box closes, and the corresponding patient's Ledger record opens with that payment selected.
Note: Accessing Ledger requires the "Ledger, Open" security right.