The day sheet (charges and receipts) is a report that is designed to help you keep track of your daily production and collection figures. It lists financial transactions (charges, payments, and adjustments) that have been posted on a given day (or range of dates). You can customize the day sheet to include or exclude certain information. Also, you can print the day sheet in various formats.
|
|
Why: |
To print a record of transactions each day, to review transactions and production totals for a date or date range, and to ensure transaction totals balance out over a variety of reports |
|
When: |
Daily |
Notes:
Generating a report in Office Manager requires the "Reports" security right.
Accessing the options for generating the day sheet (charges and receipts) requires the "Print Day Sheet" security right.
Including month-to-date and year-to-date totals on a day sheet requires the "Print Day Sheet - MTD/YTD" security right.
Viewing or printing a report in the Batch Processor requires the "Batch Processor, Print/Display Reports" security right.
To generate the day sheet (charges and receipts)
In Office Manager, on the Reports menu, point to Management, and then click Day Sheet (Charges and Receipts).
Notes:
Whether the management reports appear on the menu or not is determined by a setting.
Also, this option is available only if your user account has been granted the "Reports" security right.
If applicable, do one of the following:
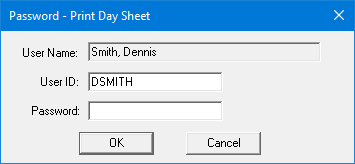
If the Password - Print Day Sheet dialog box appears, user verification has been assigned to the "Print Day Sheet" task. Do one of the following:
If your user account has been granted the "Print Day Sheet" security right, enter your credentials in the User ID and Password boxes, and then click OK.
If your user account has not been granted the "Print Day Sheet" security right, have a user with permission temporarily override this restriction so you can set up the options to generate a day sheet this one time. The overriding user enters his or her credentials in the User ID and Password boxes and then clicks OK.
If a message appears, informing you that you do not have rights to this operation, your user account has not been granted the "Print Day Sheet" security right. To have a user with permission temporarily override this restriction so you can set up the options to generate a day sheet this one time, do the following:
On the message, click Yes.
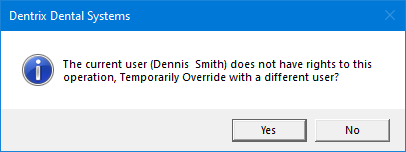
In the Password - Print Day Sheet dialog box, the overriding user enters his or her credentials in the User ID and Password boxes and then clicks OK.
The Day Sheet dialog box appears.
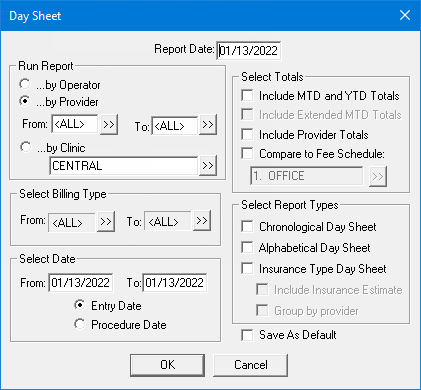
Set up the following options:
Report Date - By default, today's date appears in the box, but you can enter a different date. The specified date appears at the top of the report.
Run Report - How you want to generate a day sheet. Select one of the following options:
By Operator - To generate a day sheet by operator. Production entered by each operator will be listed.
By Provider - To generate a day sheet by provider. With this option selected, to specify the providers whose production you want to include, do one of the following:
To include all providers, type <ALL> for both From and To.
To include a specific range of providers, enter or select the starting provider (numerically by ID) of the range for From and the ending provider of the range for To.
To include a specific provider, enter or select the same provider for From and To.
To include an open-ended range of providers, enter or select a provider for either From or To, and type <ALL> for the other option.
To select a provider for From or To, do the following:
Click the corresponding search button ![]() .
.
The Select Provider dialog box appears.

Either leave the ID and Last Name boxes empty to get a list of all providers, or enter all or part of a provider's ID or last name in the ID or Last Name box, respectively, to search for a provider.
Under Search By, select one of the following options: This Clinic, to search for the provider in the clinic that you are currently logged in to; All Clinics, to search for the provider in all clinics; or My Clinics, to search for the provider in the clinics to which you have been granted the "My Clinics, Select Provider " security right.
Notes:
The All Clinics option is available only if your user account has been granted the "View All Providers" security right for the Central clinic and if your user account has not been granted the "My Clinics, Select Provider" security right for the clinic that you are currently logged in to.
The My Clinics option is available only if your user account has been granted the "My Clinics, Select Provider" security right for at least one clinic and if your user account has not been granted the "View All Providers" security right for the Central clinic.
Either select the All Providers option to include providers who are associated with clinics (and who have a Log On User ID), or select the In ApptBook option to include providers who have been set up in Appointment Book.
Click the search button ![]() .
.
The matching primary and secondary providers appear in the list.
Select the correct provider.
Click OK.
By Clinic - To generate a day sheet by clinic. With this option selected, to specify the clinic with patients whose production you want to include, do one of the following:
Enter the correct clinic ID in the box.
To select a clinic, do the following:
Click the search button ![]() .
.
The Select Clinic dialog box appears.
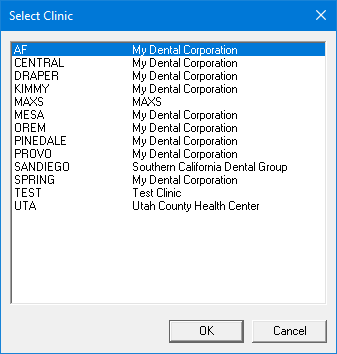
Note: If your user account has been granted the "View All Patients" security right for the Central clinic, the ID and name of all clinics appear in the list; otherwise, the ID and name of each clinic for which your user account has been granted the "My Clinics, View" security right (in the "Practice/Clinic Setup" category) appear in the list; however, if your user account has not been granted that right to any clinic, only the ID and name of the clinic that you are currently logged in to appear in the list.
In the list, select the correct clinic.
Click OK.
Select Billing Type - The billing types of patients with production to include on the report. To specify billing types, do one of the following:
To include all billing types, select <ALL> for both From and To.
Note: The year-to-date (YTD) and previous month's totals will appear only if the report includes all billing types.
To include a specific range of billing types, select the starting billing type (numerically by ID) of the range for From and the ending billing type of the range for To.
To include a specific billing type, select the same billing type for From and To.
To include an open-ended range of billing types, select a billing type for either From or To, and select <ALL> for the other option.
To select a billing type for From or To, do the following:
Click the corresponding search button ![]() .
.
The Select Billing Type dialog box appears.
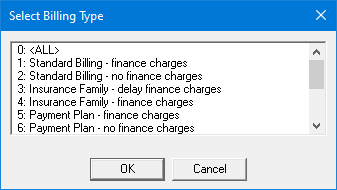
In the list, select the correct billing type.
Click OK.
Select Date - The date of transactions to include on the report, based on the entry or procedure date.
Do one of the following:
To include transactions for a specific date, enter the same date for From and To.
To include transactions within a date range, enter the starting date of the range for From and the ending date of the range for To.
Also, select one of the following options:
Entry Date - To include a transaction based on the date that it was created (entered into the database).
Procedure Date - To include a transaction based on the date that was specified for it.
Notes:
Most of the time, a transaction will have the same entry and procedure date. They will differ only if you backdate the transaction.
Applied credits are included based on the allocate date instead of the entry or procedure date. So, credits that have been applied within the date range for the report will appear on the report even if the date of the credit is not within the date range for the report. For example, a payment dated 4/8/2022 can be partially applied on 4/9/2022. If the report is run for 4/9/2022 by provider, the applied portion of the payment will appear (with the 4/8/2022 date). However, any suspended amount will not appear.
Entry date indicates all transactions entered into the database within the specified date range.
Procedure date indicates all transactions that have a date in Ledger within this date range. Most of the time, procedures will have the same entry and procedure date; they will only differ if you backdate a procedure.
Select Totals - The totals to include on the report. Select or clear any of the following checkboxes:
Include MTD and YTD Totals - With this checkbox selected, the report includes a running balance for the month and year.
Note: Including month-to-date and year-to-date totals on a day sheet requires the "Print Day Sheet - MTD/YTD" security right.
If applicable, do one of the following:
If the Password - Print Day Sheet dialog box appears, user verification has been assigned to the "Print Day Sheet" task. Do one of the following:
If your user account has been granted the "Print Day Sheet" security right, enter your credentials in the User ID and Password boxes, and then click OK.
If your user account has not been granted the "Print Day Sheet" security right, have a user with permission temporarily override this restriction so you can set up the options to generate a day sheet this one time. The overriding user enters his or her credentials in the User ID and Password boxes and then clicks OK.
If a message appears, informing you that you do not have rights to this operation, your user account has not been granted the "Print Day Sheet" security right. To have a user with permission temporarily override this restriction so you can set up the options to generate a day sheet this one time, do the following:
On the message, click Yes.
In the Password - Print Day Sheet dialog box, the overriding user enters his or her credentials in the User ID and Password boxes and then clicks OK.
Include Extended MTD Totals - With this checkbox selected, the report includes the average production per patient and average charge per procedure.
Note: This checkbox is available only if the Include MTD and YTD Totals checkbox is selected.
Include Provider Totals - With this checkbox selected, the report includes the production and collection for each individual provider.
Compare to Fee Schedule - With this checkbox selected, the report includes a comparison of the fees for procedures on the report with the fees for the same procedures from a specified fee schedule and display the net difference of those fees. On the report, two totals will appear in the Current column (not the day sheet totals): the first total will show the total charges as if each procedure on the day sheet were charged at that fee schedule, and the second total will show the difference between the charges and the fee schedule total.
With this option selected, to select the fee schedule that you want to use for the comparison, do the following:
Click the search button ![]() .
.
The Select Fee Schedule dialog box appears.

Notes:
By default, the fee schedules that are associated with the clinic that you are currently logged in to appear. To view other fee schedules, from the Show Clinic list, select a particular clinic to view the fee schedules that are associated with that clinic, select Unassigned to view fee schedules that are not associated with a clinic, or select All to view all fee schedules.
To filter the list of fee schedules by name, enter part of a fee schedule's name in the box directly above the list. As you type, the matching fee schedules appear in the list. To return to viewing the list that is not filtered by name, delete the text that you entered in the box.
Either select the correct fee schedule, or select <NONE> to not assign a fee schedule.
Click OK.
Note: The fee schedule that is assigned to the insurance plan overrides a fee schedule that may be assigned to the patient's primary (preferred) provider. However, a fee scheduled that is assigned to the patient overrides any other fee schedule that may be assigned to the patient's insurance plan or primary (preferred) provider.
Select Report Types - The types of day sheets to generate. Select or clear any of the following checkboxes (but at least one must be selected):
Chronological Day Sheet - For a day sheet that includes charges, payments, and adjustments chronologically (in the order that they were posted).
Alphabetical Day Sheet - For a day sheet that includes charges, payments, and adjustments alphabetically by patients' last name.
Insurance Type Day Sheet - For a day sheet that includes charges, payments, and adjustments for patients with insurance coverage. For each transaction, the insurance carrier name appears. With this checkbox selected, select or clear any of the following checkboxes:
Include Insurance Estimate - With this checkbox selected, the estimated insurance portion appears for each procedure.
Group by provider - With this checkbox selected, the transactions are grouped by provider.
To save these settings for the next time that you access this dialog box, select the Save As Default checkbox.
Click OK to send the report to the Batch Processor.
Preview and then print the report, or print the report without previewing it.
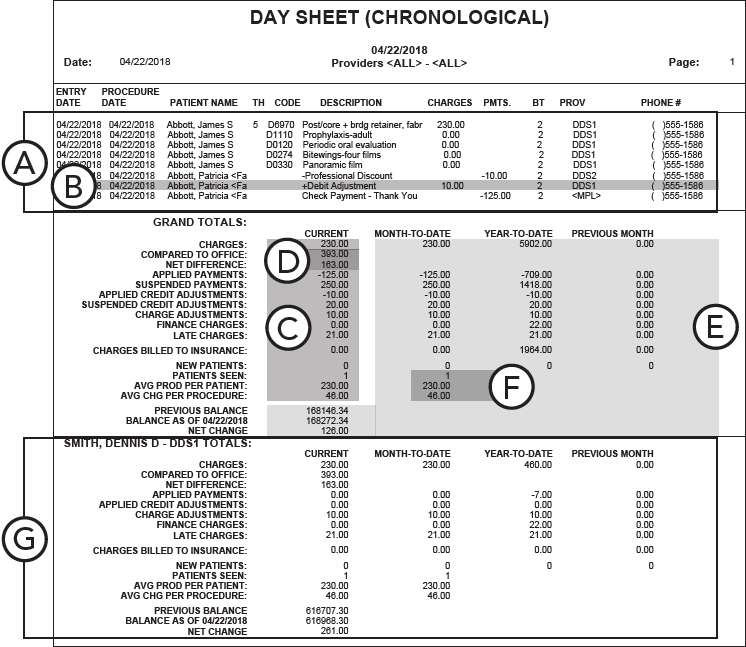
Important information this report provides
Three separate day sheets can be generated: chronological, alphabetical, and insurance. A day sheet may display the following information:
Transactions - Charges, payments, and adjustments.
Transaction Details - The following details appear for each transaction: entry date, procedure date, patient name, tooth numbers, description, charge or credit amount, and provider.
Note: For an insurance day sheet, the insurance carrier name appears, and the estimated insurance portion of the charge may appear.
Grand Totals Information (Default) - The following information appears in the Grand Totals section:
Charges Billed to Insurance - The total amount billed to insurance.
Average Prod Per Patient - The average value of procedures per patient (the total charged for procedures divided by the total number of patients seen).
Average Chg Per Procedure - The average charge per procedure (the total charged for procedures divided by the total number of procedures performed).
Fee Schedule Details - If you select Compare to Fee Schedule when setting options for this report, you can compare the actual total of charges with the estimated total, had all charges been applied using the selected fee schedule.
Compared to [Fee Schedule] - The estimated total of charge,s had all procedures been billed using the selected fee schedule.
Net Difference - The difference between the actual total and the estimated total. A negative value indicates that the practice would have lost revenue had all procedures been billed using the selected fee schedule. A positive value indicates the office would have increased revenue.
MTD and YTD Totals - If you select Include MTD and YTD Totals when setting options for this report, the month-to-date and year-to-date totals appear on the report. You can use these totals to ensure the practice is on track to meet its production goals for the month and year. You can also use these totals to compare the current production levels with the previous month.
Note: MTD and YTD totals only appear when running the report by entry date.
Extended MTD Totals - If you select Include Extended MTD Totals when setting options for this report, the Avg Prod Per Patient and Avg Chg Per Procedure appears in the Month-to-date column. The Extended MTD Totals help you determine whether the current day’s production average is higher or lower than the current month’s average.
Provider Totals - If you select Include Provider Totals when setting options for this report, the transaction totals for each provider appear on the report. Providers can use this information to monitor their daily production.

