The Microsoft SQL Server client utilities must be installed for the Dentrix Enterprise to function properly. After you install Dentrix Enterprise, you must configure the client network utility. The instructions to configure this utility vary depending on the version of Microsoft SQL Server you have installed.
Important: It is highly recommended that you install the Microsoft SQL Client Connectivity tools on not only the database server but on every computer that has Dentrix Enterprise installed (including terminal servers and Citrix servers).
To configure the client network utility (for Microsoft SQL Server 2017)
On the Windows Start menu, expand Microsoft SQL Server 2017, and then click SQL Server Configuration Manager. (This utility is located at C:\Windows\SysWOW64\SQLServerManager14.msc.)
The Sql Server Configuration Manager window appears.
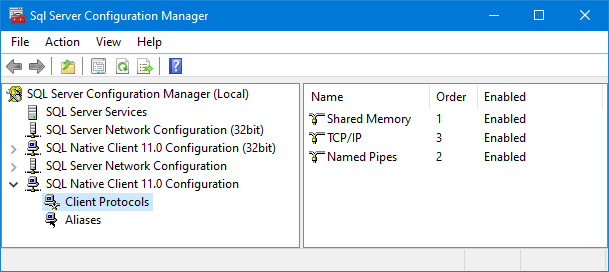
To make sure that the correct protocol for your network setup is enabled, expand SQL Native Client 11.0 Configuration, and then select Client Protocols. TCP/IP or Named Pipes should have Enabled next to it.

Note: If the correct protocol is not available, to enable it, expand SQL Server Network Configuration, select Protocols for [instance name or MSSQLSERVER], right-click the protocol, and then click Enable.
To create an alias for connecting to the database using either protocol, do the following:
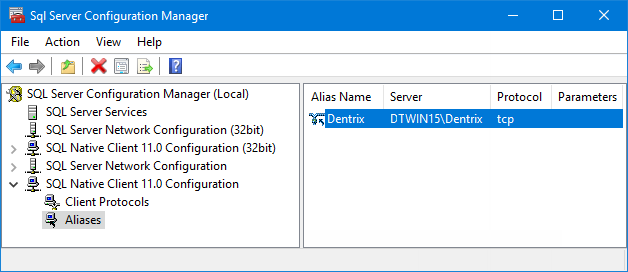
With SQL Native Client 11.0 Configuration still expanded, select Aliases.

On the Action menu, click New Alias.
Depending on your network setup, change Protocol to TCP/IP or Named Pipes.
Set up the following options as needed:
Alias Name - Type Dentrix.
Port No - (For TCP/IP only) Optionally, enter a port number to allow access through your network firewall.
Note: For information about allowing connections through the Windows firewall, refer to the applicable Miscrosoft documentation, such as the topics about configuring a fixed port and opening ports in the firewall.
Server - If your SQL server instance is named, enter the server's name, a back slash (\), and then the instance name. If your SQL server instance is unnamed, enter either the server's name or a dot (.).
Pipe Name - (For Named Pipes only) This box should contain two back slashes (\\), the server's name or a dot(.), a back slash (\), pipe, either \MSSQL$ followed by the name of your SQL server instance (for a named instance) or nothing (for an unnamed instance), and then \sql\query. This box is updated automatically according to what you enter in the Server box.
Click OK.
If necessary, repeat steps 2-3 for SQL Native Client 11.0 Configuration (32bit).
Close the SQL Server Configuration Manager.