To ensure that you can submit claims for patients covered by insurance plans to the correct insurance carriers, and to ensure that those claims have the correct information on them, you need to properly attach insurance to each patient's record. Before you attach insurance to dependents, make sure that the insurance plan has been attached to the subscriber and that the subscriber is part of the same family as the patient to whom you are attaching the insurance plan.
Notes:
By default, when you add a family member to a family with a subscriber that already has insurance plans attached to his or her record as a subscriber, Dentrix Enterprise automatically attaches the subscriber's insurance plans to that family member as a dependent, but you can change the family member's insurance as needed.
If an insurance subscriber is not one of your patients, create a Family File record with a "Non-patient" status for the subscriber within the applicable family record. With insurance attached to the subscriber's record as a subscriber, you can attach insurance to the family members who are your patients as dependents.
Accessing a patient's insurance information requires the "Patients, Edit Insurance Information" security right.
To attach dental insurance to a subscriber
With a patient selected in Family File, double-click the Insurance Information block.
If applicable, do one of the following:
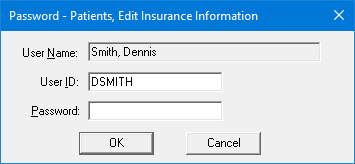
If the Password - Patients, Edit Insurance Information dialog box appears, user verification has been assigned to the "Patients, Edit Insurance Information" task. Do one of the following:
If your user account has been granted the "Patients, Edit Insurance Information" security right, enter your credentials in the User ID and Password boxes, and then click OK.
If your user account has not been granted the "Patients, Edit Insurance Information" security right, have a user with permission temporarily override this restriction so you can access a patient's insurance information this one time. The overriding user enters his or her credentials in the User ID and Password boxes and then clicks OK.
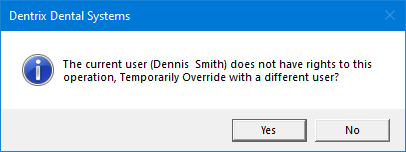
If a message appears, informing you that you do not have rights to this operation, your user account has not been granted the "Patients, Edit Insurance Information" security right. To have a user with permission temporarily override this restriction so you can access a patient's insurance information this one time, do the following:
On the message, click Yes.
In the Password - Patients, Edit Insurance Information dialog box, the overriding user enters his or her credentials in the User ID and Password boxes and then clicks OK.

The Insurance Information dialog box appears. The Dental Insurance tab is selected by default.
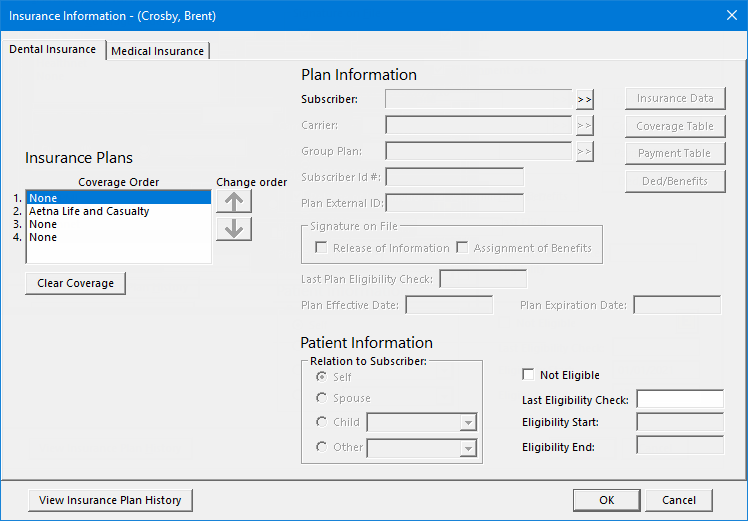
In the Coverage Order list, select the None option that corresponds to the coverage order of the plan that you want to attach to the subscriber: 1 (primary), 2 (secondary), 3 (tertiary), or 4 (quaternary).
If the current patient does not appear in the Subscriber box, to assign the patient as the subscriber, do the following:
Click the search button ![]() .
.
The Select [Coverage Order] Subscriber (Insured Party) dialog box appears.
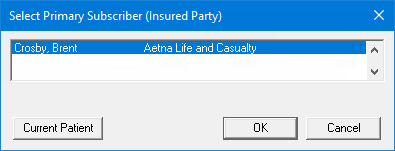
Click Current Patient.
To add the subscriber's insurance plan, do the following:
Click the Carrier search button ![]() .
.
The Select Dental Insurance Plan dialog box appears.
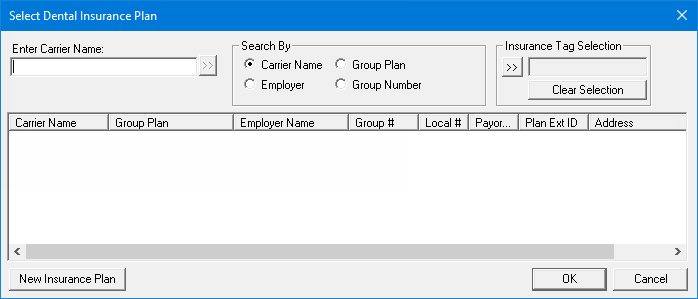
To search for an insurance plan in your database, do the following:
To search for plans that have particular insurance tags, do the following:
Under Insurance Tag Selection, click the search button ![]() .
.
The Insurance Tag Selection dialog box appears.
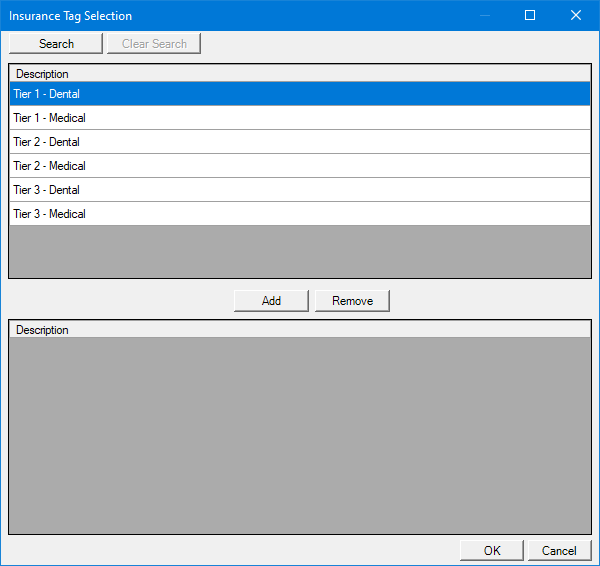
Note: If the upper list is long, to filter it by name, click Search, enter all or the first part of a tag name, and then click Show Results to view the matches.
In the upper list, select the desired tags.
Note: To select multiple tags, click a tag, and then, while pressing the Ctrl key, click the other desired tags. To select a range of adjacent tags, click the first tag of the desired range of tags, and then, while pressing the Shift key, click the last tag of the desired range of tags.
Click Add.
The selected tags now appear in the lower list.
Note: To remove a tag from the lower list, select it, and then click Remove.
Click OK.
Note: To clear all the selected insurance tags at one time, click Clear Selection.
Under Search By, select one of the following options:
Carrier Name - To search by carrier name.
Employer - To search by employer name.
Note: This option is available only if an employer has already been assigned to the current patient.
Group Plan - To search by group plan name.
In the Enter Carrier Name, Enter Employer Name, Enter Group Plan Name, or Enter Group Number box (the name varies according to the selected Search By option), enter all or part of a carrier name, employer name, group plan name, or group plan number, respectively.
Click the search button ![]() .
.
The matching insurance plans, if any, appear in the list.
If the correct insurance plan is listed, do one of the following:
Double-click the correct plan.
Select the correct plan, and then click OK.
You are returned to the Insurance Information dialog box.
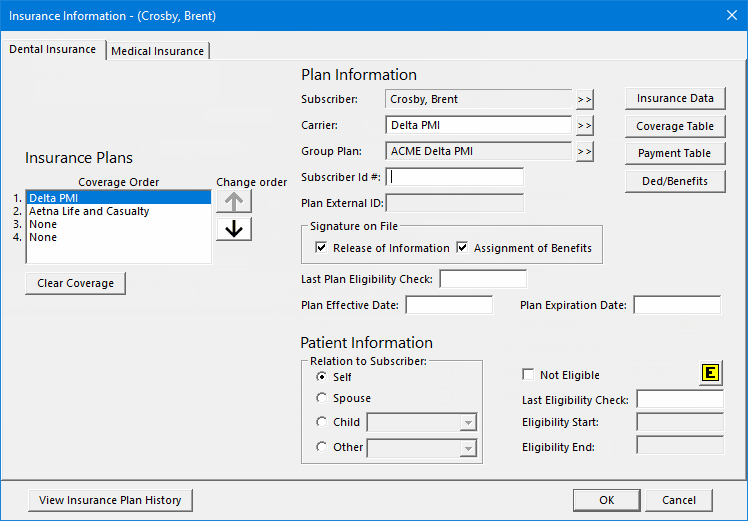
Under Plan Information, set up the following subscriber options:
Subscriber Id # - Enter the subscriber's ID number. The maximum length is 30 characters. According to the organization setting to require "Subscriber ID," the subscriber ID may be required.
Signature on File - Select or clear the following checkboxes:
Release of Information - With this checkbox selected, the words "Signature on File" prints on insurance claims, indicating that the subscriber authorizes the release of information.
Assignment of Benefits - With this checkbox selected, you authorize payments to be sent directly to the provider instead of the subscriber.
Important: If your office accepts assignment of benefits from insurance carriers, you must select the Assignment of Benefits checkbox; if you do not, insurance checks will be mailed to the subscriber, not the office.
Note: The default status of these checkboxes is determined by certain practice defaults.
Last Plan Eligibility Check Date - In the box, enter today's date (in a mm/dd/yyyy format) or a different date as the date that you verified the plan's effective and expiration dates.
Note: Dentrix Enterprise automatically adds slashes to dates when you enter six or eight numbers (mmddyy or mmddyyyy) and then press the Tab key.
Plan Effective Date - If known, enter the effective date (in a mm/dd/yyyy format) of the plan.
Note: Dentrix Enterprise automatically adds slashes to dates when you enter six or eight numbers (mmddyy or mmddyyyy) and then press the Tab key.
Plan Expiration Date - If known, enter the expiration date (in a mm/dd/yyyy format) of the plan.
Note: Dentrix Enterprise automatically adds slashes to dates when you enter six or eight numbers (mmddyy or mmddyyyy) and then press the Tab key.
Note: Changing any of these plan options affects the subscriber for this plan and all patients who are covered under the subscriber's plan.
Click Coverage Table to change the following coverage options for the plan:
Required deductibles - Change the required amounts for the individual's lifetime, individual's annual, and family's annual deductibles as needed.
Maximum benefits - Change the individual's and family's maximum benefits as needed.
Claim deadline.
Coverage percentages - Assign a different coverage table and/or modify the coverage as needed.
Insurance co-payment calculation.
Note: Changing any of these coverage options affects all subscribers and patients who are covered under this plan.
Click Payment Table to create or update the list of procedure codes and corresponding insurance portions.
Notes:
It is recommended that you add to or update this table as you enter insurance payments and only if certain conditions are met.
Changing the payment table affects all subscribers and patients who are covered under this plan.
Click Ded/Benefits to set up the following coverage options:
Met deductibles - Enter the met amounts for the individual's lifetime, individual's annual, and family's annual deductibles.
Used benefits - Enter the individual's and family's used benefits.
Note: Changing the family amounts of the met deductibles and used benefits affects the subscriber for this plan and all patients who are covered under the subscriber's plan.
Under Patient Information, set up the following patient options:
Relation to Subscriber - Make sure that the Self option is selected as the patient's relation to the subscriber.
The patient's eligibility for coverage under this plan.
Click OK.