You can customize the colors that are used to display various Chart elements.
Note: Setting up chart colors requires the "Chart Setup" security right.
To customize chart colors
In Chart, on the File menu, click Set Chart Colors.
If applicable, do one of the following:
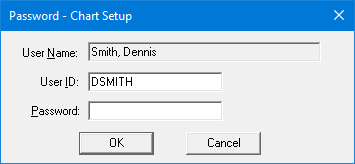
If the Password - Chart Setup dialog box appears, user verification has been assigned to the "Chart Setup" task. Do one of the following:
If your user account has been granted the "Chart Setup" security right, enter your credentials in the User ID and Password boxes, and then click OK.
If your user account has not been granted the "Chart Setup" security right, have a user with permission temporarily override this restriction so you can set up chart colors this one time. The overriding user enters his or her credentials in the User ID and Password boxes and then clicks OK.
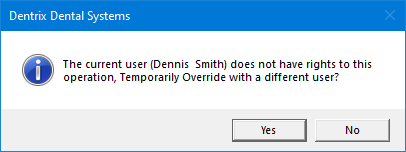
If a message appears, informing you that you do not have rights to this operation, your user account has not been granted the "Chart Setup" security right. To have a user with permission temporarily override this restriction so you can set up chart colors this one time, do the following:
On the message, click Yes.
In the Password - Chart Setup dialog box, the overriding user enters his or her credentials in the User ID and Password boxes and then clicks OK.

The Set Chart Colors dialog box appears.
Do any of the following as needed:
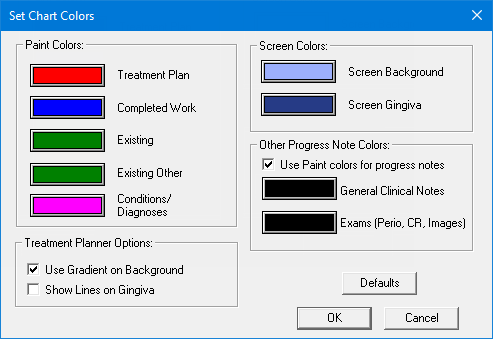
To specify which colors to use for charting symbols on the graphical chart in Chart and Treatment Planner, under Paint Colors, assign a color to each treatment status (Treatment Plan, Completed Work, Existing, Existing Other, and Conditions/Diagnoses).
To customize the appearance of the graphical chart in Treatment Planner, under Treatment Planner Options, select or clear the following checkboxes:
Use Gradient on Background - With this checkbox selected, the background and gingiva are displayed as a gradient (the colors blend into each other). With this checkbox clear, the background and gingiva are displayed as distinct colors (there is no blending from one color to the other).
Show Lines on Gingiva - With this checkbox selected, parallel, horizontal lines are displayed across the gingiva. With this checkbox clear, the gingiva does not have lines.
To specify which colors to use for the background and gingiva of the graphical chart in Chart and Treatment Planner, under Screen Colors, assign a color to Screen Background and Screen Gingiva. In Chart, the background and gingiva are displayed as distinct colors (there is no blending from one color to the other).
Other Progress Note Colors - The system default color for the text of treatment, clinical notes, and exams on the Progress Notes panel is black. To customize the colors for any of these items, do any of the following as needed:
To use the Paint Colors for the text of treatment, select the Use colors for progress notes checkbox. To use black text for the text of treatment regardless of the status, clear this checkbox.
To specify which color to use for the text of clinical notes, assign a color to General Clinical Notes.
To specify which color to use for the text of exams, assign a color to Exams (Perio, CR, Images).
To assign a color, do the following:
Click the corresponding colored button.
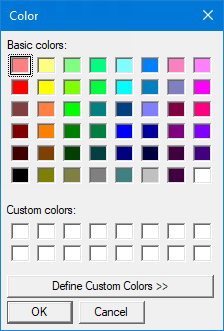
The Color dialog box appears.
Do one of the following:
To use a basic color as is, under Basic colors, select the desired box.
To define and use a custom color, do the following:
Under Basic colors, select the box of a color that is similar to the one you want to define.
Click Define Custom Colors to expand the dialog box.
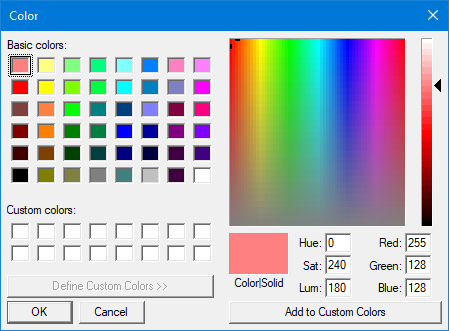
Notes:
If you know the specific HSL color values you want, enter them in the Hue, Sat (for saturation), and Lum (for luminosity) boxes.
If you know the specific RGB color values you want, enter them in the Red, Green, and Blue boxes.
Click
anywhere on the rainbow swatch, or drag the cross hairs  to any location on the
rainbow swatch.
Click
anywhere on the narrow horizontal luminosity bar, or drag the arrow  up or down to brighten or darken the color.
Click Add to Custom Color.
Under Custom colors, select the box of the newly-added color.
Click OK.
Note: To restore all colors to the system defaults, click Defaults.
Click OK.
Note: Chart colors are workstation-specific, meaning that different computers on the network can have their own colors. Also, the changes that are applied to a workstation will remain in effect even after Chart is closed and reopened.