Setting up providers
You can customize work hours, colours, and provider aliases for each provider in your office. Provider setup information is stored on the file server, and the information is available to all computers on the network.
To set up provider hours
1. In the Appointment Book, click Setup, and then click Provider Setup.
The Provider Setup dialog box appears.

2. Select the provider you want to set a schedule for.
3. Click Setup.
The Provider Setup dialog box appears.

4. Select the days of the week the provider usually works.
Note: Dentrix defaults to Monday through Friday.
5. Set the working hours for each selected day.
a. Click the search button to the right of the day.
The Set Time Limits dialog box appears.

Note: Dentrix allows you to break each day into three time ranges. The default for each day is 8:00 a.m. to 12:00 p.m., and 1:00 p.m. to 5:00 p.m.
b. To change the time range for a time block, click the Start Time or End Time search button of the time block you want to change.
The Select Time dialog box appears.

c. To change the time in intervals of 10 minutes, click the left arrow to decrease or the right arrow to increase the time. Or, drag the slider to the left or right.
d. Click OK.
e. Repeat steps b �" d for all other start and end times.
f. When you are finished changing the time blocks for that day, click OK.
g. Repeat steps a �" f for all other workdays.
6. If you assigned multiple provider IDs or aliases to the same provider, select all of the IDs that represent the same provider under Provider Alias.
7. Assign a unique appointment colour to each provider.
All scheduled appointments for each provider will appear with the colour you assign.
a. Click Provider Color.
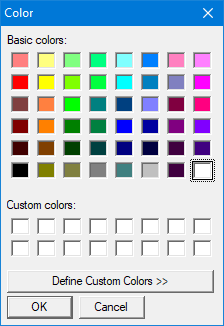
b. In the Color palette, click the colour you want.
Note: Click Define Custom Colors to add custom colours to the colour palette.
c. Click OK to return to the Provider Setup dialog box.
Note: Appointment information text is black. Select a provider colour that contrasts well with black text, such as light colours without patterns.

8. To save the information, click OK.
9. Repeat steps 1 �" 8 for each provider in your practice.
Note: Setting up time blocks is used primarily for Perfect Day Scheduling.


