Changing the default colour scheme
From the Appointment Book, you can customize your practice schedule, some appointment defaults, and the time block size used throughout the system. Setup information is stored on the file server and that information is available to all computers on the network. However, default appointment settings, screen colour, and button bar orientation are specific to each computer on your network. The Appointment Book colour scheme visually indicates your office hours, and Dentrix lets you change the default Appointment Book color scheme to suit individual preferences.
To change the default colour scheme
1. In the Appointment Book, click Setup, and then click Practice Appointment Setup.
The Practice Appointment Setup dialog box appears.

2. To change the open schedule colour, click the Office Open colour button.
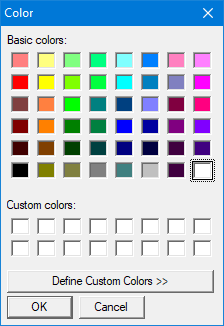
The Color palette appears.

3. Click the colour that you want to change the open schedule colour to, or click Define Custom Colors to create your own colour, and click OK.
4. To change the closed schedule colour, click the Office Closed colour button.
5. From the Color palette, click the colour you want to change the closed schedule colour to, or click Define Custom Colors to create your own colour,and click OK.
Note: Dentrix users typically find that the default colour choices produce the least eye strain. If you have modified the colour options and want to reset them to the original colours, click Default Colors.


