When you open DDX Desktop for the first time, some setup is required before you can begin using DDX Desktop.
To set up DDX Desktop for first time use
1. Open DDX Desktop by double-clicking the desktop shortcut icon.

The DDX Desktop window opens, and a welcome message appears.
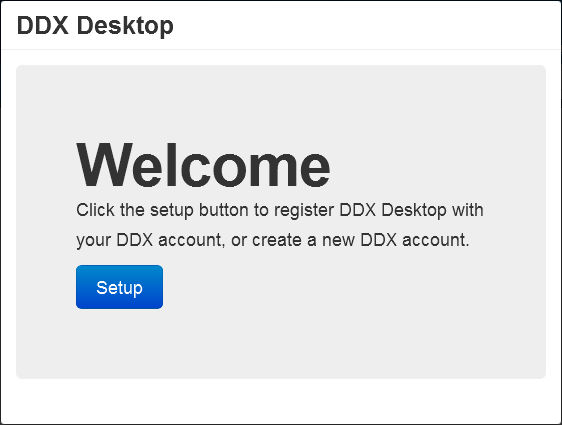
2. Click Setup.
The Login page opens.

3. Log in to your DDX account. For information about how to log in, see the "Logging in to your account" topic in the DDX Help.
Note: If you do not already have a DDX account, to sign up for a free account, click Sign up near the top of the page. For information about how to create a DDX account, see the "Creating a DDX account" topic in the DDX Help.
The Register Remote Application page opens.
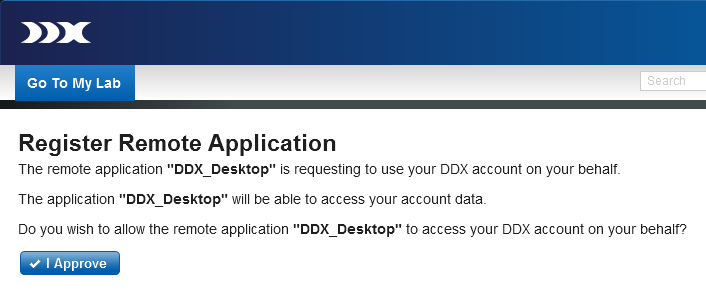
4. To allow DDX Desktop to access your DDX account, click I Approve.
A message appears and asks if you want to integrate Dentrix with DDX Desktop.
5. Click OK.
Note: If you click Cancel, you can enable the integration at a later time by changing a setting.
A message appears and asks you to confirm that you want to update files that control the integration of Dentrix and DDX Desktop.
6. Close all Dentrix modules on all computers, and then click Yes.
A Data Access Request message appears and asks you to confirm that you want to grant DDX Desktop access to your Dentrix data.
7. Click Yes.
A progress indicator appears.
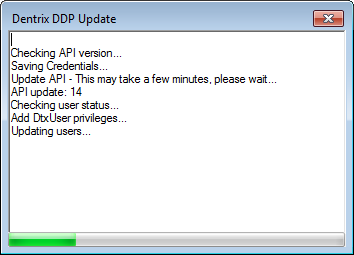
When the update is complete, the portal page of your DDX account opens.