
You can customize the Dentrix toolbars to show only the buttons that you use most frequently.
To customize the Dentrix toolbars
1. From any Dentrix module, right-click the toolbar.
A shortcut menu appears.
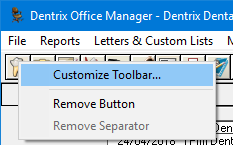
2. Click Customize Toolbar.
The Customize Toolbar dialog box appears.
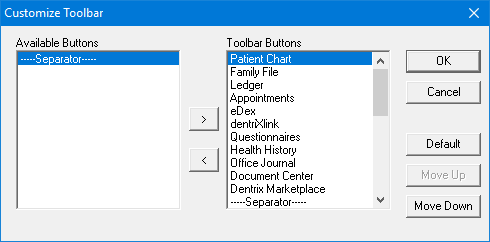
3. Customize the toolbar using any of the following methods:
Remove a button from the toolbar - Under Toolbar Buttons, select the button description for the button to be removed and click the left arrow button. The description moves to the Available Buttons.
Add a button to the toolbar - Under Available Buttons, select the button description for the button to be added and click the right arrow button. The description moves to the Toolbar Buttons.
Arranging buttons on the toolbar - Under Toolbar Buttons, select the description for the button to be moved. (Separators are used to separate one set of buttons from another set.) Click Move Up or Move Down. The button description moves up or down one position. Keep clicking Move Up or Move Down until the description appears in the correct position.
4. To save your toolbar settings, click OK.