
One type of financial arrangement you can make with customers is a future due payment plan.
To create a future due payment plan
1. Select a patient.
2. From the Transaction menu in the Ledger, click Process Future Due Payment Plan.
The Select Payment Plan dialog box appears.
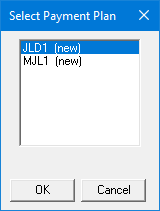
3. Select a provider for the payment plan, and then click OK.
The Create Payment Plan dialog box appears.
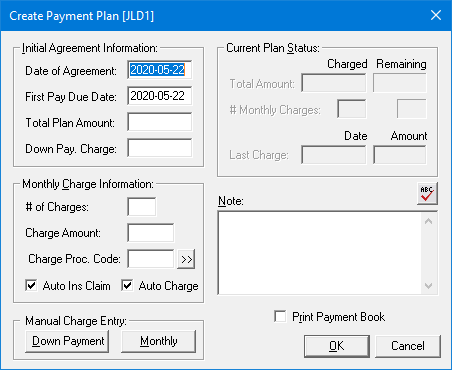
Note: The current date appears automatically in the Date of Agreement and First Payment Due Date boxes. You can change the dates if necessary.
4. As appropriate, do the following:
Total Plan Amount – Type the total amount to be charged over time.
Down Pay Charge – Type the amount if you are requiring a down payment.
# of Charges – Type the number of charges.
Dentrix calculates the amount to charge and puts that amount in the Charge Amount box. Conversely, you can enter the amount to charge in the Charge Amount box and Dentrix then calculates the number of charges and puts that number in the # of Charges box.
Note: Future due payment plans are charged monthly. Keep this in mind when entering the number of charges.
Charge Proc. Code – Click the search button, and then select the appropriate procedure code to post with the monthly charge.
Note: If a procedure code does not exist for the type of charge you need to post, you can create one in the Office Manager.
5. By default, an insurance claim is generated and charges are posted automatically. To generate an insurance claim and post a charge manually, clear Auto Ins. Claim and Auto Charge.
Note: If you clear the Auto Charge check box, charges won't be posted to the account when Future Due Payment Plans are updated each month.
6. To post a down payment, click Down Payment.
The Down Payment Charge dialog box appears with the amount that you entered in step 4 and the current date.
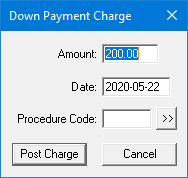
a. If necessary, change the Amount and Date, click the Procedure Code search button, and select the procedure code that Dentrix will use to post the down payment charge.
b. Click Post Charge.
The down payment is posted to the Ledger.
7. To add a note to the payment plan, type the information in the Note box.
8. To provide the patient with a payment or a coupon book, select Print Payment Book.
9. To accept the payment plan, click OK.
Notes:
During you month-end process, run the Future Due Payment Plan Update utility to post charges to individual accounts.
If you selected Print Payment Book, you can print the payment book immediately or send it to the Batch Processor when you close the Create Payment Plan dialog box.